Introduction
This manual provides essential information for the safe and effective use of your Zoo Med RS25N Nano Infrared Heat Lamp. Please read these instructions carefully before installation and operation. Keep this manual for future reference.
Product Overview
The Zoo Med RS25N Nano Infrared Heat Lamp is designed to provide infrared heat for reptiles and amphibians. Its true red glass construction minimizes visible light, making it suitable for nocturnal viewing and maintaining warmth without disrupting your pet's sleep cycle. This 25-watt bulb is ideal for creating a warm basking spot in smaller enclosures.

Image: The Zoo Med RS25N Nano Infrared Heat Lamp, showing the bulb itself and its retail packaging. The bulb is red and designed to emit heat for reptile habitats.
Setup Instructions
- Select Appropriate Fixture: Ensure you use a ceramic socket fixture rated for the wattage of this bulb (25W). Do not use plastic sockets, as they may melt.
- Secure Installation: Carefully screw the bulb into the fixture until snug. Do not overtighten.
- Positioning: Position the heat lamp above the desired basking area in your reptile's enclosure. Maintain a safe distance from the reptile to prevent burns. A distance of approximately 25-30 cm (10-12 inches) is generally recommended, but always monitor the temperature with a thermometer.
- Temperature Monitoring: Use a reliable thermometer to measure the basking spot temperature. Adjust the lamp's height as needed to achieve the optimal temperature range for your specific reptile species.
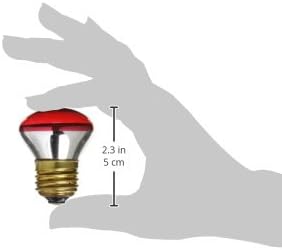
Image: A hand holding the compact Zoo Med RS25N Nano Infrared Heat Lamp, with a ruler indicating its small size (2.3 inches or 5 cm). This illustrates the bulb's nano form factor for small enclosures.
Operating Instructions
- Continuous Heat: This infrared heat lamp provides 24-hour heat, making it suitable for maintaining ambient temperatures day and night.
- Nocturnal Use: The minimal visible light emitted by the true red glass allows for nocturnal viewing of your pets without disturbing their natural sleep cycle.
- Basking Spot: The lamp creates a warm basking area, allowing reptiles to thermoregulate by moving closer to or further away from the heat source.
- Power On/Off: Connect the fixture to a power source. Use an external timer or thermostat (sold separately) for automated on/off cycles and precise temperature control.
Maintenance
- Cleaning: Ensure the lamp is unplugged and completely cool before cleaning. Wipe the bulb gently with a dry, soft cloth. Do not use water or cleaning solutions.
- Replacement: Heat lamps have a finite lifespan. It is recommended to replace the bulb every 3-6 months, or sooner if you notice a decrease in heat output, to ensure consistent and effective heating for your pet.
- Inspection: Regularly inspect the bulb and fixture for any signs of damage, such as cracks, loose connections, or discoloration. Replace damaged components immediately.
Troubleshooting
| Problem | Possible Cause | Solution |
|---|---|---|
| Lamp does not light up. |
|
|
| Insufficient heat output. |
|
|
| Overheating of enclosure. |
|
|
Specifications
- Brand: Zoo Med
- Model: RS-25N
- Wattage: 25 Watts
- Voltage: 110 Volts
- Bulb Base: E26 Medium
- Light Type: Infrared
- Special Feature: Infrared, Minimal Visible Light (True Red Glass)
- Product Dimensions: 6.35 x 5.87 x 5.87 cm
- Item Weight: 22.68 g
- Country of Origin: China
Helpful Videos
MIXJOY Infrared Heat Lamp Bulbs Overview
This video provides a general overview of infrared heat lamp bulbs, highlighting features such as efficient heat emission, E26 standard screw base, premium materials, continuous heating, and quality testing. While not specific to the Zoo Med brand, it demonstrates the general characteristics and benefits of similar products for reptile care.
MIXJOY Reptile Heat Lamp Bulbs Features
This video showcases features of a reptile heat lamp, including compatibility with dimmers, UVA and heat emission, soft light, long-lasting performance, and suitability for various reptiles. It also briefly shows the manufacturing process with aging, lighting, and quality tests. This provides insight into the technology and quality considerations for reptile heat lamps.
Warranty and Support
For warranty information or technical support, please refer to the manufacturer's official website or contact their customer service directly. Keep your purchase receipt as proof of purchase.
- Manufacturer: Zoo Med
- Contact: Refer to Zoo Med's official website for contact details and support resources.