1. Setup

This image displays the REHAU automatic irrigation timer, a compact grey device designed for automated garden watering. It features two prominent rotary dials for setting frequency and duration, along with two orange push buttons for special functions.
1.1 Unpacking
Carefully remove all components from the packaging. Ensure all parts are present: the irrigation timer unit and the instruction manual.
1.2 Battery Installation
The REHAU irrigation timer requires one 9V alkaline battery (not included).
- Locate the battery compartment on the back of the unit.
- Open the battery compartment cover.
- Insert one 9V alkaline battery, ensuring correct polarity (+/-).
- Close the battery compartment cover securely.
Note: The unit features a battery status indicator. Replace batteries when the indicator shows low power to ensure continuous operation.
1.3 Connecting to Water Tap
The irrigation timer is designed for connection to water taps with 26.5mm (3/4") or 30.5mm (1") external threads.
- Ensure the tap is turned off.
- Screw the top connector of the irrigation timer onto your water tap. Hand-tighten only.
- Connect your garden hose (with a 19mm (3/4") connector) to the bottom outlet of the irrigation timer.

This image illustrates how to connect the REHAU irrigation timer to a standard outdoor water tap. The timer is compatible with both 3/4 inch (G 26.5mm) and 1 inch (G 30mm) tap threads, ensuring broad compatibility. A garden hose is shown connected to the bottom outlet of the timer.
2. Operating Instructions
2.1 Overview of Controls

This diagram provides a detailed overview of the REHAU irrigation timer's control panel and components. It labels the 'Frequency' dial for intervals, the 'Run Time' dial for duration, the 'Rain Stop' button, the 'Time Delay' button, the battery compartment, and the 3/4 inch tap and hose connections.
The REHAU irrigation timer features two main rotary dials and two push buttons for easy programming.
- Frequency Dial (left): Controls the watering interval.
- Run Time Dial (right): Controls the duration of each watering cycle.
- Rain Stop Button: Manually stops the current watering cycle or prevents future cycles.
- Time Delay Button: Delays the start of the next watering cycle.
2.2 Setting Watering Frequency
Use the left dial (labeled "FREQUENCY") to set how often the irrigation timer will activate.
- Rotate the dial to select your desired interval: from 1 minute to 1 week.
- Available settings include: 1 Min, 3, 5, 10, 20, 30, 40, 50, 60 minutes, 2, 6, 12, 24, 48, 72 hours, and Week.
- The "Reset" position will clear the current frequency setting.
2.3 Setting Watering Duration
Use the right dial (labeled "RUN TIME") to set how long each watering cycle will last.
- Rotate the dial to select your desired duration: from 5 seconds to 60 minutes.
- Available settings include: 5 Sec, 10, 20, 30, 40, 50, 60 seconds, 1, 3, 5, 10, 20, 30, 40, 50, 60 minutes.
- The "OFF" position will disable watering.

This image highlights the two main control dials on the REHAU irrigation timer. The left dial is used to set the watering frequency (intervals), while the right dial is used to set the watering duration (run time). This intuitive design allows for individual adjustment of both parameters.
2.4 Special Functions
The timer includes two special functions for enhanced control:
Rain Stop Function
Press the "Rain Stop" button (orange, left) to manually stop an ongoing watering cycle or to prevent the next scheduled cycle from starting. This is useful during periods of rain to conserve water.
Time Delay Function
Press the "Time Delay" button (orange, right) to postpone the start of the next scheduled watering cycle. This allows you to delay watering for a specific period without changing your programmed settings.
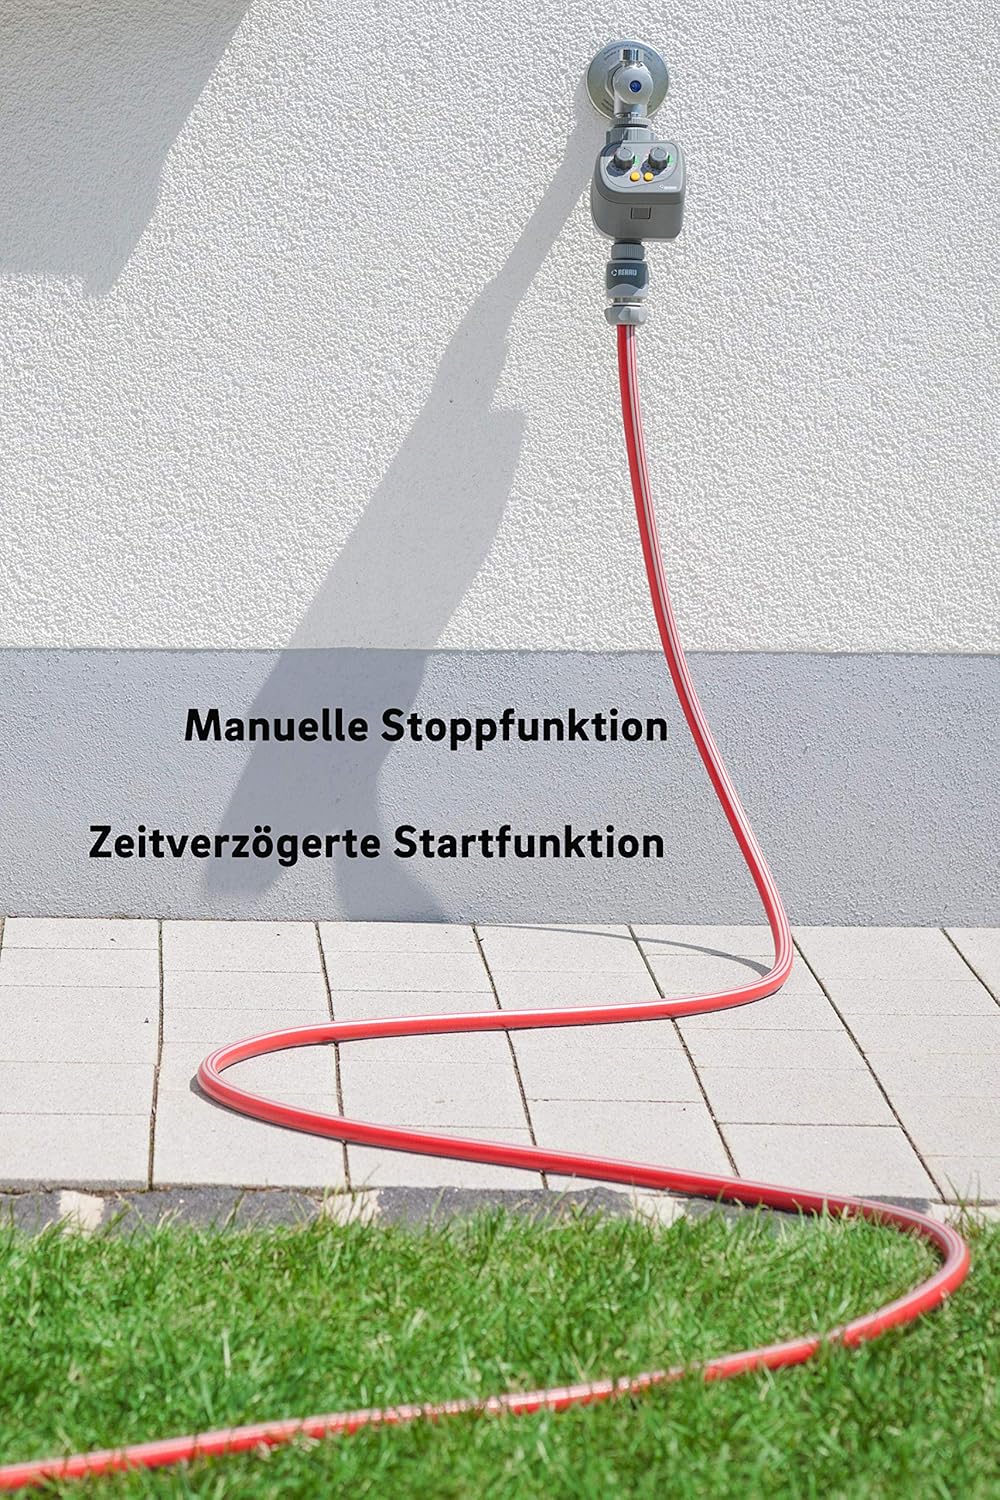
This image shows the REHAU irrigation timer connected to a garden hose, emphasizing its special functions. The 'Rain Stop' function allows for manual interruption of watering, while the 'Time Delay' function enables a postponed start of the irrigation cycle, providing flexibility for various weather conditions or gardening needs.
3. Maintenance
Regular maintenance ensures the longevity and optimal performance of your REHAU irrigation timer.
- Cleaning: Clean the exterior of the unit with a damp cloth. Do not use abrasive cleaners or immerse the unit in water.
- Filter Cleaning: Periodically check and clean the filter located at the water inlet to prevent blockages and ensure proper water flow.
- Winter Storage: Before the first frost, disconnect the timer from the tap and hose. Remove the battery. Store the unit in a dry, frost-free location to prevent damage from freezing water.
- Battery Replacement: Replace the 9V battery annually or when the battery status indicator shows low power.
4. Troubleshooting
If you encounter issues with your REHAU irrigation timer, refer to the table below for common problems and solutions.
| Problem | Possible Cause | Solution |
|---|---|---|
| Timer does not turn on. | Battery is dead or incorrectly installed. | Check battery polarity; replace with a new 9V alkaline battery. |
| No water flow. | Water tap is off; filter is clogged; hose is kinked; low water pressure. | Ensure tap is fully open; clean the inlet filter; straighten hose; check water supply pressure. |
| Timer leaks. | Connections are not tight; damaged O-ring/washer. | Ensure all connections are hand-tight; check and replace any damaged washers or O-rings. |
| Watering cycle does not start at programmed time. | "Time Delay" function activated; incorrect frequency setting. | Check if "Time Delay" is active; verify frequency dial setting. |
5. Specifications
| Feature | Detail |
|---|---|
| Model Number | 18418 2 |
| Dimensions (L x W x H) | 9 x 8.5 x 15.5 cm |
| Weight | 250 g |
| Power Source | 1 x 9V Alkaline Battery (not included) |
| Watering Intervals | 1 minute to 1 week (11 settings) |
| Watering Duration | 5 seconds to 60 minutes (10 settings) |
| Tap Connection | 26.5mm (3/4") or 30.5mm (1") external thread |
| Hose Connection | 19mm (3/4") |
| Material | Plastic |
6. Warranty and Support
For warranty information, please refer to the terms and conditions provided at the time of purchase or contact REHAU customer service. Keep your proof of purchase for any warranty claims.
For further assistance or technical support, please visit the official REHAU website or contact their customer service department. Contact details can typically be found on the product packaging or the REHAU website.


