1. Product Overview
The Apeks XTX50 Regulator is a high-performance diving regulator designed for reliability and ease of use in various underwater environments. It features an advanced first stage and a pneumatically balanced second stage to ensure consistent and comfortable breathing at all depths. This manual provides essential information for the proper setup, operation, maintenance, and troubleshooting of your XTX50 regulator.
2. Key Features
- Superior Reliability: Over-balanced diaphragm 1st stage ensures consistent performance at all depths.
- Optimized Breathing Effort: Pneumatically balanced 2nd stage with adjustable breathing resistance knob for personalized comfort.
- Extreme Durability: Chrome-plated brass 1st stage and techno-polymer 2nd stage withstand harsh marine environments.
- Enhanced Ease of Use: User-friendly dive/pre-dive venturi switch minimizes free flow.
- Versatile Configuration: Equipped with 4 low-pressure (3/8") ports and 2 high-pressure (7/16") ports for various equipment setups.
- Rotating Turret: Four medium-pressure ports mounted on a rotating turret for optimal hose routing.
- Environmental Dry System: Keeps water out of the main spring chamber, preventing ice build-up and contamination.
- 2-Stage Progressive Purge: Large, easy-to-operate purge buttons offer controlled low flow or full purge.
3. Components

Figure 3.1: The Apeks XTX50 Regulator showing both the first stage (bottom right) and the second stage (top left) components. The first stage connects to the air tank, and the second stage is the mouthpiece.

Figure 3.2: Close-up view of the Apeks XTX50 second stage. This is the part of the regulator that the diver breathes from, featuring the mouthpiece, purge button, and venturi lever.
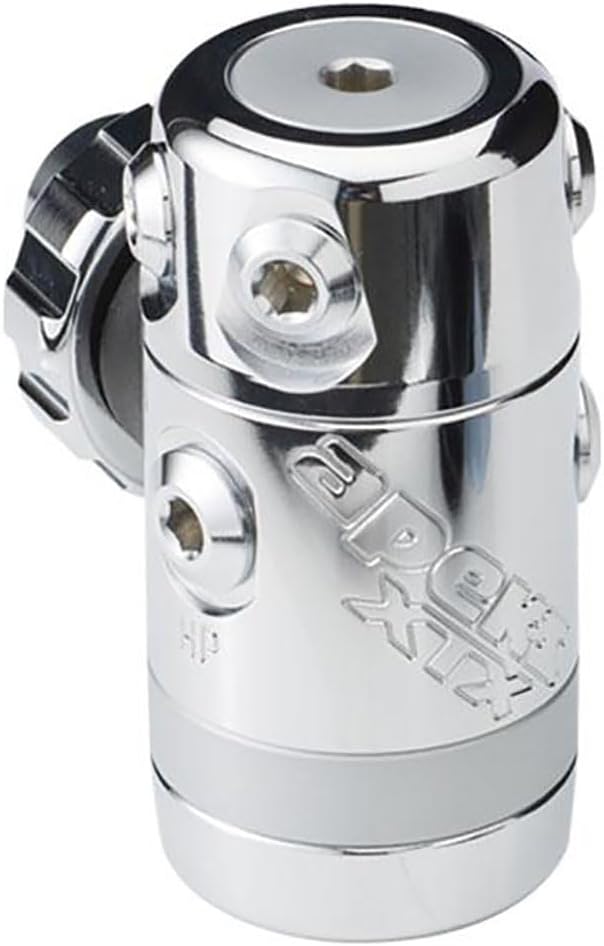
Figure 3.3: Close-up view of the Apeks XTX50 first stage. This component connects directly to the scuba tank valve and reduces the high-pressure air to an intermediate pressure for the second stage and other accessories.
4. Setup Instructions
- Inspect Components: Before each dive, visually inspect all parts of the regulator for any signs of damage, corrosion, or wear. Ensure O-rings are present and in good condition.
- Connect First Stage to Tank: For DIN connection, screw the first stage directly into the tank valve until hand-tight. Do not overtighten.
- Hose Routing: Route the low-pressure hoses (second stage, BCD inflator, drysuit inflator if applicable) and high-pressure hose (SPG/console) to ensure they are comfortable and do not snag during the dive. The rotating turret on the first stage aids in optimal hose routing.
- Pressure Check: Slowly open the tank valve. Listen for any leaks. Check the Submersible Pressure Gauge (SPG) to confirm air pressure.
- Function Test: Take a few breaths from the second stage to ensure smooth air delivery. Depress the purge button to confirm it functions correctly. Test the BCD and drysuit inflators.
5. Operating Instructions
5.1. Pre-Dive Checks
- Confirm tank pressure.
- Check for any air leaks.
- Verify smooth breathing from the second stage.
- Ensure the venturi lever is set to the pre-dive position to prevent free flow at the surface.
5.2. In-Water Use
- Breathing: Breathe naturally and calmly through the second stage.
- Venturi Lever: Once submerged, move the venturi lever to the dive position to optimize breathing performance.
- Purge Button: The large purge button offers a 2-stage progressive purge. Press gently on the side for a lower flow rate (e.g., for filling lift bags), or press firmly in the center for the full purge effect (e.g., for clearing the regulator).
- Breathing Resistance Knob: Adjust the knob to fine-tune the inhalation effort to your preference. Turn clockwise for increased resistance, counter-clockwise for decreased resistance.
5.3. Post-Dive Procedures
- Close the tank valve slowly.
- Purge the regulator to release any remaining pressure in the system.
- Carefully unscrew the first stage from the tank valve.
6. Maintenance
- Rinsing: After each dive, thoroughly rinse the regulator with fresh, clean water while it is still attached to a pressurized tank (or with the dust cap securely in place on the first stage). Do not press the purge button or attempt to breathe from the second stage while rinsing unless it is pressurized, as this can allow water to enter the internal components.
- Drying: Allow the regulator to air dry completely in a cool, shaded area away from direct sunlight.
- Storage: Store the regulator in a clean, dry place, ideally in a protective bag or case, away from extreme temperatures and chemicals. Avoid kinking hoses.
- Professional Service: Apeks recommends that your XTX50 regulator be serviced by an authorized Apeks technician annually or every 100 dives, whichever comes first. Regular professional servicing is crucial for maintaining performance and safety.
7. Troubleshooting
| Problem | Possible Cause | Solution |
|---|---|---|
| Regulator free flows | Venturi lever in dive position at surface; debris in second stage; worn seat. | Move venturi lever to pre-dive; rinse thoroughly; seek professional service. |
| Hard breathing | Breathing resistance knob set too high; worn components; insufficient air pressure. | Adjust knob; check tank pressure; seek professional service. |
| Air leak | Damaged O-ring; loose connection; internal component failure. | Check connections and O-rings; seek professional service immediately. |
| Purge button stuck | Salt crystal buildup; debris. | Rinse thoroughly; gently work button; if persistent, seek professional service. |
Important: If you experience any persistent issues or suspect a malfunction, discontinue use immediately and have the regulator inspected and serviced by an authorized Apeks technician.
8. Specifications
| Attribute | Value |
|---|---|
| Model | XTX50 |
| Manufacturer | Apeks |
| First Stage Type | Over-balanced diaphragm |
| Second Stage Type | Pneumatically balanced |
| HP Ports | 2 (7/16" UNF) |
| MP Ports | 4 (3/8" UNF) on rotating turret |
| Product Dimensions | 12.1 x 9.2 x 3.9 inches |
| Product Weight | 3.15 Pounds |
| ASIN | B01KILAKIW |
| Date First Available | August 17, 2016 |
9. Warranty and Support
Specific warranty details for the Apeks XTX50 Regulator are not provided in this manual's source data. For comprehensive warranty information, please refer to the documentation included with your purchase or visit the official Apeks website.
For technical support, service, or inquiries regarding your Apeks XTX50 Regulator, please contact an authorized Apeks dealer or service center. They are equipped to provide expert assistance and genuine replacement parts.