Introduction
Thank you for choosing the Scentsationals Wax Melt Warmer. This device is designed to safely melt scented wax cubes, releasing fragrance into your home without the need for an open flame. Please read this manual thoroughly before use to ensure safe and proper operation.
Safety Information
- Always place the warmer on a flat, stable, heat-resistant surface away from flammable materials.
- Do not operate the warmer near water or in excessively humid environments.
- Keep out of reach of children and pets. The wax dish and melted wax will become hot.
- Never leave the warmer unattended while in use.
- Use only Scentsationals wax melts or other approved wax melts designed for electric warmers. Do not add water or other substances to the wax dish.
- Unplug the warmer when not in use or before cleaning.
- If the power cord is damaged, it must be replaced by the manufacturer or a qualified service agent to avoid hazards.
- This appliance is not intended for use by persons (including children) with reduced physical, sensory or mental capabilities, or lack of experience and knowledge, unless they have been given supervision or instruction concerning use of the appliance by a person responsible for their safety.
Package Contents
Verify that all items are present in your package:
- Scentsationals Wax Melt Warmer (Model MC-040)
- Removable Wax Dish
- 25W Incandescent Bulb (pre-installed or included separately)
Note: Scented wax cubes are sold separately.

Setup
- Unpack: Carefully remove all components from the packaging.
- Placement: Place the warmer on a firm, level, and heat-resistant surface. Ensure it is away from drafts, open windows, and any flammable materials.
- Bulb Installation: If the 25W incandescent bulb is not already installed, gently screw it into the bulb holder located inside the warmer. Do not overtighten.
- Position Wax Dish: Place the removable wax dish securely on top of the warmer.
- Connect Power: Plug the power cord into a standard AC 120 Volt electrical outlet.
Operating Instructions
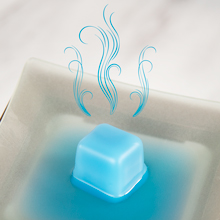
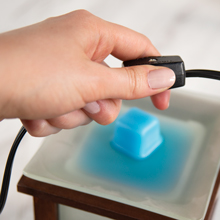
- Add Wax Melts: Place one or two scented wax cubes into the removable wax dish. Do not overfill.
- Turn On: Flip the on/off switch on the power cord to the 'ON' position. The bulb inside will illuminate, and the warmer will begin to heat the wax.
- Enjoy Fragrance: The wax will melt within minutes, releasing its fragrance into your room.
- Turn Off: When you wish to stop the fragrance, flip the on/off switch to the 'OFF' position. The light will turn off, and the warmer will begin to cool.

Video 1: This video demonstrates the features and usage of Scentsationals Scented Wax Warmers, including how to add wax cubes and the flame-free operation.
Maintenance and Cleaning
Regular cleaning ensures optimal performance and extends the life of your wax warmer.
- Turn Off and Unplug: Always turn off the warmer and unplug it from the electrical outlet before cleaning.
- Cool Down: Allow the warmer and wax dish to cool completely before handling.
- Remove Used Wax:
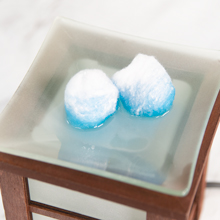
- Method 1 (Cotton Balls): While the wax is still liquid (but not too hot to touch), place several cotton balls into the melted wax to absorb it. Once absorbed, discard the cotton balls.
- Method 2 (Solid Wax Removal): Allow the wax to cool and solidify. Gently warm the wax for a few minutes until the bottom layer softens, then carefully slide the solid wax out of the dish.
- Wipe Clean: Use a soft, damp cloth to wipe the wax dish and the exterior of the warmer. Do not use abrasive cleaners or immerse the warmer in water.
- Bulb Replacement: If the bulb burns out, unplug the warmer, allow it to cool, and replace it with a new 25W incandescent bulb.
Troubleshooting
| Problem | Possible Cause | Solution |
|---|---|---|
| Warmer does not turn on. | No power, faulty bulb, or faulty switch. | Check if the warmer is properly plugged into a working outlet. Ensure the on/off switch is in the 'ON' position. Replace the bulb if it is burnt out. |
| Wax is not melting or fragrance is weak. | Insufficient heat, old wax, or too much wax. | Ensure the bulb is working and is the correct wattage (25W). Replace old wax with fresh wax cubes. Do not overfill the wax dish; use 1-2 cubes at a time. |
| Warmer emits a burning smell. | Dust or debris on the heating element, or foreign object in wax. | Immediately unplug the warmer. Allow it to cool. Clean the wax dish and the area around the bulb. Ensure only wax melts are used in the dish. |
Specifications
- Brand: Scentsationals
- Model Name: Thousand Kisses Light Green
- Item Model Number: MC-040
- Material: Glass, Wood
- Power Source: AC 120 Volt
- Wattage: 25.00 W
- Light Source Type: Incandescent
- Product Dimensions: 5 x 5 x 6 inches
- Item Weight: 1.39 pounds
- UPC: 877991057951
Warranty and Support
For warranty information or product support, please contact the manufacturer, Rimports, directly. Refer to the product packaging or their official website for contact details.


