1. Safety Information
Please read all instructions carefully before using your new Haier Mini Fridge. Keep this manual for future reference. Failure to follow these instructions may result in property damage or personal injury.
- Ensure the appliance is properly grounded.
- Do not operate the appliance with a damaged power cord or plug.
- Avoid placing flammable materials near the appliance.
- Do not store explosive substances such as aerosol cans with a flammable propellant in this appliance.
- Unplug the appliance before cleaning or performing any maintenance.
- Keep ventilation openings clear of obstruction.
2. Product Overview
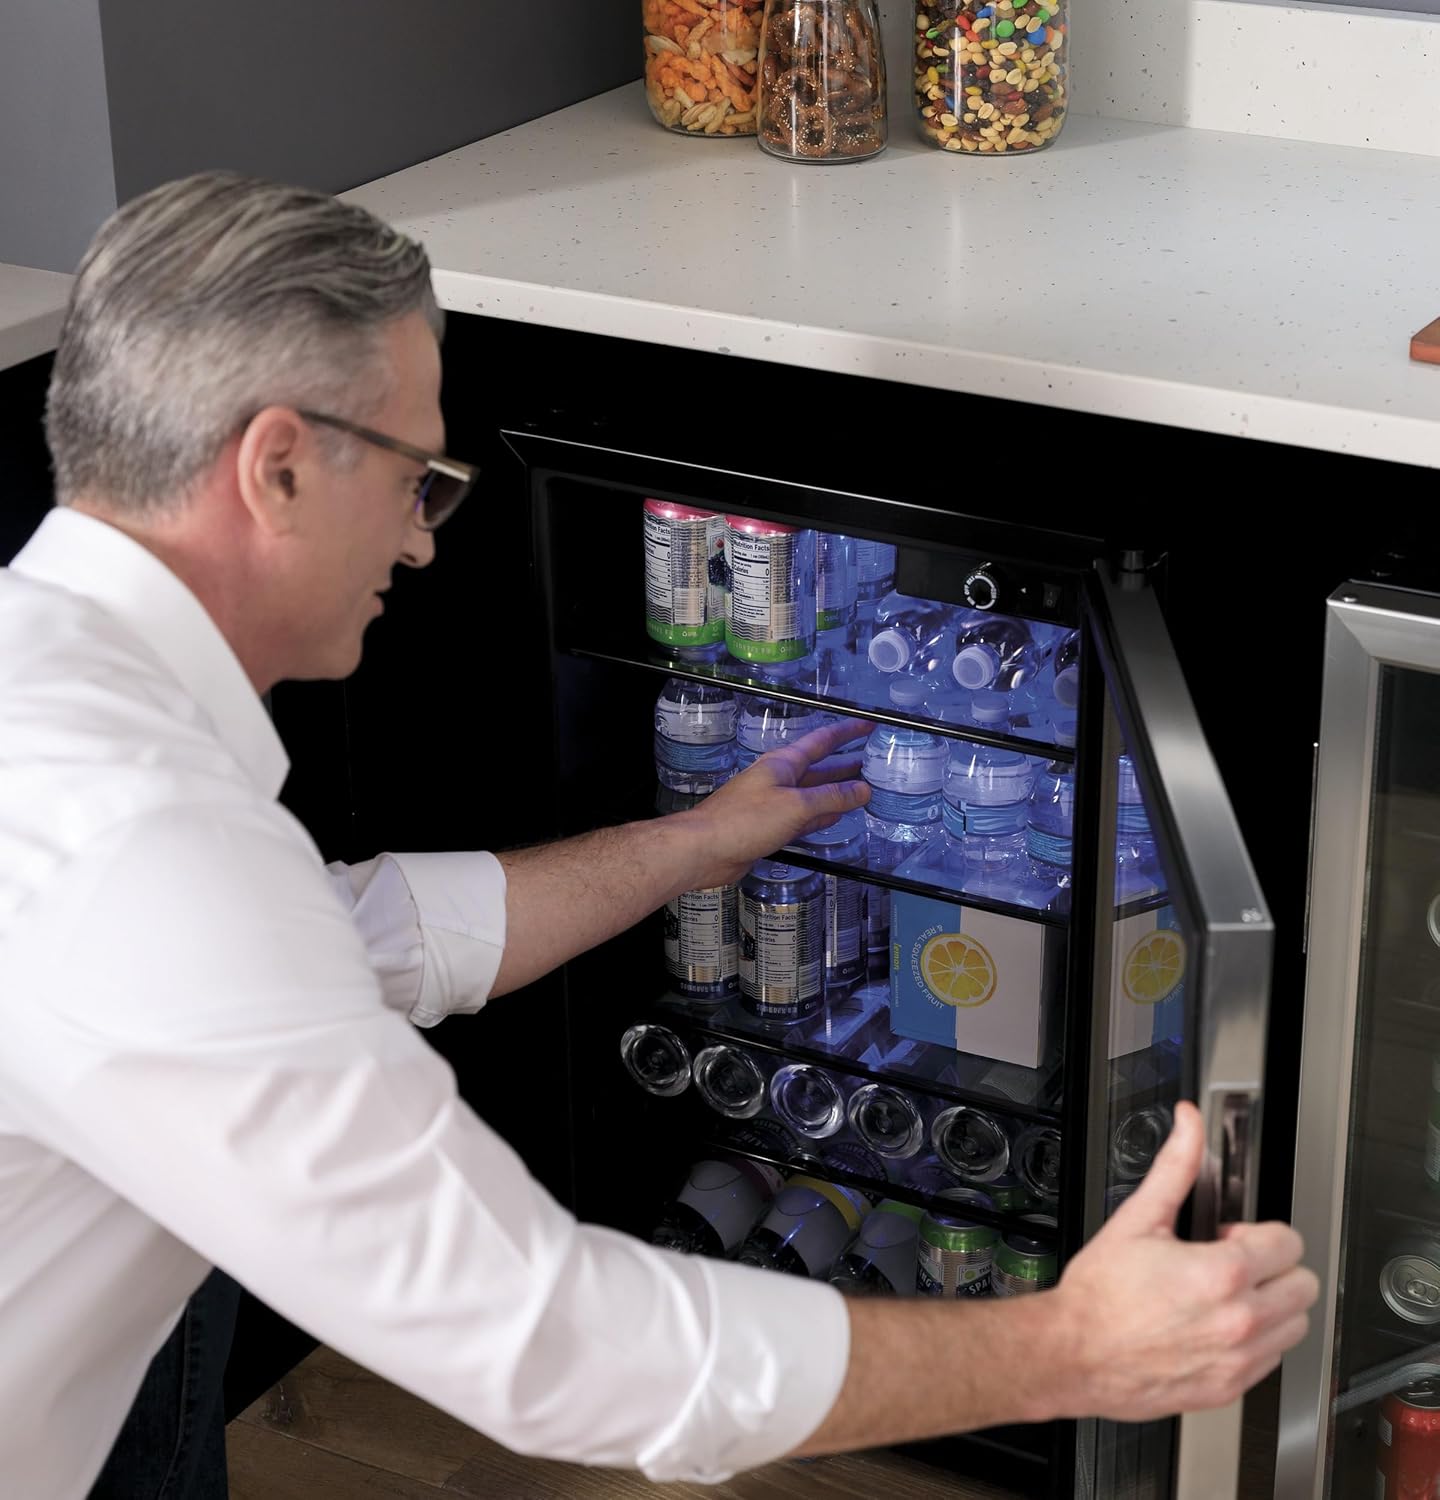
The Haier 150-Can Mini Fridge is designed for convenient beverage storage. It features a glass door, adjustable thermostat, and an automatic LED interior light.
Key Features:
- Capacity: Stores up to 150 standard beverage cans.
- Adjustable Thermostat: Allows precise temperature control for optimal cooling.
- Automatic LED Interior Light: Illuminates the interior for easy viewing.
- Reversible Glass Door: Offers flexible placement options.
- Lock and Key: Provides security for stored items.
- Four Full-Width Glass Shelves: Durable and easy to clean, allowing for organized storage.


3. Setup and Installation
3.1 Unpacking
Carefully remove all packaging materials. Ensure no parts are missing or damaged. Keep packaging materials away from children.
3.2 Placement
Place the mini fridge on a flat, stable surface away from direct sunlight and heat sources. Allow at least 4 inches of space around the back and sides for proper ventilation. This appliance is designed for freestanding installation.

3.3 Door Reversal (Optional)
The door hinges are reversible, allowing the door to open from either the left or right side. Refer to the detailed diagram in the full product manual for specific instructions on reversing the door. This process typically involves unscrewing hinges, moving the door, and reattaching hinges on the opposite side.
3.4 Power Connection
Plug the appliance into a dedicated, grounded 115 Volt AC outlet. Do not use extension cords or adapter plugs. Allow the unit to stand upright for at least 2-4 hours before plugging it in to allow refrigerating fluids to settle.
4. Operating Instructions
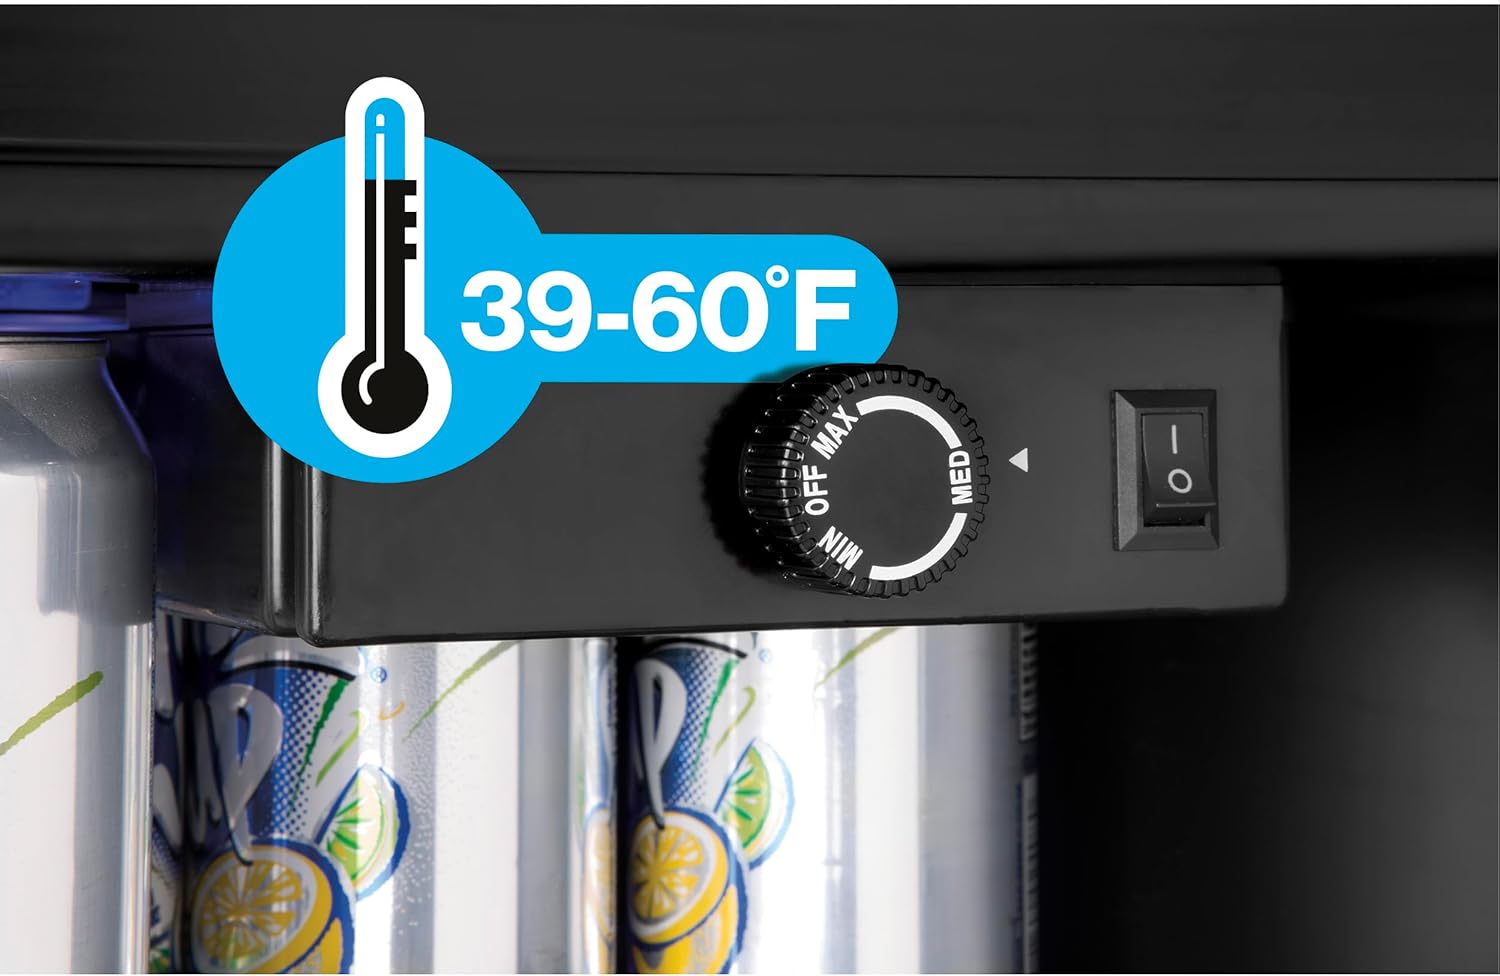
4.1 Temperature Control
The mini fridge features an adjustable thermostat located inside the unit, typically at the top. Turn the dial to adjust the cooling temperature. Settings range from MIN (least cold) to MAX (coldest). The recommended operating temperature range is 39-60°F (3.9-15.6°C).
4.2 Interior LED Light
The unit is equipped with an automatic LED interior light that illuminates when the door is opened. There is also a manual ON/OFF switch for the light, usually located near the thermostat control.
4.3 Lock and Key
To secure the contents of your mini fridge, use the provided lock and key. The lock mechanism is located at the bottom of the door. Insert the key and turn to lock or unlock.

5. Loading and Storage
The mini fridge comes with four full-width glass shelves. These shelves can be adjusted to accommodate various sizes of beverages, from standard cans to taller bottles. To adjust a shelf, carefully lift it and slide it out, then reposition it into the desired slots.

6. Maintenance and Care
6.1 Cleaning
Always unplug the appliance before cleaning. Clean the interior and exterior surfaces with a soft cloth and mild detergent. Avoid abrasive cleaners or solvents. The glass shelves can be removed and washed with warm, soapy water.
6.2 Defrosting
This unit features an automatic defrost system, minimizing the need for manual defrosting. If excessive frost builds up, unplug the unit and allow the frost to melt naturally. Do not use sharp objects to remove frost.
6.3 Power Outage
In case of a power outage, keep the door closed to maintain the internal temperature for as long as possible. Avoid opening the door unnecessarily.
7. Troubleshooting
Before contacting customer service, please check the following common issues:
| Problem | Possible Cause | Solution |
|---|---|---|
| Appliance does not operate. | Not plugged in; circuit breaker tripped; power outage. | Ensure plug is secure; check circuit breaker; verify power supply. |
| Temperature is not cold enough. | Thermostat set too warm; door not closed properly; excessive door openings; poor ventilation; too many items. | Adjust thermostat to a colder setting; ensure door is sealed; reduce frequency of door openings; ensure adequate space around unit; do not overload. |
| Unusual noises. | Unit not level; normal operating sounds (compressor, refrigerant flow). | Adjust leveling feet; these sounds are normal for refrigeration units. |
| Excessive frost buildup. | Door left open; high humidity; door seal issue. | Ensure door is closed tightly; check door gasket for damage; manually defrost if necessary. |
8. Specifications
| Feature | Detail |
|---|---|
| Brand | Haier |
| Model Number | HEBF100BXS |
| Capacity | 150 Cans / 7.5 Cubic Feet |
| Dimensions (D x W x H) | 21.25" x 20.5" x 31.38" |
| Item Weight | 67 Pounds |
| Color | Stainless Steel |
| Installation Type | Freestanding |
| Defrost System | Automatic |
| Voltage | 115 Volts |
| Shelf Type | Glass (4 Full-Width) |
| Door Material | Glass |
| Special Features | Lock & Key, LED Interior Light, Adjustable Thermostat, Reversible Door |

9. Warranty and Support
For warranty information and customer support, please refer to the warranty card included with your product or visit the official Haier website. Keep your purchase receipt as proof of purchase for any warranty claims.
Online Support: www.haierappliances.com/support


