1. Safety Information
Important: Before attempting any installation or maintenance, ensure the appliance is completely disconnected from the main power supply. Failure to do so can result in electric shock, injury, or death. It is recommended that installation be performed by a qualified technician.
- Always disconnect power before servicing.
- Wear appropriate personal protective equipment (e.g., gloves, eye protection).
- Handle the heating element carefully to avoid damage.
- Ensure all connections are secure and correct before restoring power.
- Do not operate the oven if the element is damaged or improperly installed.
2. Product Overview
This genuine Indesit 2-turn heating element is a replacement part designed for various Indesit oven and cooker models. It provides 2000 watts of power, essential for the oven's heating function. The element is constructed for durability and efficient heat distribution within the oven cavity.

Figure 2.1: Front view of the Indesit 2-turn 2000 Watt heating element. This image shows the circular heating coils and the terminal connections.
3. Specifications
| Feature | Detail |
|---|---|
| Brand | Indesit |
| Model Number | BNNXC707MHGKG5SDS445S-66 |
| Wattage | 2000 watts |
| Turns | 2 Turns |
| Length | 210 mm |
| Width | 180 mm |
| Bracket | 70 mm |
| Tags | 25 mm |
| Material Type | Stainless Steel |
| Item Weight | 230 g |
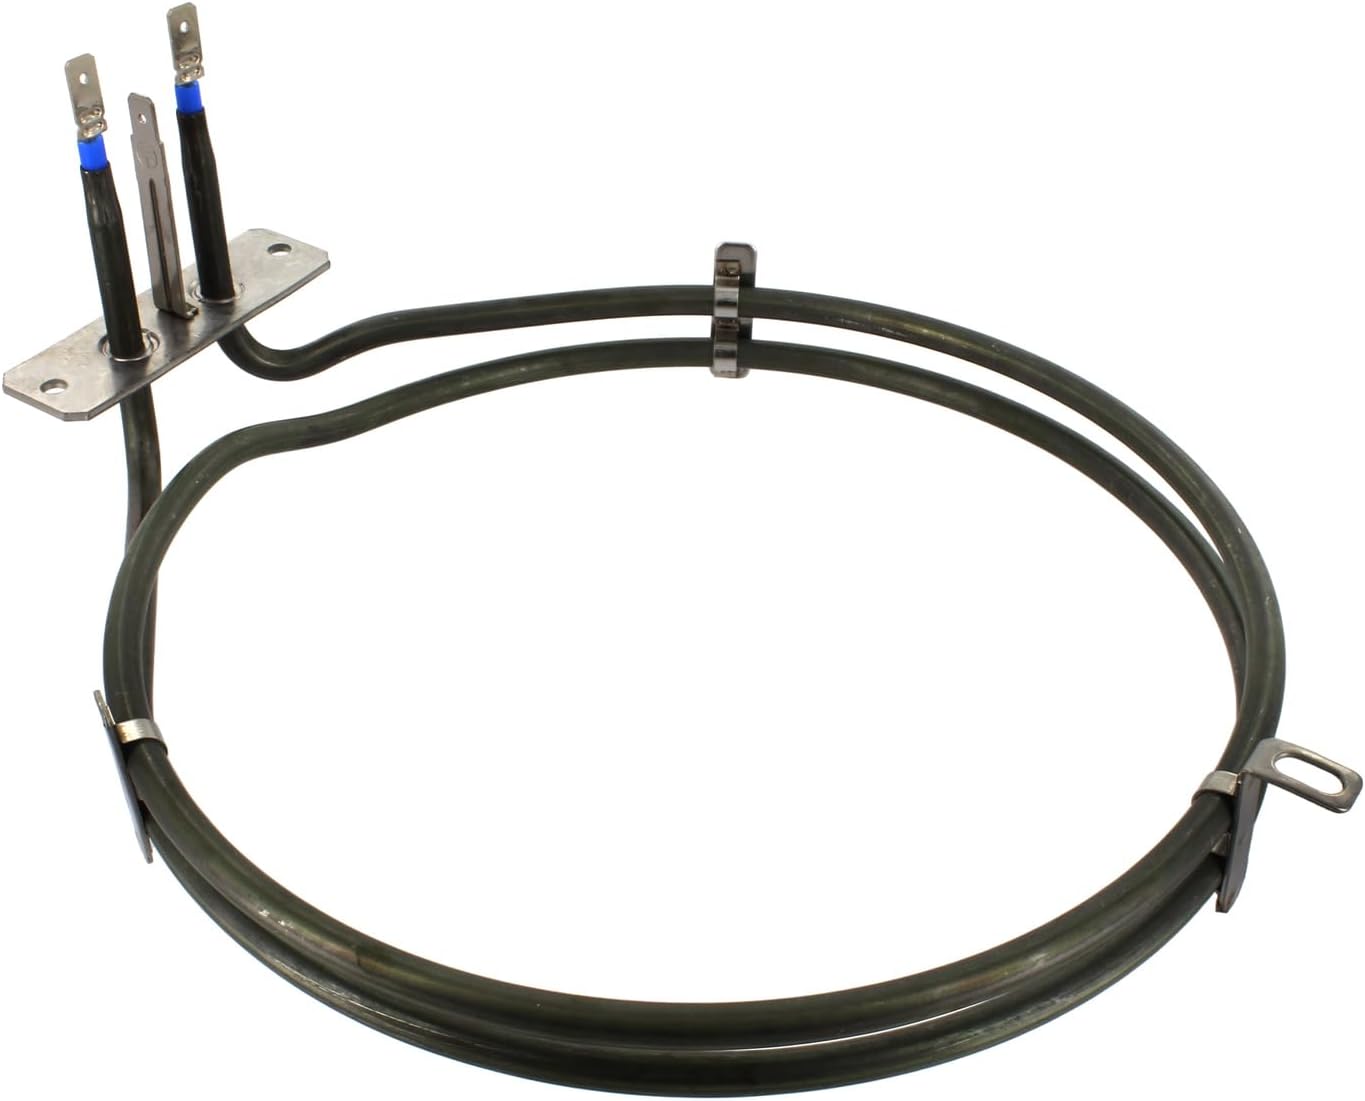
Figure 3.1: Angled view of the heating element, highlighting the electrical terminals and mounting bracket.
4. Compatibility
This heating element is compatible with a wide range of Indesit oven and cooker models. Please verify your appliance's model number against the list below to ensure proper fitment. If your model is not listed, consult your appliance's original manual or contact Indesit customer support.
Partial list of compatible models:
- K 3C8 VA/G, K3C36(X)/G, K3C8VW/G, K3C8VX/G, K3T32(W)/O, K3T32S(W)/O, K3T35(X)/O, K3T35S(X)/O
- K6C32(W)/G, K6C32(X)/G, K6C320(W)/G, K6C320(X)/AUS, K6C320(X)/G, K6E32(W)/G, K6E32(X)/G
- K6G32(W)/G, K6G32(X)/G, K6G4(W)/T, K6G40S(W)/T, K6G4S(W)/T, K6M40S(W)/T, K6M4S(W)/T
- KD6C35A, KD6C35K, KD6C35M (T), KD6C35M, KD6C35W (T), KD6C35W, KD6C35X (T), KD6C35X
- KD6E35W (T), KD6E35W, KD6G35M, KD6G35W, KD6G35X, KDP60C (T), KDP60C, KDP60CS
- KDP60E (T), KDP60E, KDP60SE S, KDP60SE, KN6C320(X)/AUS S, KN6C320(X)/AUS
- KN6G40SA(W)/T S, KN6M40SA(W)/T S, KN6M40SA(W)/T, KT6C3M, KT6C3W, RID60C2 (W) UK
- BIMDS 23 B IX S, BIMDS 23 B IX, BIMS 31 K.A B IX GB, BIMS 31K.A B IX GB S, DD60C2C(X)UK, DD60C2CRUK, DIMDN13IXS
- FI 31 K.B (BK) GB, FI 31 K.B (WH) GB, FI 31 K.B IX GB, FID10IX/1 S, FID10IX/1, FID20BK (T), FID20BK MK2, FID20BK/1
- FID20IX MK2, FID20IX/1, FID20WH (T), FID20WH MK2, FID20WH/1, FIDM20IX (T), FIDM20IX MK2, FIDM20IX/1
- FIE 36 K.B (BK) GB/1, FIE 36 K.B (BK) GB, FIE 36 K.B (WH) GB/1, FIE 36 K.B (WH) GB, FIE 36 K.B IX GB/1, FIE 36 K.B IX GB
- FIM 31 K.A (BK) GB, FIM 31 K.A (WH) GB, FIM 31 K.A IX GB, FIM 33 K.A (BK) GB, FIM 33 K.A (WH) GB, FIM 33 K.A IX GB
- FIMD 13 IX S, FIMD 13 IX, FIMD 23 (BK) S, FIMD 23 (WH) S, FIMD 23 IX S, FIMD 23 IX, FIMD E 23 IX S, FIMD E 23 IX
- FIMD23BK, FIMD23WH, FIMU 23 (BK) S, FIMU 23 (WH) S, FIMU 23 (WH), FIMU 23 IX S, FIMU 23 IX, FIMU23BK
- FIU20BK (T), FIU20BK, FIU20IX (T), FIU20IX MK2, FIU20IX/1, FIU20WH (T), FIU20WH MK2, FIU20WH/1
- FV 10 K.B IX GB, FV 20 K.B (WH) GB, I6EVA(W)/UK, I6GTAG(W)/T, I6VV2A(W)/UK, I6VV2A(X)/EX, I6VV2A(X)/UK
- ID60C2(A) S, ID60C2(A), ID60C2(K) S, ID60C2(K), ID60C2(M) S, ID60C2(W) S, ID60C2(W), ID60C2(X) S, ID60C2(X)
- ID60C2AA(M), ID60C2M, ID60C2NUK, ID60C2RUK, ID60E2(W) S, ID60E2(W), ID6IVS2(A)/UK, ID6IVS2(X)/UK
- IS60C1(W) S, IS60C1(W), IS60C1(X), IS60C1(XX) S, IS60E(W) S, IS60E(W)
- K 342 V(W)/IR, K 342 V(W)/O, K 343 V(X)/O, K 345 VT.B(W)/O, K 346 VT.B(X)/O, K 3C8 V(W)/G, K 3C8 V(X)/G, K 3C8 V.B A/G, K 3C8 V.B(X)/G

Figure 4.1: Side view of the heating element, showing the two turns of the coil and the mounting points.
5. Installation (Setup)
Replacing an oven heating element requires careful attention to safety and proper procedure. If you are unsure about any step, consult a qualified appliance technician.
- Disconnect Power: Locate your oven's circuit breaker or unplug the appliance from the wall socket to completely cut off electrical power. Verify power is off using a voltage tester.
- Access the Element: Open the oven door. The heating element is typically located at the back of the oven cavity. You may need to remove oven racks to gain better access.
- Remove Mounting Screws: Identify the screws holding the element in place. These are usually located at the back of the oven, securing the element's bracket. Carefully unscrew them.
- Gently Pull Element Forward: Once screws are removed, gently pull the element forward a few inches. This will expose the electrical terminals at the back.
- Disconnect Wires: Note the position of each wire on the terminals. It is advisable to take a photo for reference. Carefully disconnect the wires from the old element's terminals. You may need needle-nose pliers. Ensure the wires do not fall back into the oven wall.
- Remove Old Element: Once wires are disconnected, fully remove the old heating element from the oven.
- Install New Element: Connect the electrical wires to the corresponding terminals on the new Indesit heating element. Ensure connections are firm and secure.
- Secure Element: Carefully push the new element back into position, aligning the mounting bracket with the screw holes. Reinsert and tighten the mounting screws.
- Test Functionality: Restore power to the oven. Set the oven to a low temperature and observe if the element begins to heat up. Gradually increase the temperature to confirm full functionality.

Figure 5.1: Close-up view of the electrical terminals on the heating element, showing the spade connectors.
6. Operation
Once correctly installed, the Indesit 2-turn heating element operates automatically as part of your oven's heating system. When the oven is turned on and a temperature is selected, the element receives electrical current, heats up, and radiates heat into the oven cavity. The oven's thermostat will regulate the power to the element to maintain the desired temperature.
- Ensure the oven door is properly closed during operation to maintain temperature and efficiency.
- Avoid touching the element when the oven is hot or recently used, as it can cause severe burns.

Figure 6.1: Rear view of the heating element, showing the full circular shape and the terminal block.
7. Maintenance
The Indesit heating element is designed for long-term performance and generally requires minimal maintenance. However, periodic inspection can help ensure its longevity and safe operation.
- Visual Inspection: Periodically inspect the element for any visible signs of damage, such as cracks, bulges, or discoloration, which may indicate wear or failure. Ensure the oven is cool and disconnected from power before inspection.
- Cleaning: Avoid direct contact with cleaning agents on the heating element. During oven cleaning, ensure no harsh chemicals or abrasive materials come into contact with the element, as this can damage its surface.
- Secure Connections: If you notice any issues with heating, and after disconnecting power, you may gently check that the electrical connections to the element terminals are still secure.
8. Troubleshooting
If your oven is experiencing heating issues after installing this element, consider the following troubleshooting steps:
- Oven Not Heating:
- Check if the oven is receiving power.
- Verify the circuit breaker has not tripped.
- Ensure the element is correctly wired and connections are secure.
- Confirm the oven's thermostat is set correctly.
- Uneven Heating:
- While less common with a new element, ensure the element is fully seated and not obstructed.
- This could indicate an issue with other oven components (e.g., fan, thermostat).
- Element Not Glowing:
- A new element should glow red when hot. If it does not, re-check wiring and power supply.
- If the element is new and correctly installed but not heating, it may be faulty.
For persistent issues, it is recommended to contact a qualified appliance repair technician.
9. Warranty and Support
For information regarding the warranty of this Indesit Genuine Oven Cooker 2 Turn Heater Element, please refer to the documentation provided at the time of purchase or contact the seller directly. Indesit also provides customer support for their products, which can be accessed through their official website or customer service channels.
When contacting support, please have your appliance model number (e.g., BNNXC707MHGKG5SDS445S-66) and the purchase details of the heating element readily available.


