
ANNKE AU-DW81KT0-54EF-P
Contents
ANNKE 8CH 3K Lite Wired Security Camera System User Manual
Brand: ANNKE | Model: AU-DW81KT0-54EF-P
1. Introduction
This manual provides detailed instructions for setting up, operating, and maintaining your ANNKE 8CH 3K Lite Wired Security Camera System. This system is designed to provide reliable surveillance with advanced features for both home and business environments.

Image: The complete ANNKE 8CH 3K Lite Wired Security Camera System, including the DVR and four bullet cameras.
Key Features:
- Tried-and-True Safe Guard: Features four 2MP wired cameras and an 8-channel DVR compatible with TVI, AHD, CVI, CVBS, and IP cameras. The DVR supports 5MP/3K@20fps cameras, with advanced sensors and smart IR for clear images up to 100ft.
- AI Motion Detection 2.0: Enhanced human and vehicle detection for accurate alerts and quicker searching in recordings.
- Upgraded to H.265+: Extends recording time and reduces bandwidth usage. Supports up to 10TB HDD (Hard Drive Disk NOT Included).
- Smart Dual-Light & Color Night Vision: Offers crisp full-color night vision, IR mode, and flexible switching. Cameras can see up to 100ft in B&W night vision and 66ft in full-color night vision.
- IP67 Weatherproof: Cameras are rated IP67, ensuring durability in various weather conditions, from cold to hot.
2. What's in the Box?
Please verify that all components listed below are included in your package:

Image: A visual representation of all components included in the ANNKE security camera system package.
- 1x 8CH H.265+ 3K Lite DVR (No Hard Drive Pre-installed)
- 4x 2MP Bullet Cameras
- 4x 60 ft BNC Cables & CCTV Cables for Cameras
- 2x Power Adapters
- 1x 4-to-1 Power Splitter Cables
- 4x Mounting Screw Kits
- 1x 5.9 ft/1.8 m HDMI Cable
- 1x USB Mouse
- 1x User Manual
- 1x Wall Sticker
3. Setup Instructions
3.1 Connecting Analog Cameras to the DVR
Follow these steps to connect your analog cameras to the DVR system:
- Connect the DVR to a monitor using a VGA or HDMI cable.
- Connect the DVR's power supply to the 12V DC Power Input.
- Connect the DVR to your router using an Ethernet cable.
- Connect the USB mouse to the DVR's USB input.
- Connect the power input interface of the BNC cable to the power supply of the cameras.
- Connect the video cable to the DVR's video input.
- Connect the video cable to the camera's BNC video output and connect the DC cable to the camera's DC power input.
Video: This video demonstrates how to hook up an analog camera to your ANNKE DVR system from the beginning, covering all necessary cable connections.
3.2 Connecting IP Cameras to the DVR
If you are integrating IP cameras, follow these connection steps:
- Connect the DVR's power supply to the 12V DC Power Input.
- Connect the DVR to a monitor using a VGA or HDMI cable.
- Connect the USB mouse to the DVR's USB input.
- Connect the DVR to your router using an Ethernet cable.
- Connect the power supply to the camera's DC power input.
- Connect the Ethernet cable to the camera's RJ45 Network Port.
Video: This video provides a step-by-step guide on how to connect an IP camera to your ANNKE DVR system.
4. Operating the System
4.1 AI Motion Detection 2.0
The system features advanced AI Motion Detection 2.0, which accurately distinguishes between human and vehicle movements. This reduces false alarms and allows for quicker searching of relevant events in your recordings.

Image: Visual demonstration of the AI Human/Vehicle Detection feature, highlighting detected subjects.

Image: A mobile app screenshot illustrating notifications for human and vehicle detection.
4.2 Smart Dual-Light & Color Night Vision
Experience clear surveillance even in low-light conditions. The Smart Dual-Light technology allows for flexible switching between black & white IR night vision (up to 100ft) and full-color night vision (up to 66ft) when motion is detected.

Image: A visual comparison demonstrating the clarity and color provided by Smart Color Night Vision versus traditional black and white night vision.
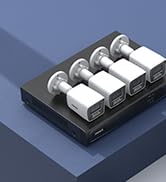
Image: A split image illustrating the difference between black and white night vision (spotlight off) and full-color night vision (spotlight on).
4.3 Remote Access
Monitor your property from anywhere using the ANNKE Vision app on your smartphone, tablet, or computer. Receive instant app pushes when intruders are detected, ensuring peace of mind.

Image: A person viewing live camera footage on a smartphone, demonstrating the remote access capability across multiple devices.

Image: Two hands holding smartphones, one displaying a QR code for easy setup and the other showing a live security camera feed.
4.4 Setting Privacy Mask
To protect privacy in sensitive areas, you can set up privacy masks. This feature allows you to block out specific regions in the camera's view from being recorded or monitored.
- Log in to the DVR via the gesture pattern or password.
- Navigate to Menu > Configuration > Camera > Privacy Mask.
- Enable the privacy mask function.
- Long-press the left mouse button to draw the desired occluded area on the preview window.
- Click 'Apply' to save the settings.
Video: This video tutorial guides you through the process of setting up a privacy mask on your ANNKE 3K Lite DVR.

Image: An illustration of privacy masks applied to a house, demonstrating how certain areas can be excluded from surveillance.
4.5 Switching Window Division and Analog to IP Channels
The DVR allows for flexible viewing modes and the ability to convert analog channels to IP channels for expanded compatibility.
4.5.1 Switching Window Division:
To change the layout of your live view:
- Right-click on the mouse to open the menu.
- Select 'Window Division' and choose your desired layout (e.g., 2x2, 1+5, 3x3, 4x4, or 1x1 for single screen).
Video: This video demonstrates how to switch between different window division layouts on your ANNKE 3K Lite DVR for multi-camera viewing.
4.5.2 Switching Analog Channels to IP Channels:
This DVR supports 8 analog channels by default and 2 IP cameras simultaneously for channel expansion. All 8 analog channels can be switched to IP channels as required, supporting up to 10 IP camera accesses. After enabling enhanced IP mode, it supports up to 12 network camera inputs.
- Different series devices have different abilities of expanding IP channels.
- Disabling one analog channel can expand one IP channel.
- After an analog channel is switched to an IP channel, the BNC interface corresponding to that channel will no longer output images even if connected to an analog camera, because the channel has become an IP channel.
- Log in to the DVR via the gesture pattern or password.
- Navigate to Menu > Configuration > Camera > Analog.
- Select the analog channel you wish to convert and click the IP icon behind it to disable the analog channel and change it to an IP channel. You can select one, several, or even all channels at the same time.
- After changing the channel mode, click 'Apply' to save the settings.
- The DVR will prompt a message to confirm. Click 'Yes' to restart the DVR and apply the changes.
Video: This video explains how to change analog channels to IP channels on your ANNKE DVR, expanding your camera compatibility.
5. Maintenance
5.1 Weather Resistance
The ANNKE cameras are designed with IP67 weatherproof rating, ensuring reliable operation in extreme temperatures ranging from -40°F (-40°C) to 140°F (60°C). This robust design protects against dust and water ingress, making them suitable for outdoor installation.

Image: The ANNKE camera demonstrating its IP67 weatherproof and robust design, capable of withstanding extreme temperatures.

Image: A series of images illustrating the camera's IP67 weatherproof capabilities, showing it in water, rain, and snow.
5.2 Storage Management (H.265+)
The system utilizes H.265+ video compression technology, which significantly reduces file sizes and extends recording time. This allows for more efficient use of your hard drive space, supporting up to 10TB HDD (not included).

Image: A comparison graphic highlighting the efficiency of H.265+ compression over H.264, saving 75% storage space.

Image: A visual representation of the DVR's scalable storage capability, supporting up to 10TB hard drives.
6. Troubleshooting
If you encounter any issues with your ANNKE Security Camera System, please consider the following common troubleshooting steps:
- No Video Output: Ensure all cables (HDMI/VGA, BNC, Ethernet) are securely connected. Verify the monitor input source is correct. Check power connections for both DVR and cameras.
- No Remote Access: Confirm the DVR is connected to the internet. Check network settings on the DVR and your router. Ensure the ANNKE Vision app is updated and configured correctly.
- Motion Detection Issues: Verify motion detection settings are enabled and configured for the desired areas. Adjust sensitivity if needed. Ensure cameras are positioned correctly to capture the intended area.
- Recording Problems: Check if a hard drive is installed and properly initialized. Verify recording schedules and settings. Ensure sufficient storage space is available.
- Image Quality Issues: Clean camera lenses regularly. Ensure proper lighting conditions, especially for night vision. Check cable integrity for any damage.
For more detailed troubleshooting or persistent issues, please refer to the comprehensive User Manual PDF linked in the support section or contact ANNKE customer support.
7. Specifications
Detailed technical specifications for the ANNKE 8CH 3K Lite Wired Security Camera System:

Image: Dimensions of the ANNKE bullet camera and DVR unit.
| Feature | Specification |
|---|---|
| Brand | ANNKE |
| Model Number | AU-DW81KT0-54EF-P |
| Connectivity Technology | VGA, USB, Ethernet, HDMI |
| Video Capture Resolution | 1080p |
| Special Features | Night Vision, Automatic Overwrite, Vehicle Detection, Smart Playback, Human Detection |
| Number of Channels | 8 |
| Power Source | Corded Electric |
| Item Dimensions L x W x H | 14.56 x 11.81 x 7.55 inches |
| Recommended Uses | Outdoor/AI Human/Vehicle Detection |
| Compatible Devices | Smartphones, Personal Computers, Tablets, Laptops, Cameras |
| Signal Format | Analog |
| Low Light Technology | Night Vision |
| Night Vision Range | 100 Feet |
| Frame Rate | Variable, with a maximum of 20fps |
| Recording Mode | Motion Detection |
| Optical Sensor Technology | CMOS |
| Total USB Ports | 1 |
| Hardware Interface | USB 3.0 Type B |
| Lens Type | Fixed |
| Video Input | BNC |
| Item Weight | 8 pounds |
| Date First Available | October 4, 2016 |
8. Warranty and Support
ANNKE products are designed for reliability and performance. For specific warranty details, please refer to the official warranty information provided with your product or visit the ANNKE official website. ANNKE is committed to providing top-notch surveillance solutions and offers dedicated customer support for any inquiries or technical assistance.
For further assistance, you can refer to the official User Manual PDF: ANNKE User Manual (PDF)
Ask a question about this manual
Ask about setup, troubleshooting, compatibility, parts, safety, or missing instructions. Manuals+ will review the question and use this page’s manual context to help answer it.