
WALI M001XL
WALI M001XL Single Extra Tall Monitor Arm Mount Instruction Manual
Model: M001XL | Brand: WALI
1. Introduction
Thank you for choosing the WALI M001XL Single Extra Tall Monitor Arm Mount. This product is designed to enhance your workspace by providing a flexible and ergonomic solution for mounting your monitor. By following these instructions, you can ensure a safe and efficient setup, allowing you to optimize your viewing experience and reclaim valuable desk space.
This monitor arm is compatible with most flat panel monitors up to 32 inches and supports a weight capacity of up to 22 lbs. It features detachable and height-adjustable mount plates for VESA patterns 75x75mm and 100x100mm.
2. Package Contents
Please verify that all components listed below are included in your package:
- 1 x WALI Extra Tall Single Monitor Mount (Black)
- 1 x Mounting Hardware Kit (various screws, washers, and tools)
- 1 x User Manual

Figure 2.1: Package Contents
3. Specifications
| Feature | Description |
|---|---|
| Brand | WALI |
| Model Number | WL-M001XL |
| Monitor Size Compatibility | Up to 32 inches |
| Weight Capacity | Up to 22 lbs (10 kg) |
| VESA Compatibility | 75x75mm, 100x100mm |
| Mounting Type | Tabletop Mount (C-Clamp or Grommet) |
| Desk Thickness (C-Clamp) | 0.4" - 3.5" (10mm - 88mm) |
| Desk Thickness (Grommet) | 0.4" - 3" (10mm - 76mm) |
| Movement Type | Articulating |
| Tilt Angle | +/-90° |
| Swivel Angle | +/-90° (at arm joint), 360° (at pole) |
| Rotation | 360° (Landscape to Portrait) |
| Pole Height | 31.5 inches |
| Max Arm Extension | 17 inches |
| Material | Alloy Steel |

Figure 3.1: Display Compatibility

Figure 3.2: Product Dimensions
4. Setup and Installation
The WALI M001XL monitor arm offers two installation options: C-Clamp and Grommet Base. Choose the method that best suits your desk setup.
4.1 C-Clamp Installation
- Attach the C-clamp to the bottom of the main pole.
- Position the pole on the edge of your desk.
- Tighten the C-clamp screw until the mount is securely fastened to the desk. Ensure the desk thickness is between 0.4" and 3.5".
4.2 Grommet Base Installation
- If your desk has a grommet hole, insert the grommet base through the hole. Ensure the desk thickness is between 0.4" and 3".
- Secure the base from underneath the desk using the provided hardware.
- Attach the main pole to the secured grommet base.

Figure 4.1: C-Clamp Installation

Figure 4.2: Grommet Base Installation
4.3 Attaching the Monitor
- Attach the VESA plate to the back of your monitor using the appropriate screws from the hardware kit.
- Slide the monitor (with the attached VESA plate) onto the arm's mounting head.
- Secure the monitor by tightening the locking screw on the mounting head.
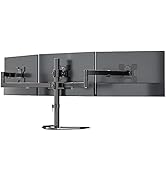
Figure 4.3: Attaching VESA Plate to Monitor

Figure 4.4: Sliding Monitor onto Arm

Figure 4.5: Fully Assembled Monitor Arm
4.4 Cable Management
Utilize the integrated cable clips along the arm and pole to route your monitor cables for a tidy and organized setup. This helps prevent cable clutter and potential damage.

Figure 4.6: Cable Management
4.5 Setup Demonstration Video
Video 4.1: This video demonstrates the unboxing and initial setup of the WALI M001XL monitor arm, including attaching it to a desk and mounting a monitor. It also shows how to manage cables for a clean look.
5. Operating and Adjustments
The WALI M001XL monitor arm provides various adjustment options to achieve your desired viewing angle and ergonomic position.
5.1 Height Adjustment
To adjust the monitor's height along the 31.5-inch pole, loosen the collar clamp on the pole, slide the arm to the desired height, and then securely tighten the clamp.

Figure 5.1: Height Adjustment
5.2 Tilt, Swivel, and Rotation
The monitor arm allows for flexible positioning:
- Tilt: Adjust the monitor screen +/-90° vertically to reduce glare and optimize viewing.
- Swivel: Swivel the monitor +/-90° horizontally at the arm joint or 360° around the pole to share your screen or change viewing angles.
- Rotation: Rotate the monitor 360° to switch between landscape and portrait modes.

Figure 5.2: Angle Adjustment Options
5.3 Adjustment Demonstration Video
Video 5.1: This video demonstrates the various adjustments of the WALI M001XL monitor arm, including height, tilt, swivel, and rotation, showcasing its flexibility for different viewing needs.
6. Maintenance
To ensure the longevity and optimal performance of your WALI monitor arm, follow these simple maintenance guidelines:
- Regular Cleaning: Wipe down the mount with a soft, damp cloth to remove dust and dirt. Avoid using abrasive cleaners or solvents.
- Check Tightness: Periodically check all screws and connections to ensure they are securely tightened. Over time, vibrations or frequent adjustments may cause them to loosen.
- Lubrication: If any joints become stiff, a small amount of silicone-based lubricant can be applied to the moving parts.
7. Troubleshooting
If you encounter any issues with your WALI monitor arm, please refer to the following common problems and solutions:
- Monitor is sagging or not holding position:
Ensure all adjustment screws on the arm joints and VESA plate are tightened. For height adjustment, ensure the pole clamp is fully secured. - Mount is wobbly:
Verify that the C-clamp or grommet base is securely fastened to the desk. The desk surface should be stable and capable of supporting the weight of the mount and monitor. - Difficulty adjusting the arm:
Check if any locking mechanisms are engaged. Loosen them slightly before attempting to adjust, then re-tighten once the desired position is achieved. - Cables are not staying in clips:
Ensure cables are properly routed and not overstuffed in the clips. If clips are damaged, contact customer support for replacements.
If the problem persists after attempting these solutions, please contact WALI customer support.
8. Warranty and Support
WALI products are backed by a manufacturer's warranty. For specific warranty details, please refer to the warranty card included in your package or visit the official WALI website. Our experienced and friendly US-based customer support team is available to assist you 7 days a week for any questions or concerns regarding your product.
For support, please visit: WALI Store on Amazon
Related documentsM001XL


Ask a question about this manual
Ask about setup, troubleshooting, compatibility, parts, safety, or missing instructions. Manuals+ will review the question and use this page’s manual context to help answer it.