1. Introduction
This manual provides essential information for setting up, operating, maintaining, and troubleshooting your new CYBERPOWERPC Luxe Gaming PC. Please read this guide thoroughly before using your system to ensure optimal performance and longevity.
The CYBERPOWERPC Luxe Gaming PC is a high-performance desktop computer designed for gaming and demanding applications. It features an Intel Core i7-12700KF processor, Nvidia GeForce RTX 4060 Ti graphics, 32GB DDR5 RAM, and a 1TB NVMe SSD, all housed in a CyberpowerPC Prism Mid Tower case with advanced cooling.
2. System Setup
2.1 Unboxing
Carefully remove the PC from its packaging. Retain all packaging materials for future transport or warranty claims. Ensure all accessories, such as power cables, documentation, and any included peripherals, are present.
2.2 Connecting Peripherals
Before powering on, connect your essential peripherals:
- Monitor: Connect your monitor to the graphics card's DisplayPort or HDMI output. Ensure the cable is securely fastened.
- Keyboard and Mouse: Connect your keyboard and mouse to the available USB ports on the rear or top of the PC.
- Audio: Connect speakers or headphones to the audio output jacks on the rear or front panel.
- Network: For a wired connection, connect an Ethernet cable to the RJ45 port. For wireless, ensure the Wi-Fi antenna (if included) is attached.

Image 2.2.1: Front view of the CYBERPOWERPC Luxe Gaming PC. This image displays the tempered glass side panel, internal components with RGB lighting, and the overall design of the PC tower.
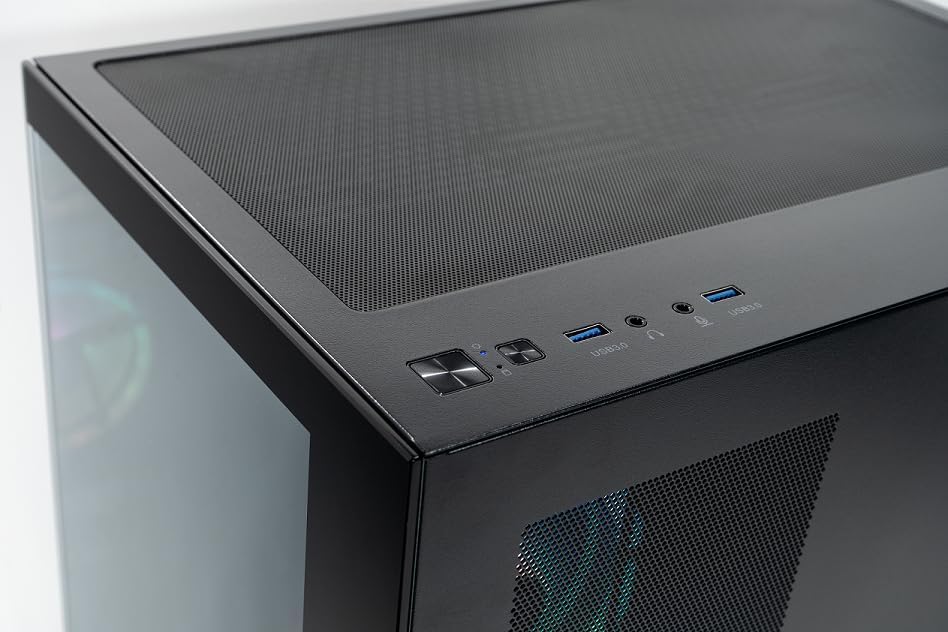
Image 2.2.2: Top panel of the CYBERPOWERPC Luxe Gaming PC. This image highlights the power button, reset button, two USB 3.0 ports, and audio input/output jacks located on the top of the PC case for easy access.
2.3 Power Connection
Connect the provided power cable to the power supply unit (PSU) input on the rear of the PC, then plug the other end into a grounded electrical outlet.
3. Operating Instructions
3.1 Powering On/Off
- To Power On: Press the power button located on the top panel of the PC.
- To Power Off: From the Windows 11 desktop, click the Start button, then select Power > Shut down. Avoid direct power-off unless necessary to prevent data loss.
3.2 Initial Boot and Windows 11 Setup
Upon first power-on, the system will guide you through the Windows 11 Home setup process. Follow the on-screen instructions to configure your region, language, network, and user account.
3.3 Network Connectivity
- Wired (Ethernet): Once the Ethernet cable is connected, Windows 11 should automatically detect and connect to the network.
- Wireless (Wi-Fi): After Windows 11 setup, click the Wi-Fi icon in the taskbar, select your network, and enter the password. The system supports 1200Mbps 802.11ac Wi-Fi.
4. Key Components and Features
Your CYBERPOWERPC Luxe Gaming PC is equipped with the following core components:
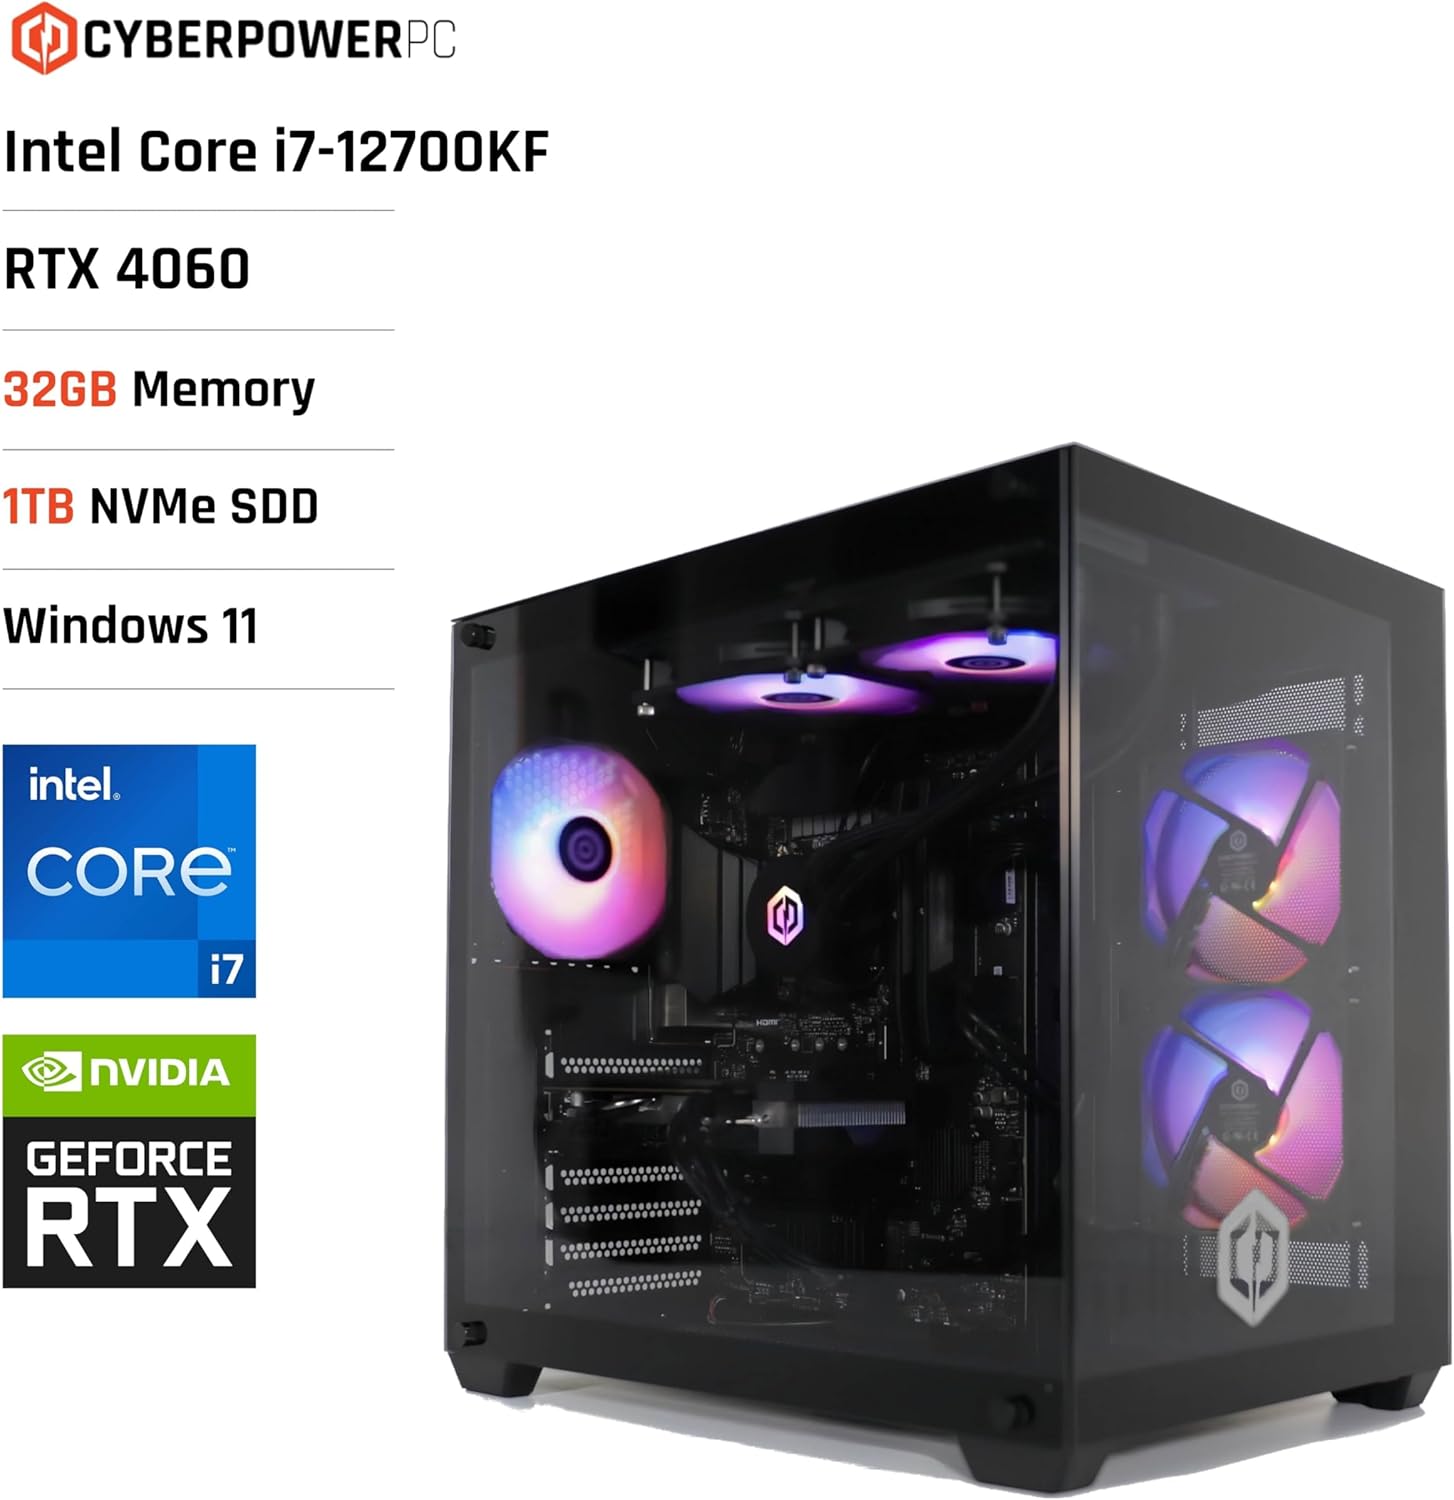
Image 4.1: CYBERPOWERPC Luxe Gaming PC with specifications. This image visually presents the PC alongside text overlays indicating its Intel Core i7-12700KF processor, RTX 4060 graphics, 32GB Memory, 1TB NVMe SSD, and Windows 11 operating system.
- Processor: Intel Core i7-12700KF (12 cores, 20 threads, up to 5.00GHz boost, 25MB cache).
- Graphics Card: Nvidia GeForce RTX 4060 Ti with 8GB GDDR6X memory. Supports DisplayPort v1.4a and HDMI 2.1.
- RAM: 32GB 5200MHz DDR5 RAM.
- Storage: 1TB M.2 NVMe Solid State Drive for fast boot times and application loading.
- Motherboard: Intel Z790 chipset motherboard.
- Power Supply: 650W 80+ certified gaming power supply.
- Cooling: 240mm all-in-one CPU water cooler and 6x RGB LED fans for efficient thermal management.
- Operating System: Windows 11 Home (64-bit) pre-installed.
- Connectivity:
- 4x USB 3.1 ports
- 2x USB 2.0 ports
- 1x PS/2 KB or mouse port
- 1x RJ45 Ethernet LAN (10/100/1000)
- 1200Mbps 802.11ac Wi-Fi / WLAN
- 7.1-Channel High Definition Audio

Image 4.2: Rear view of the CYBERPOWERPC Luxe Gaming PC. This image details the various input/output ports available on the back panel, including USB ports, Ethernet, audio jacks, and video outputs from the graphics card.

Image 4.3: Nvidia GeForce RTX logo. This image represents the powerful graphics processing unit integrated into the system.
5. Maintenance
Regular maintenance helps ensure the longevity and performance of your PC.
- Dust Cleaning: Periodically clean dust from the case fans, CPU cooler, and graphics card heatsink using compressed air. Ensure the PC is powered off and unplugged before cleaning.
- Software Updates: Keep your Windows operating system, drivers (especially graphics drivers), and applications updated to the latest versions for security and performance improvements.
- Ventilation: Ensure the PC is placed in a well-ventilated area, free from obstructions that could block airflow to the intake and exhaust vents.
- Cable Management: Organize internal and external cables to improve airflow and prevent accidental disconnections.
6. Troubleshooting
This section addresses common issues you might encounter.
6.1 No Power
- Check if the power cable is securely connected to both the PC and the wall outlet.
- Verify the power switch on the PSU (located at the rear of the PC) is in the 'ON' position.
- Test the outlet with another device to ensure it is functional.
6.2 No Display on Monitor
- Ensure the monitor is powered on and the video cable (HDMI/DisplayPort) is securely connected to the graphics card outputs, not the motherboard's integrated video ports.
- Try a different video cable or monitor if available.
- Confirm the correct input source is selected on your monitor.
6.3 Network Connectivity Issues
- For wired connections, check the Ethernet cable and router status.
- For Wi-Fi, ensure the Wi-Fi adapter is enabled in Windows settings and you are connected to the correct network with the correct password.
- Restart your router/modem and the PC.
6.4 System Performance Issues
- Ensure all drivers, especially graphics drivers, are up to date.
- Check for background applications consuming excessive resources using Task Manager (Ctrl+Shift+Esc).
- Verify that the system is not overheating. Monitor CPU and GPU temperatures using appropriate software.
7. Technical Specifications
| Component | Specification |
|---|---|
| Brand | CyberpowerPC |
| Operating System | Windows 11 Home (64-bit) |
| CPU Model | Intel Core i7-12700KF |
| CPU Speed | 3.6 GHz (Base), up to 5.0 GHz (Boost) |
| CPU Cores/Threads | 12 Cores (8 Performance, 4 Efficient) / 20 Threads |
| Cache Size | 25 MB |
| Graphics Card | Nvidia GeForce RTX 4060 Ti 8GB GDDR6X |
| RAM | 32GB 5200MHz DDR5 |
| Storage | 1TB M.2 NVMe SSD |
| Motherboard Chipset | Intel Z790 |
| Power Supply | 650W 80+ Gaming PSU |
| Cooling | 240mm All-in-One CPU Water Cooler, 6x RGB LED Fans |
| Wi-Fi | 1200Mbps 802.11ac WLAN |
| Ethernet | 10/100/1000 Gigabit LAN |
| Audio | 7.1-Channel High Definition Audio |
| USB Ports | 4x USB 3.1, 2x USB 2.0 |
| Case Type | CyberpowerPC Prism Mid Tower |
| Specific Uses | Games |
8. Warranty and Support
Your CYBERPOWERPC Luxe Gaming PC comes with the following warranty and support:
- Component Warranty: 2 years for components.
- Manufacturing Warranty: 3 years for manufacturing defects.
- Technical Support: Lifetime Technical Support.
- Software: Includes 1 Year Norton 360 VPN & Security for Gamers.
For technical assistance or warranty claims, please contact CyberpowerPC customer support through their official website or the contact information provided in your product documentation.


