1. Product Overview
The Kanto PMX660 Full Motion Pro Series TV Mount is designed for flat panel TVs ranging from 37" to 80" and supports up to 125 lb (57 kg). It accommodates VESA sizes from 200x100 to 600x400. This mount offers extensive adjustability, including extension, swivel, and tilt, to optimize your viewing experience.
- Fits most flat panel TVs from 37" to 80".
- Supports TVs up to 125 lb (57 kg).
- Accommodates VESA sizes from 200x100 to 600x400.
- Extends up to 22" (55.9 cm) from the wall and retracts to 2.5" (6.3 cm).
- Accommodates 16" stud spacing.
- Accessible tilt mechanism provides +12 degrees to -3 degrees of tilt.
- 90 degrees of swivel in either direction, depending on screen size.
- 6" (15.2 cm) of horizontal offset and adjustable horizontal leveling.
- cULus Certified.
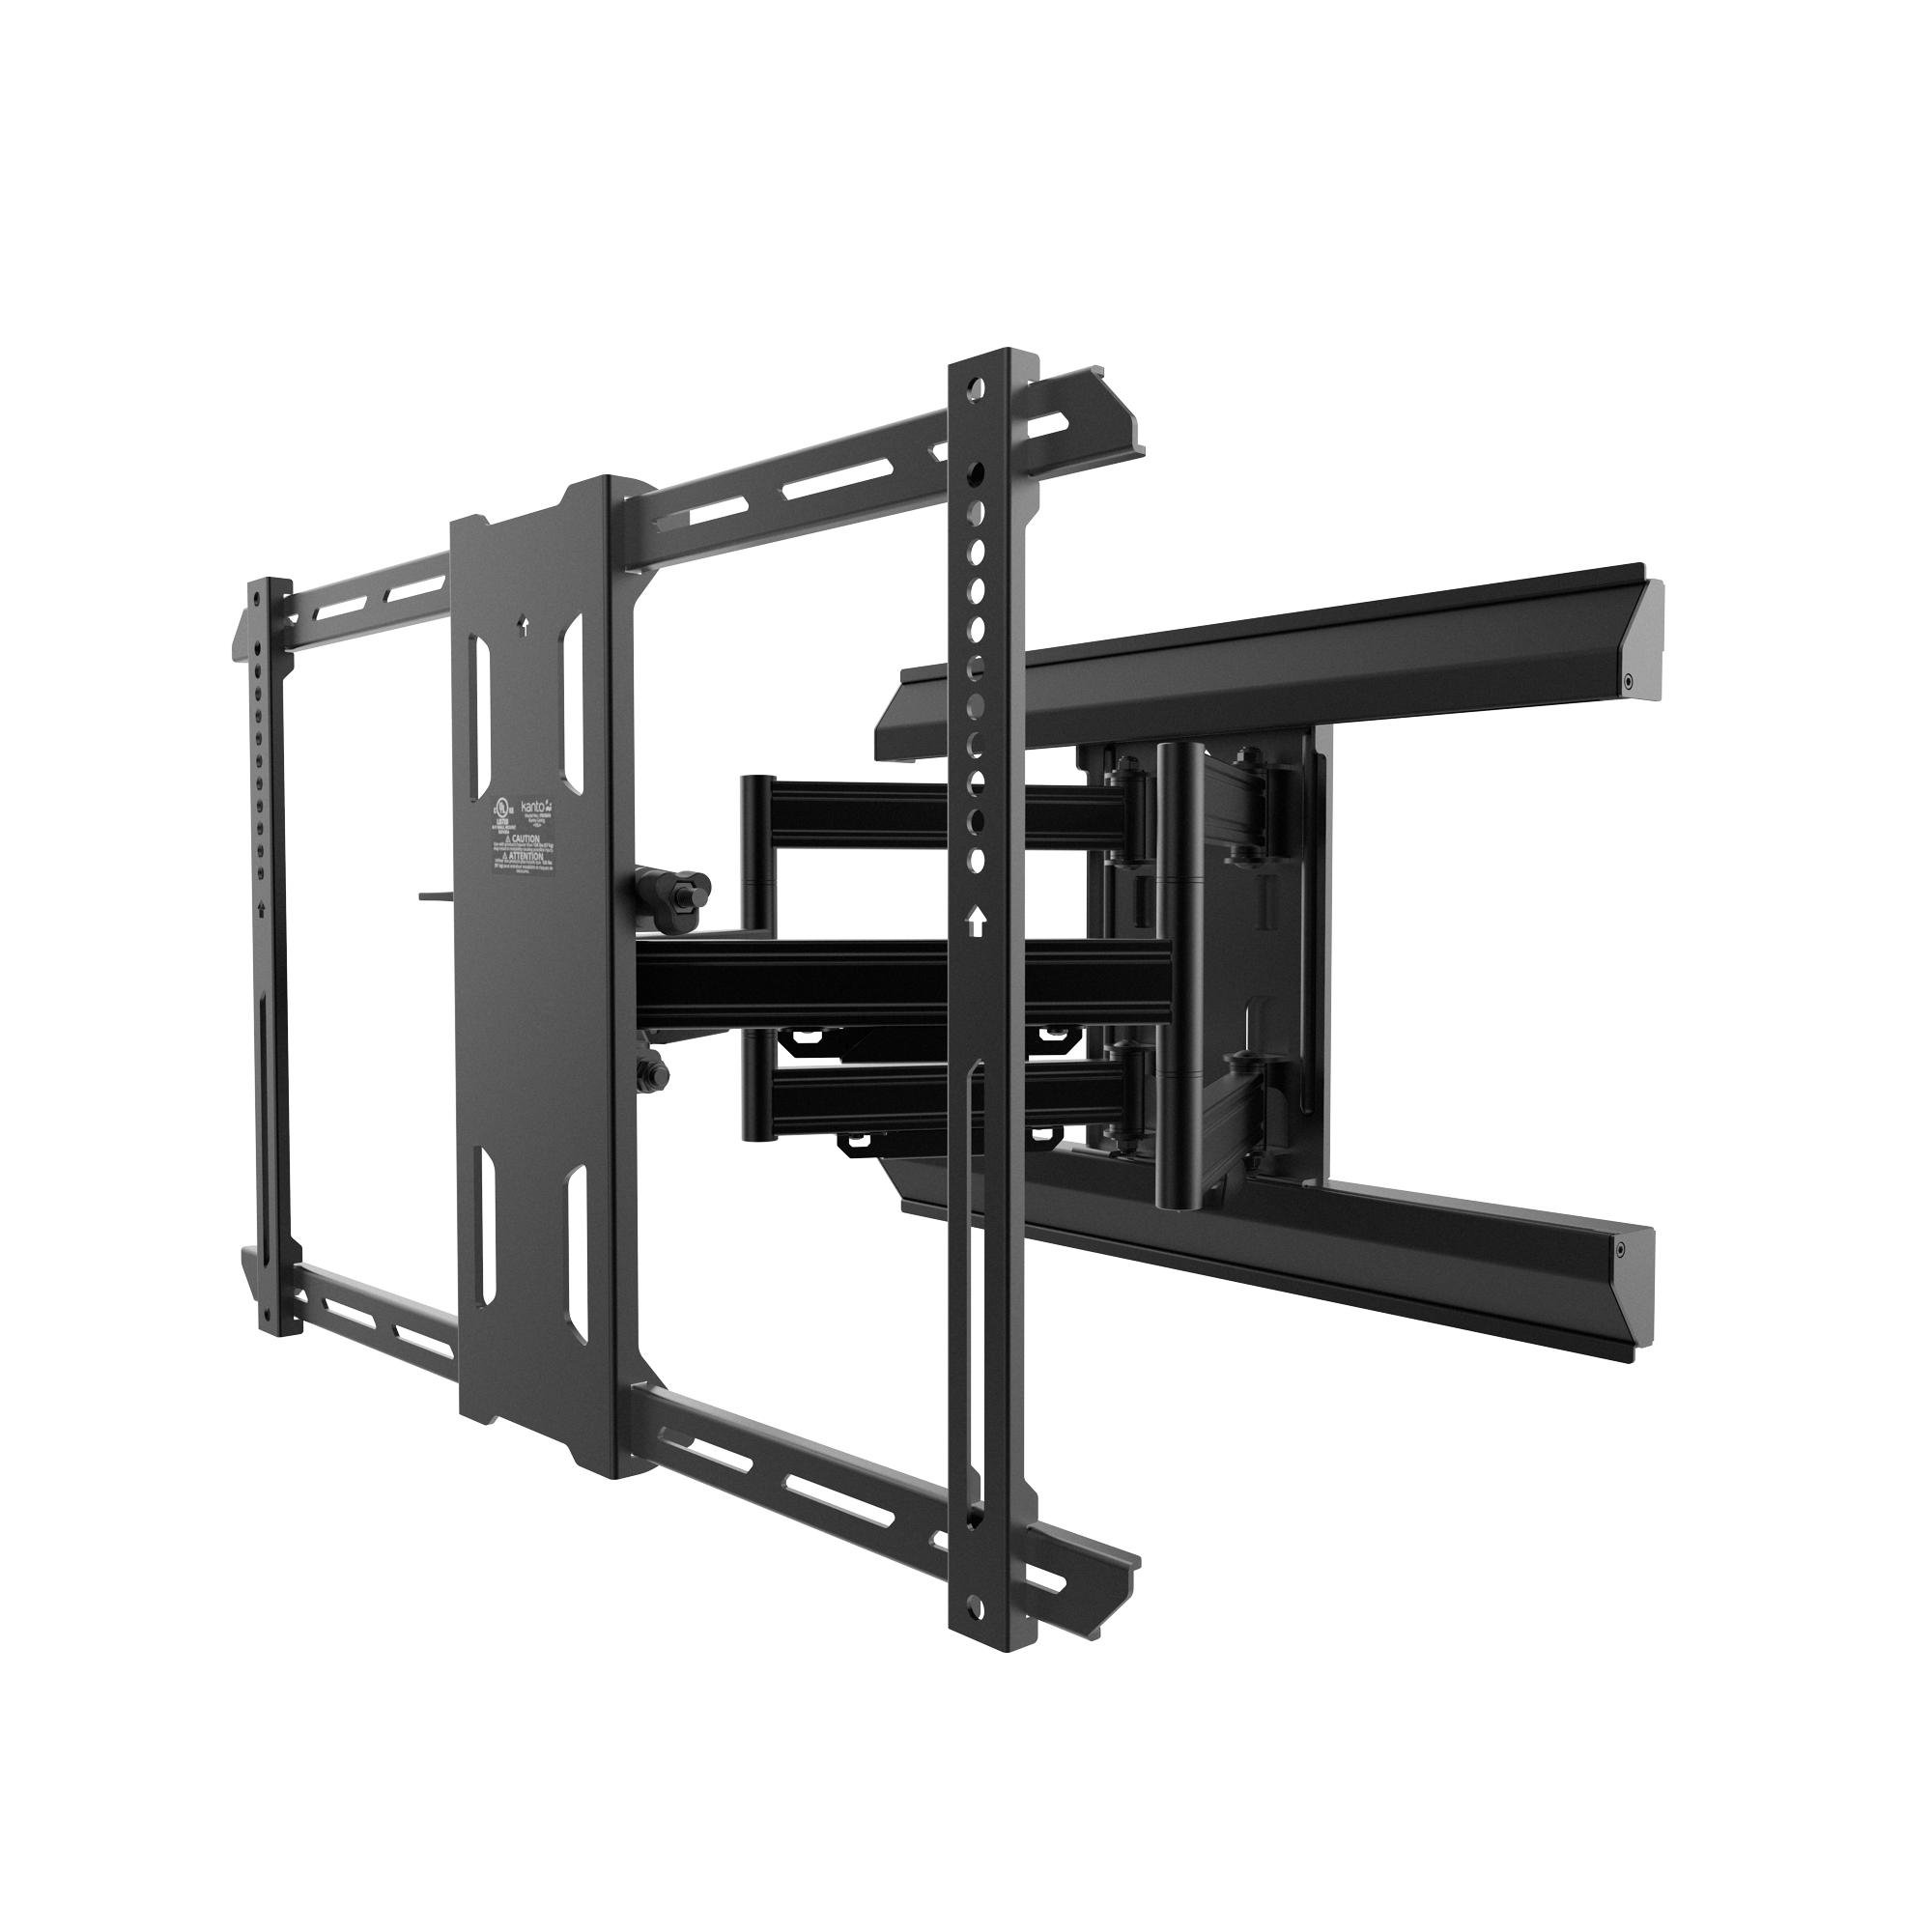
Figure 1: Kanto PMX660 Full Motion Pro Series TV Mount.
Video 1: Overview of PMX Series Professional TV Mounting Solutions, highlighting key features and benefits for installers and end-users.
2. Setup and Installation
Proper installation is crucial for the safety and functionality of your TV mount. Please follow these instructions carefully. A detailed installation video is available for visual guidance.
2.1. Unpacking and Component Check
Verify all components are present before beginning installation. The package includes the mount, various hardware for wood studs and concrete, a manual, and a punched cardboard template.

Figure 2: All mounting hardware, precision drill template, and installation components included with the Kanto PMX660 mount.
2.2. Attaching TV Brackets
Attach the vertical TV brackets to the back of your television using the appropriate screws and spacers from the provided bolt package. Ensure the brackets are securely fastened and centered on the VESA mounting holes.

Figure 3: Rear view of a television, illustrating the VESA mounting pattern where the brackets attach.
2.3. Wall Plate Installation
Locate suitable wood studs or a concrete wall for mounting. Use the provided template to mark drill holes accurately. The arm assembly can be easily removed from the wall plate to facilitate unassisted installation of the wall plate, reducing the weight and making the process simpler.
Video 2: Detailed installation guide for Kanto PMX Series Full Motion TV Mounts, covering all steps from wall preparation to final TV mounting.
2.4. Attaching Arm Assembly and TV
Once the wall plate is secure, reattach the arm assembly. Finally, carefully lift and hook the TV (with attached brackets) onto the arm assembly. Secure the TV to the mount using the safety screws.

Figure 4: The Kanto PMX660 mount securely installed on a wall, ready for TV attachment.
3. Operating the Mount
The PMX660 mount offers versatile positioning options to achieve the optimal viewing angle from anywhere in the room.
3.1. Extension and Swivel
The articulating arms allow the TV to extend up to 22 inches from the wall and swivel 90 degrees in either direction. This provides ample clearance to maneuver even large TVs around corners or out of recessed locations.

Figure 5: The TV mount fully extended from the wall, demonstrating its reach.

Figure 6: The TV mount angled to provide optimal viewing from various positions.
3.2. Toolless Tilt
Adjust the tilt angle of your TV from +12 degrees to -3 degrees using the specially designed toolless tilt mechanism. A simple lever, in conjunction with heavy-duty friction washers, allows for fingertip adjustments or locking the TV in place.

Figure 7: Close-up view of the toolless tilt mechanism for easy angle adjustments.
3.3. Cable Management
The PMX660 is equipped with four cable management raceways and screw-on aluminum covers. Route your cables through these channels to maintain a clean and organized appearance.
4. Maintenance
To ensure the longevity and safe operation of your Kanto PMX660 TV mount, regular maintenance is recommended.
- Cleaning: Wipe the mount with a soft, dry cloth. Avoid abrasive cleaners or solvents that could damage the finish.
- Inspection: Periodically check all screws and bolts to ensure they are tight and secure. Over time, vibrations or movement may cause fasteners to loosen.
- Movement: If the articulation or tilt mechanisms become stiff, apply a small amount of silicone-based lubricant to the moving parts. Do not use oil-based lubricants as they can attract dust and debris.
5. Troubleshooting
If you encounter any issues with your Kanto PMX660 TV mount, refer to the following common troubleshooting tips:
- TV Not Level: The mount features adjustable horizontal leveling. Loosen the appropriate screws on the TV brackets, adjust the TV to be level, and then re-tighten the screws.
- Difficulty Moving/Adjusting TV: Ensure all locking mechanisms (especially for tilt) are disengaged. Check for any obstructions or cables that might be caught. If movement is still stiff, refer to the maintenance section for lubrication.
- Mount Feels Loose: Immediately check all lag bolts securing the wall plate to the wall and all screws connecting the TV brackets to the TV. Tighten any loose fasteners. If the issue persists, consult a professional installer.
- Missing Parts: If any parts were missing from the package, contact Kanto customer support for assistance.
6. Specifications
| Feature | Specification |
|---|---|
| Mounting Type | Wall Mount |
| Movement Type | Articulating |
| Brand | Kanto |
| Material | Metal |
| Color | Black |
| Compatible Devices | Monitor, Television |
| Maximum Tilt Angle | 12 Degrees |
| UPC | 800152716626 |
| Manufacturer | Kanto Distribution Inc. |
| Maximum-Supported Screen Size | 80 Inches |
| Minimum-Supported Screen Size | 37 Inches |
| Item Weight | 29.1 Pounds |
7. What's in the Box
- Kanto PMX660 TV Mount
- Mounting Hardware (for wood studs and concrete)
- Instruction Manual
- Punched Cardboard Template
8. Warranty and Support
The Kanto PMX660 Full Motion Pro Series TV Mount comes with a Ten year manufacturer's warranty. For technical support, missing parts, or warranty claims, please visit the official Kanto website or contact their customer service directly. Ensure you have your product model and purchase information available.
For additional resources and installation videos, you can visit the Kanto website: http://q-r.to/bad7VQ


