1. Introduction
This manual provides detailed instructions for the installation, operation, and maintenance of your G.SKILL Trident Z DDR4-3200 16GB (2x8GB) Memory Module Kit. Please read this manual thoroughly before installation to ensure proper setup and optimal performance.
2. Safety Information
Always observe the following safety precautions when handling computer components:
- Ensure your computer is powered off and unplugged from the wall outlet before installation.
- Discharge any static electricity from your body by touching a grounded metal object (e.g., the computer case) before handling memory modules. Consider using an anti-static wrist strap.
- Handle memory modules by their edges to avoid touching the gold contacts or integrated circuits.
- Do not force the modules into the DIMM slots. They should fit securely with moderate pressure.
- Keep memory modules away from liquids and extreme temperatures.
3. Package Contents
Your G.SKILL Trident Z DDR4-3200 16GB Memory Module Kit package should contain:
- Two (2) G.SKILL Trident Z DDR4-3200 8GB Memory Modules (Total 16GB)
If any items are missing or damaged, please contact your retailer or G.SKILL support.
4. Setup and Installation
Follow these steps to install your G.SKILL Trident Z memory modules:
- Prepare Your System: Power off your computer and unplug the power cord. Open the computer case to access the motherboard.
- Locate DIMM Slots: Identify the DDR4 DIMM slots on your motherboard. Consult your motherboard manual for the correct slot configuration for dual-channel memory (typically slots 2 and 4, or 1 and 3).
- Open Retention Clips: Gently push open the retention clips at both ends of the DIMM slots where you intend to install the modules.
- Insert Memory Modules: Align the notch on the memory module with the key in the DIMM slot. Place the module into the slot and apply firm, even pressure on both ends until the retention clips snap into place. You should hear a click.

Image: G.SKILL Trident Z memory modules correctly installed in a desktop motherboard's DIMM slots.
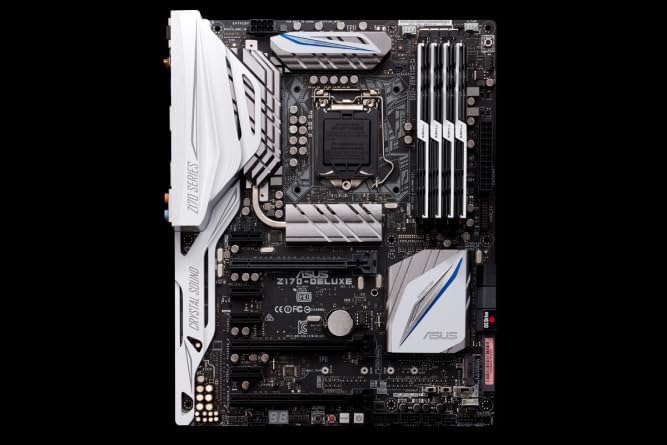
Image: An example motherboard (ASUS Z170-DELUXE) showing the location of RAM slots for installation reference.
- Verify Installation: Ensure both clips are fully closed and the module is seated correctly.
- Close Case and Power On: Close your computer case, reconnect the power cord, and power on your system.
- BIOS/UEFI Configuration: Upon first boot, enter your system's BIOS/UEFI settings. Locate the memory settings and enable the Extreme Memory Profile (XMP) to achieve the advertised speed of 3200MHz. Save and exit the BIOS/UEFI.
5. Operating Your Memory Modules
Once installed and configured in the BIOS/UEFI, your G.SKILL Trident Z memory modules will operate at their rated speed and timings. The primary operation involves ensuring the XMP profile is active for optimal performance.
- XMP Profile Activation: As mentioned in the setup, activating the XMP profile in your motherboard's BIOS/UEFI is crucial. This automatically configures the memory to its rated speed (3200MHz) and timings, which are faster than the default JEDEC speeds.
- System Stability: Monitor your system for stability after installation and XMP activation. If you experience crashes or instability, ensure your motherboard BIOS is up to date and that your CPU and motherboard officially support DDR4-3200 memory.
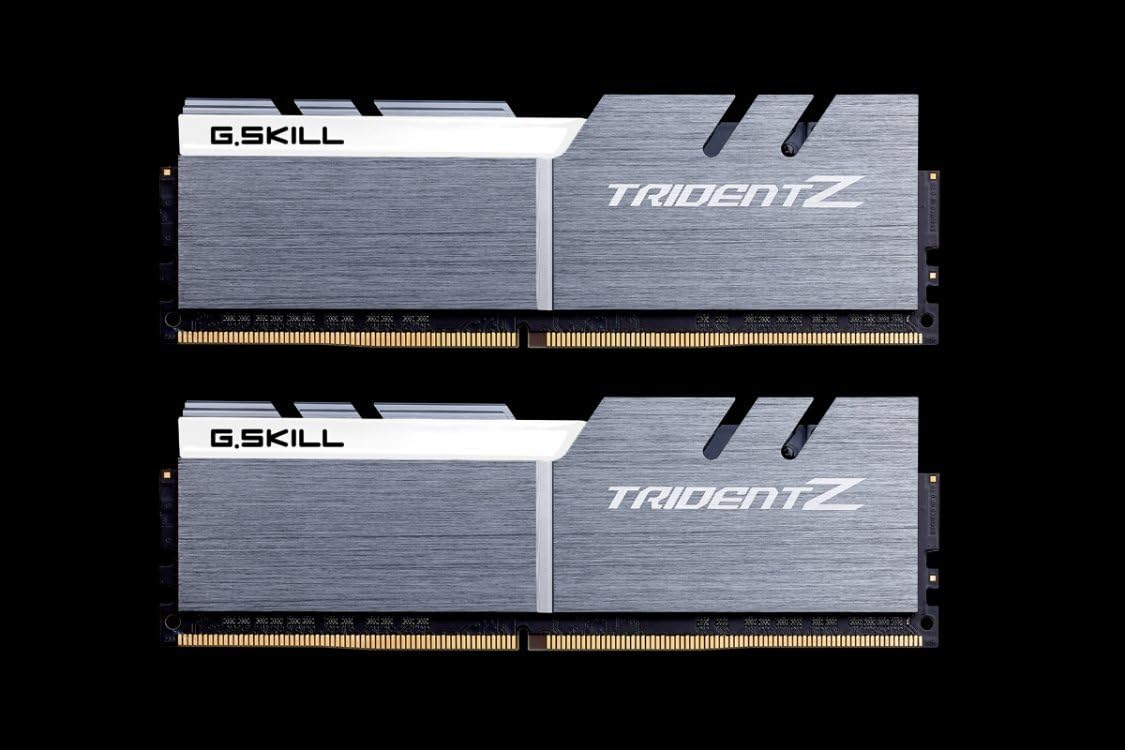
Image: A pair of G.SKILL Trident Z DDR4 memory modules, ready for installation.
6. Maintenance
G.SKILL Trident Z memory modules are designed for long-term reliability and require minimal maintenance.
- Cleaning: If necessary, gently clean the heat spreaders with a soft, dry, lint-free cloth. Do not use liquid cleaners or abrasive materials.
- Handling: Always handle the modules by their edges. Avoid touching the gold contacts or the components on the PCB.
- Environment: Ensure your computer's internal environment is free from excessive dust and has adequate airflow to prevent overheating of components, including memory.
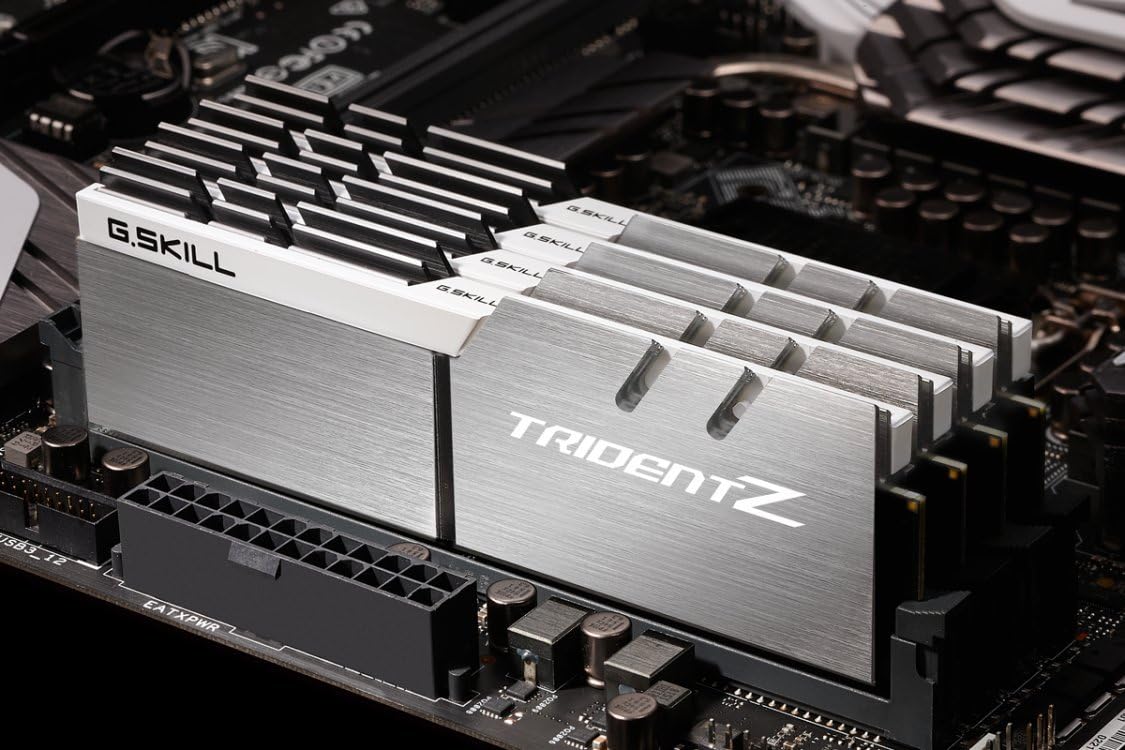
Image: Close-up of the Trident Z logo, highlighting the module's aesthetic design.
7. Troubleshooting
If you encounter issues after installing your memory modules, consider the following:
- System Not Booting/No Display:
- Ensure modules are fully seated in their DIMM slots and retention clips are closed.
- Try installing only one module at a time to identify a potentially faulty module or slot.
- Reset your motherboard's CMOS (refer to your motherboard manual).
- Incorrect Memory Speed Detected:
- Enter BIOS/UEFI and ensure the XMP profile is enabled.
- Verify your motherboard and CPU support DDR4-3200 speeds.
- System Instability/Crashes:
- Ensure your motherboard BIOS is updated to the latest version.
- Check for compatibility with your specific motherboard model on the G.SKILL website or your motherboard's Qualified Vendor List (QVL). Some users have reported better stability with specific CAS Latency (CL) versions (e.g., CL14 vs CL16) depending on their motherboard. This kit is CL14.
- Run memory diagnostic tools (e.g., MemTest86) to check for errors.
8. Specifications
| Brand | G.SKILL |
| Series | Trident Z |
| Model Number | F4-3200C14D-16GTZSW |
| Memory Type | DDR4 SDRAM |
| Capacity | 16 GB (2 x 8GB) |
| Speed | 3200 MHz (PC4-25600) |
| CAS Latency | CL14 |
| Color | Silver/White Heat Spreaders with Black PCB |
| Compatible Devices | Desktop PCs |
| Product Dimensions (Package) | 23.62 x 23.62 x 33.46 inches (approximate) |
| Item Weight | 7 ounces |
Note: Some specifications, such as package dimensions, may vary slightly. The memory kit is rated for 3200MHz, though some system configurations might support higher speeds like 3333MHz via XMP.
9. Warranty and Support
G.SKILL memory products typically come with a limited lifetime warranty. For specific warranty terms and conditions, please refer to the official G.SKILL website or the warranty information included with your purchase.
For technical support, troubleshooting assistance, or warranty claims, please visit the official G.SKILL support page:
Ensure you have your product model number (F4-3200C14D-16GTZSW) and proof of purchase available when contacting support.


