Product Overview
The SENCO SFW05-C Pneumatic Semi Pro Fine Wire Stapler is designed for efficient and reliable fastening in various professional and semi-professional applications. This manual provides essential information for the safe and effective use of your tool.
SENCO SFW05-C Pneumatic Semi Pro Fine Wire Stapler
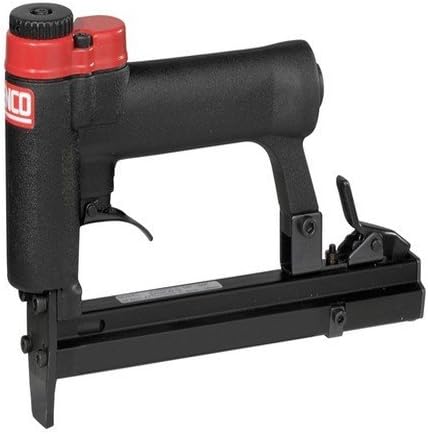
An image showing the SENCO SFW05-C Pneumatic Semi Pro Fine Wire Stapler, a black tool with red accents on the air inlet and trigger mechanism. The tool features a long magazine for staples and a comfortable grip.
Important Safety Instructions
Always follow basic safety precautions when using this pneumatic tool to reduce the risk of personal injury. Read all instructions before operating.
- Eye Protection: Always wear ANSI Z87.1 approved safety glasses with side shields.
- Hearing Protection: Wear hearing protection during extended use.
- Disconnect Air: Always disconnect the air supply before making adjustments, clearing jams, servicing, or leaving the tool unattended.
- Proper Air Pressure: Do not exceed the maximum recommended air pressure for the tool.
- Never Point: Never point the tool at yourself or others.
- Workpiece Contact: Ensure the tool is firmly against the workpiece before firing.
- Read Manual: Familiarize yourself with all controls and operating procedures.
Package Contents
Upon opening the package, verify that all items are present and undamaged.
- SENCO SFW05-C Pneumatic Semi Pro Fine Wire Stapler
- (Refer to product packaging for any additional accessories or documentation)
Setup Guide
1. Air Supply Connection
- Ensure your air compressor is turned off and completely depressurized.
- Connect a suitable air hose (minimum 3/8-inch inner diameter recommended) to the tool's air inlet.
- It is highly recommended to use an air filter/regulator/lubricator (FRL) unit in your air line for optimal tool performance and longevity.
- Set the air pressure at the regulator to the recommended operating range, typically between 70-120 PSI (4.8-8.3 bar), as indicated on the tool or in its specifications.
2. Loading Fasteners
- Always disconnect the air supply from the tool before loading fasteners.
- Locate and open the magazine latch or push button.
- Insert a stick of the correct type and size of fine wire staples into the magazine. Ensure the staples are oriented correctly.
- Close the magazine latch securely until it clicks into place.
Operating Instructions
1. General Operation
- Connect the tool to the air supply.
- Hold the tool firmly with both hands, if possible, and place the nose of the tool against the workpiece where the fastener is to be driven.
- Depress the trigger to drive a staple. Release the trigger to stop.
- Allow the tool to fully cycle after each fastener is driven.
2. Depth Adjustment (if applicable)
Some models of staplers feature a depth adjustment mechanism to control how deep the fastener is driven. If your tool has this feature:
- Locate the depth adjustment dial or lever on the tool.
- Adjust the setting as needed. A higher setting typically drives the fastener deeper.
- Always test the depth setting on a scrap piece of material before fastening your final workpiece.
3. Clearing Jams
If the tool jams, follow these steps:
- IMMEDIATELY disconnect the air supply from the tool.
- Locate the jam clearing mechanism, which may involve opening the nose piece or a specific latch.
- Carefully remove the jammed fastener using pliers or a similar tool. Do not force it.
- Ensure all parts are clear of debris.
- Close the jam clearing mechanism securely before reconnecting the air supply.
Maintenance
Regular maintenance ensures the longevity and optimal performance of your SENCO stapler.
1. Lubrication
- Apply 5-10 drops of pneumatic tool oil into the tool's air inlet daily or before each use.
- Do not over-lubricate.
- If using an FRL unit with an auto-lubricator, manual oiling may not be necessary. Consult your FRL unit's manual.
2. Cleaning
- Keep the tool clean and free of dirt, dust, and debris.
- Wipe down the exterior with a clean, dry cloth.
- Periodically check and clean the air filter on your FRL unit to ensure clean air supply.
3. Storage
- Always disconnect the air supply before storing the tool.
- Store the tool in a clean, dry environment, away from extreme temperatures and humidity.
Troubleshooting
This section addresses common issues you might encounter with your pneumatic stapler.
| Problem | Possible Cause | Solution |
|---|---|---|
| Tool not firing | No air supply / Low air pressure / Fastener jam | Check air hose connection, ensure compressor is on and pressurized, increase air pressure, clear any jams. |
| Tool jamming frequently | Incorrect fastener size / Damaged fasteners / Worn driver blade | Ensure correct fastener type and size, inspect fasteners for damage, contact authorized service for driver blade replacement. |
| Air leak from tool | Loose fittings / Damaged O-rings / Worn seals | Tighten all air fittings, inspect and replace damaged O-rings or seals. If problem persists, seek professional service. |
| Fasteners not driven flush | Low air pressure / Incorrect depth adjustment / Hard material | Increase air pressure, adjust depth setting, ensure tool is suitable for material. |
Specifications
Key technical specifications for the SENCO SFW05-C Pneumatic Semi Pro Fine Wire Stapler:
| Feature | Detail |
|---|---|
| Manufacturer | Senco |
| Brand | Senco |
| Model Number | 9260761 |
| ASIN | B01HR2YYUU |
| Power Source | Pneumatic (Air-powered) |
| Fastener Type | Fine Wire Staples |
| Product Status | Currently available (as of listing date) |
Warranty and Support
For detailed warranty information, please refer to the warranty card or documentation included with your SENCO SFW05-C Pneumatic Semi Pro Fine Wire Stapler. Warranty terms and conditions may vary by region and retailer.
For technical support, service, or to inquire about replacement parts, please contact Senco customer service directly. Visit the official Senco website for the most up-to-date contact information and support resources.
- Senco Official Website: www.senco.com (Please verify the correct regional website)
- Customer Service: Refer to the website or product packaging for phone numbers and email contacts.