
1. Introduction
Thank you for choosing the VOLT Polska IPS-500/1000 Power Inverter. This device is designed to convert 12V DC power from your vehicle's battery into 230V AC power, allowing you to operate standard household appliances and charge sensitive USB devices such as MP3 players and digital cameras while on the go. Please read this manual thoroughly before use to ensure safe and efficient operation.
2. Safety Information
Important Safety Instructions:
- Read all instructions before operating the inverter.
- Do not open the inverter casing. There are no user-serviceable parts inside.
- Keep the inverter away from moisture, water, and flammable materials.
- Ensure adequate ventilation around the inverter to prevent overheating. Do not block the fan or vents.
- Connect the inverter only to a 12V DC power source. Connecting to a 24V or higher source will damage the unit.
- Always connect the inverter to the battery terminals correctly: positive to positive, negative to negative. Reverse polarity can cause damage.
- Do not connect the inverter to AC distribution wiring.
- Disconnect the inverter from the power source when not in use.
- Avoid overloading the inverter. The continuous power output is 500W, with a peak power of 1000W.
3. Product Overview
The VOLT Polska IPS-500/1000 power inverter is a compact and efficient device designed for mobile power needs. Familiarize yourself with its components:
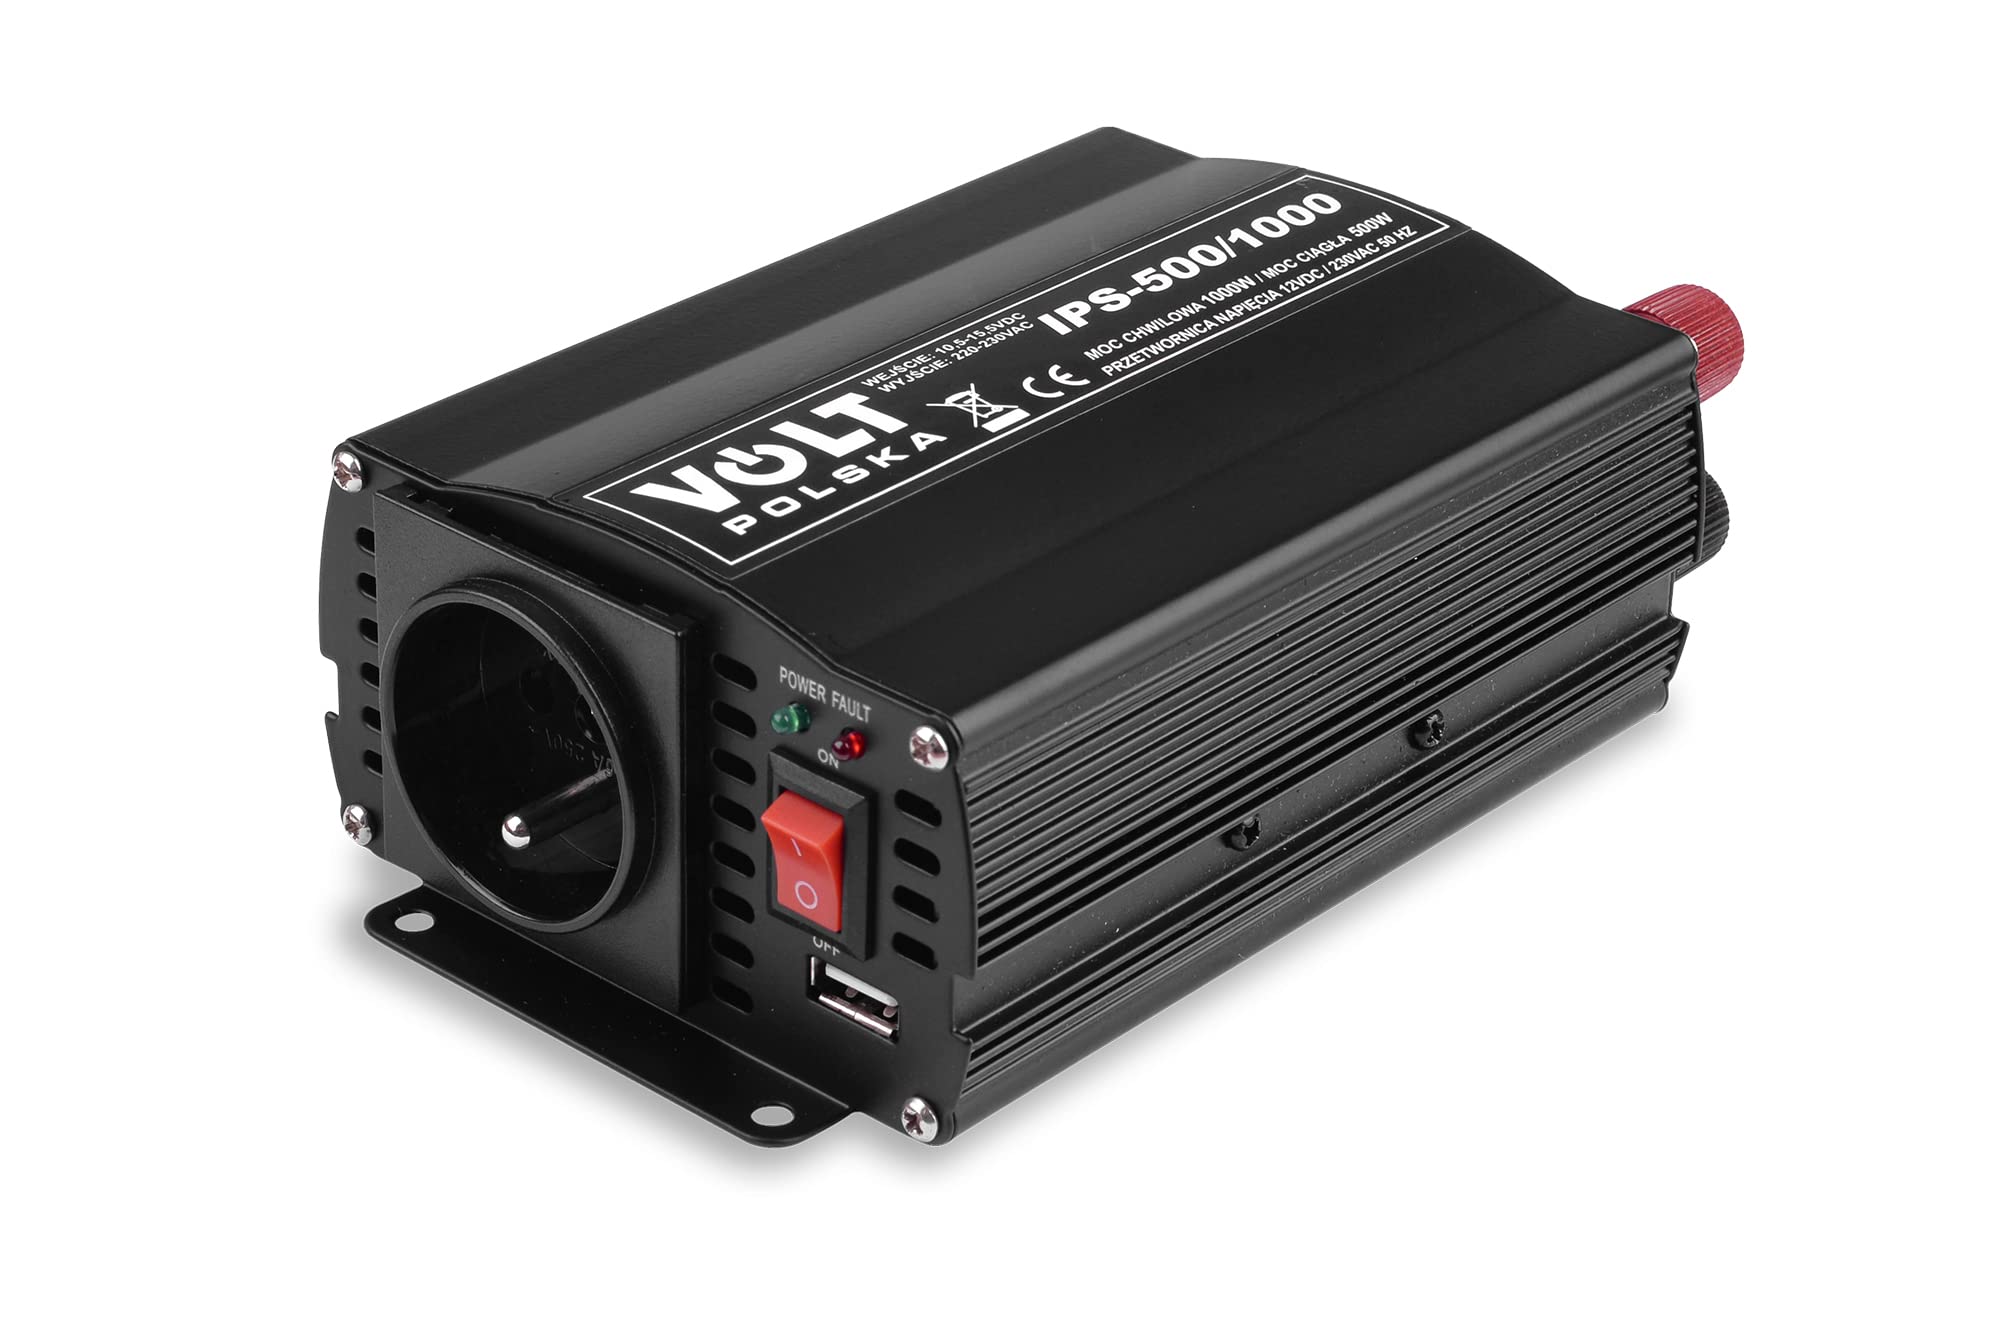
Figure 3.1: Overall view of the VOLT Polska IPS-500/1000 Power Inverter. This image shows the compact black casing with branding and specifications printed on the top surface, along with the input and output ports on either end.
3.1. DC Input Side

Figure 3.2: The DC input side of the inverter. This end features the positive (red) and negative (black) terminals for connecting to a 12V DC power source, a replaceable fuse, and a cooling fan for thermal management.
- Positive (+) Terminal (Red): Connects to the positive terminal of the 12V battery.
- Negative (-) Terminal (Black): Connects to the negative terminal of the 12V battery.
- Fuse Holder: Contains a replaceable fuse for overcurrent protection.
- Cooling Fan: Automatically activates to dissipate heat during operation.
3.2. AC Output Side

Figure 3.3: The AC output side of the inverter. This end includes a universal AC outlet, a power switch, and USB charging ports.
- AC Outlet (230V): Standard European-style AC socket for connecting appliances.
- Power Switch (ON/OFF): Controls the power to the inverter.
- Power/Fault Indicators (LEDs): Green for power ON, Red for fault conditions.
- USB Charging Ports: For charging USB-powered devices.
3.3. Included Accessories

Figure 3.4: The cables included with the inverter. These typically include battery clamp cables for direct connection to a car battery and a cigarette lighter adapter cable for lower power applications.
- Battery Clamp Cables: For direct connection to a 12V car battery.
- Cigarette Lighter Adapter Cable: For connecting to a vehicle's 12V cigarette lighter socket (suitable for loads up to approximately 150W).
4. Setup
Follow these steps to properly set up your power inverter:
- Choose a Location: Place the inverter in a dry, well-ventilated area, away from direct sunlight, heat sources, and flammable materials. Ensure the cooling fan is not obstructed.
- Ensure Power Off: Make sure the inverter's power switch is in the "OFF" position before making any connections.
- Connect to 12V DC Power Source:
- Using Battery Clamp Cables (for loads > 150W or direct battery connection):
- Connect the red cable clamp to the positive (+) terminal of the 12V battery.
- Connect the black cable clamp to the negative (-) terminal of the 12V battery.
- Connect the other end of the red cable to the red (+) terminal on the inverter.
- Connect the other end of the black cable to the black (-) terminal on the inverter.
- Ensure all connections are tight and secure.
- Using Cigarette Lighter Adapter Cable (for loads up to 150W):
- Plug the cigarette lighter adapter into your vehicle's 12V accessory socket.
- Connect the other end of the cable to the appropriate input terminals on the inverter (usually a single plug or specific terminals designed for this cable).
- Using Battery Clamp Cables (for loads > 150W or direct battery connection):
- Connect AC Appliances: Plug your 230V AC appliances into the AC outlet on the inverter. For USB devices, use the USB charging ports. Ensure the total wattage of connected devices does not exceed the inverter's continuous power rating (500W).
5. Operating Instructions
Once the inverter is properly set up, follow these steps to operate it:
- Turn On the Inverter: Flip the power switch on the inverter to the "ON" position. The green "POWER" indicator light should illuminate.
- Monitor Indicators:
- Green LED (POWER): Indicates the inverter is operating normally and providing AC power.
- Red LED (FAULT): Indicates a fault condition such as overload, overheating, or low battery voltage. The inverter will typically shut down automatically under these conditions.
- Use Appliances: Operate your connected AC and USB devices as normal.
- Power Limits:
- Continuous Power: 500W. This is the maximum power the inverter can supply continuously.
- Peak Power: 1000W. This is the maximum power the inverter can supply for a very short duration (e.g., during appliance startup).
- Do not exceed the continuous power rating to avoid triggering overload protection or damaging the inverter.
- Turn Off the Inverter: When finished, turn off all connected appliances, then flip the inverter's power switch to the "OFF" position. Disconnect the inverter from the 12V power source if not needed for an extended period.
6. Maintenance
Regular maintenance ensures the longevity and optimal performance of your inverter:
- Cleaning: Periodically clean the exterior of the inverter with a soft, dry cloth. Do not use liquid cleaners or solvents. Ensure the cooling fan and vents are free from dust and debris.
- Connections: Regularly check all electrical connections (battery clamps, terminals) to ensure they are tight and free from corrosion. Loose connections can cause overheating and poor performance.
- Fuse Replacement: The inverter is equipped with an internal fuse for protection. If the inverter stops working and the fault indicator is on, the fuse might need replacement. This should ideally be done by a qualified technician. Refer to specifications for fuse type.
- Storage: When storing the inverter for extended periods, ensure it is clean, dry, and disconnected from any power source. Store in a cool, dry place.
7. Troubleshooting
If you encounter issues with your inverter, refer to the following common problems and solutions:
| Problem | Possible Cause | Solution |
|---|---|---|
| No power output, green LED off. |
|
|
| Red FAULT LED is on, no power output. |
|
|
| Output voltage is incorrect or unstable. |
|
|
8. Specifications
Technical specifications for the VOLT Polska IPS-500/1000 Power Inverter:
| Model | IPS-500/1000 (Manufacturer Model: 3IPS651012) |
| Input Voltage | 12 Volts DC |
| Output Voltage | 230-240 Volts AC |
| Continuous Power | 500 Watts |
| Peak Power | 1000 Watts |
| Frequency | 50 Hz |
| Efficiency | > 92% |
| No-load Current | 300 mA |
| Operating Temperature | 0 ~ 40 °C |
| Dimensions (L x W x H) | 17.6 x 10.5 x 6 cm |
| Weight | 656 Grams |
| Protections | Overload, Low Voltage, Short Circuit, Overheating |
9. Warranty & Support
For warranty information and technical support, please refer to the documentation provided with your purchase or contact Volt Polska customer service directly. Keep your proof of purchase for any warranty claims.
Contact Information: Please visit the official Volt Polska website or refer to your purchase receipt for the most up-to-date contact details for support.


