
Retevis FA9138AX3
Retevis RT20 Walkie Talkies User Manual
Model: RT20 (FA9138AX3) | Brand: Retevis
1. Introduction
The Retevis RT20 Walkie Talkies are compact, wearable two-way radios designed for easy communication. They are particularly suitable for adults, seniors, and individuals in various professional and recreational settings due to their simple operation, loud sound, and convenient features like FM radio and a key lock function. This manual provides detailed instructions for setting up, operating, and maintaining your RT20 walkie talkies.
2. What's Included
Your Retevis RT20 package includes the following items:
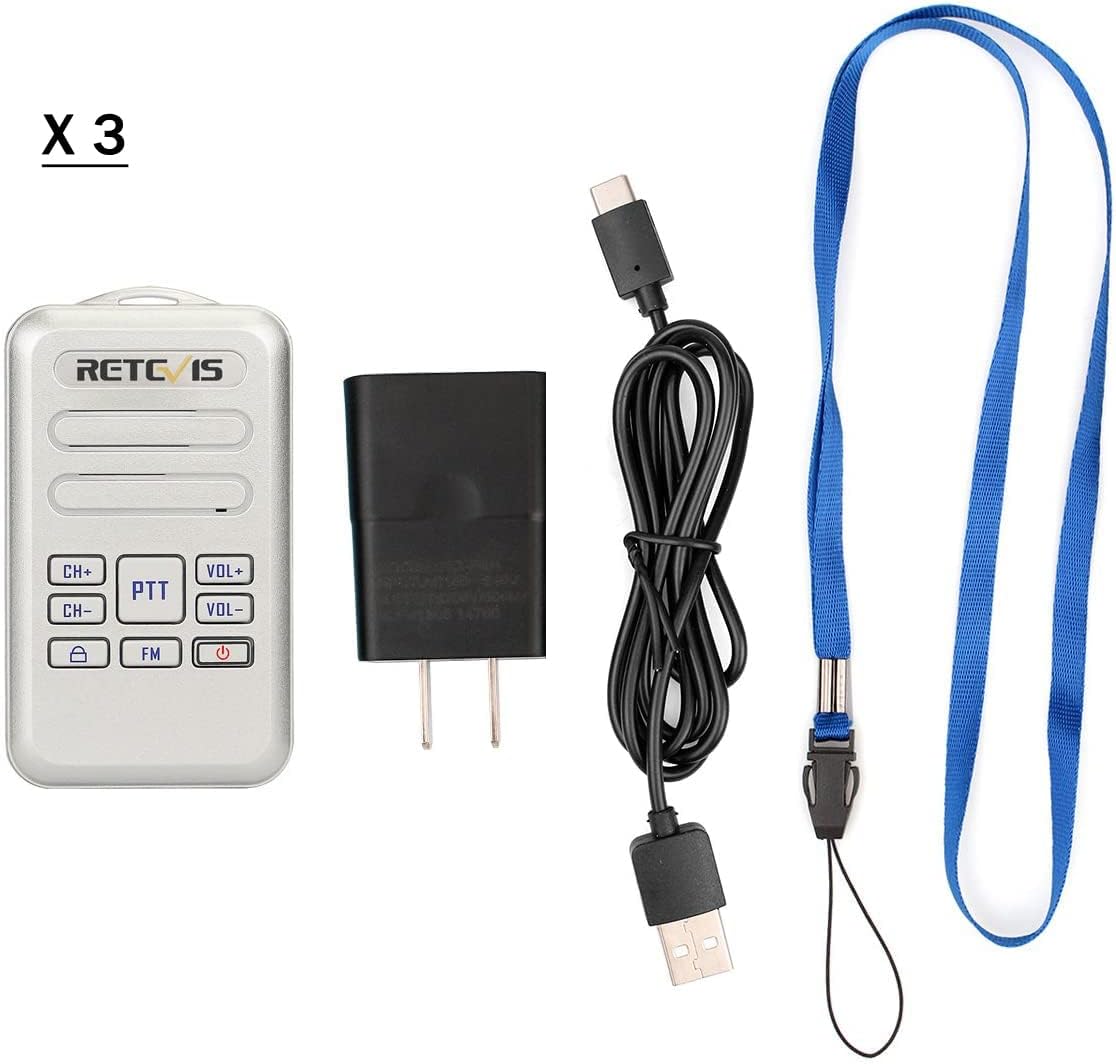
Figure 2.1: Package Contents - Three Retevis RT20 walkie talkies, three blue lanyards, three USB-C charging cables, and three power adapters.
- 3 x Retevis RT20 Walkie Talkies
- 3 x Blue Lanyards
- 3 x USB-C Charging Cables
- 3 x Power Adapters (Charging Boxes)
- 1 x User Manual (this document)
3. Setup
3.1 Charging the Battery
The Retevis RT20 walkie talkies come with a built-in 1000 mAh rechargeable Lithium-Ion battery. Before first use, fully charge each unit.

Figure 3.1: USB-C Charging Port and Battery Information.
- Connect the USB-C charging cable to the Type-C Charger Jack on the side of the walkie talkie.
- Plug the other end of the USB-C cable into the provided power adapter.
- Plug the power adapter into a standard wall outlet.
- The charging indicator light will illuminate. Once fully charged, the light may change color or turn off (refer to the specific indicator behavior in the full manual).
- WARNING: The RT20 walkie-talkie charger outputs 5V. Car charger voltage should NOT exceed 6.5V.
- A voice prompt "please charge battery" will indicate a low battery.
3.2 Attaching the Lanyard
The included blue lanyard allows for convenient and secure wearing of the walkie talkie around your neck.

Figure 3.2: Retevis RT20 worn with lanyard.
- Locate the small loop at the top of the walkie talkie.
- Thread the thin loop end of the lanyard through this loop.
- Pass the main part of the lanyard through the thin loop and pull to secure.
4. Operating Instructions
The Retevis RT20 features a simple button layout for ease of use.
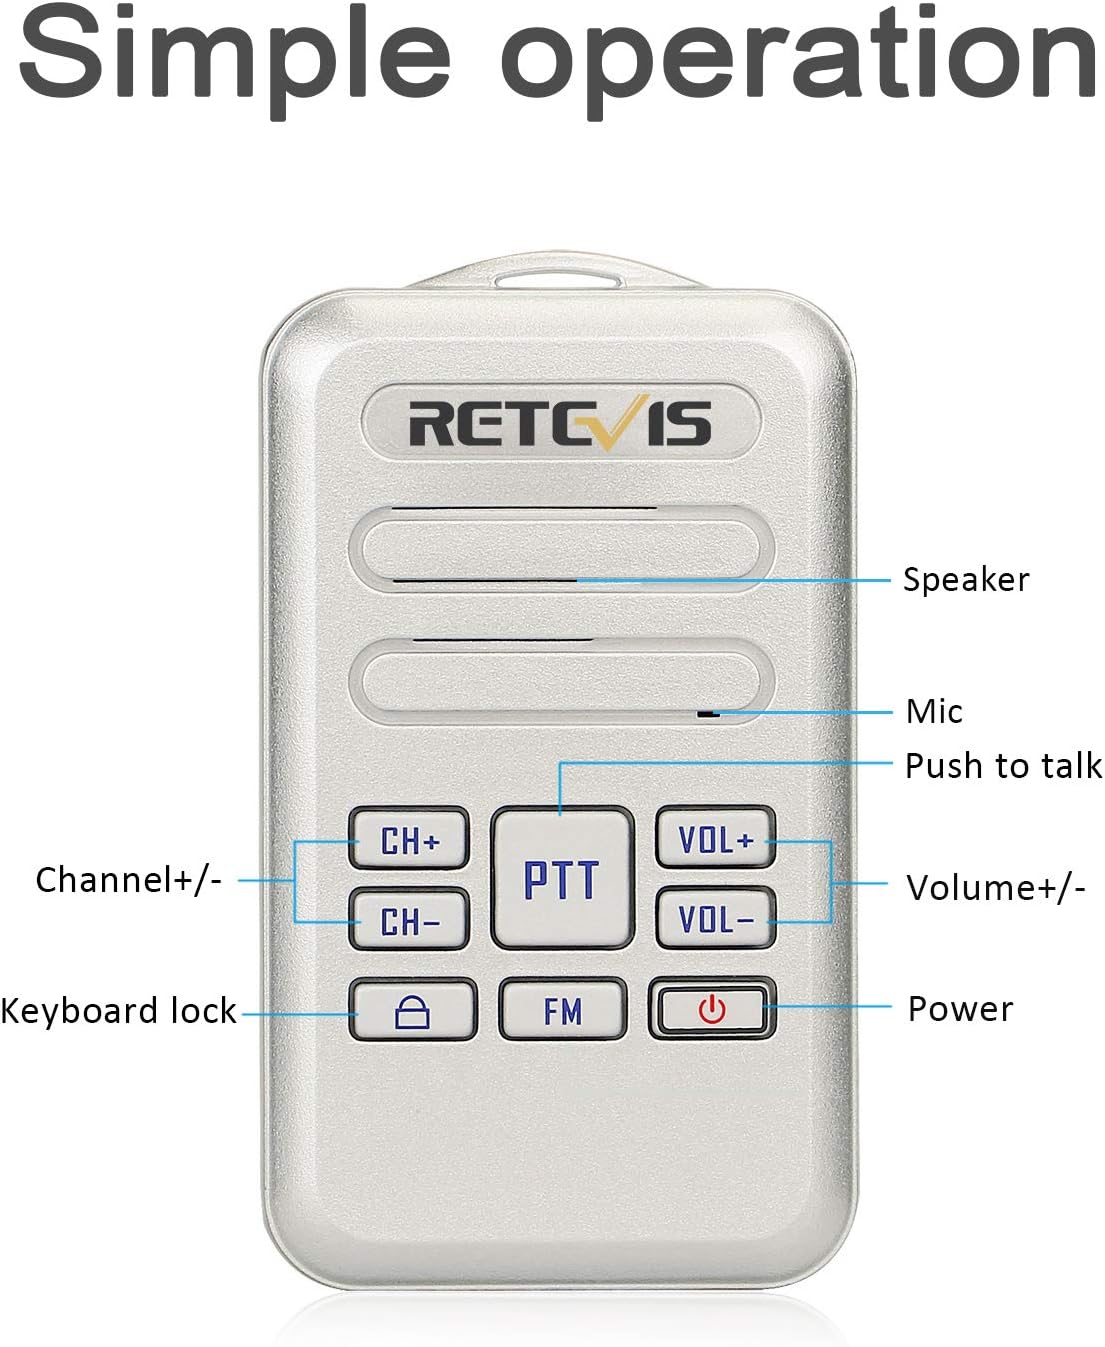
Figure 4.1: Simple Operation Button Layout.
4.1 Power On/Off
- To power on: Press and hold the Power button (symbol: circle with vertical line) until you hear "Power On" and the current channel announcement.
- To power off: Press and hold the Power button until you hear "Power Off".
4.2 Adjusting Volume
- To increase volume: Press the VOL+ button.
- To decrease volume: Press the VOL- button.
- The walkie talkie has 8 volume levels.
4.3 Changing Channels
- To go to the next channel: Press the CH+ button.
- To go to the previous channel: Press the CH- button.
- The RT20 has 16 channels.
4.4 Push-to-Talk (PTT)
- To transmit: Press and hold the large PTT button while speaking clearly into the microphone. The indicator light will turn red.
- To receive: Release the PTT button.
4.5 Keyboard Lock Function
To prevent accidental changes to settings, use the keyboard lock function.

Figure 4.2: Shortcut Keys for VOX and Keyboard Lockout.
- To lock: Press and hold the Keyboard Lock button (symbol: padlock) for 2 seconds. You will hear a single beep.
- To unlock: Press and hold the Keyboard Lock button for 2 seconds. You will hear two beeps.
4.6 FM Radio Function
- To activate FM radio: Press the FM button. The radio will begin scanning for stations.
- To exit FM radio: Press the FM button again.
4.7 VOX (Voice Operated Exchange) Function
The RT20 supports VOX for hands-free operation. This feature allows transmission when your voice is detected, without needing to press the PTT button.
- To turn VOX on/off: Long press the VOL+ button for 2 seconds.
- Note: To enable VOX functionality, you may need to download and transfer specific software to your device via a computer. This feature is not built-in out of the box.
5. Features
- Compact and Wearable: Measuring 3.5 x 2.01 x 0.59 inches and weighing only 0.2lb, the RT20 is designed to be lightweight and easily worn around the neck with the included lanyard.
- Clear and Loud Sound: Features 8 adjustable volume levels and crystal-clear audio for effective communication.
- Long-lasting Battery: Equipped with a 1000 mAh battery providing approximately 10-12 hours of normal daily usage.
- USB-C Charging: Conveniently charge using a power bank, PC, or car charger.
- FRS License-Free: Operates on FRS frequencies, requiring no license for use.
- Privacy Codes: Includes 50 CTCSS and 208 DCS codes for secure communication, compatible with other Retevis FRS radios on the same CTCSS/DCS channel.
- Earpiece Jack: A 3.5mm earpiece jack is available for private listening.
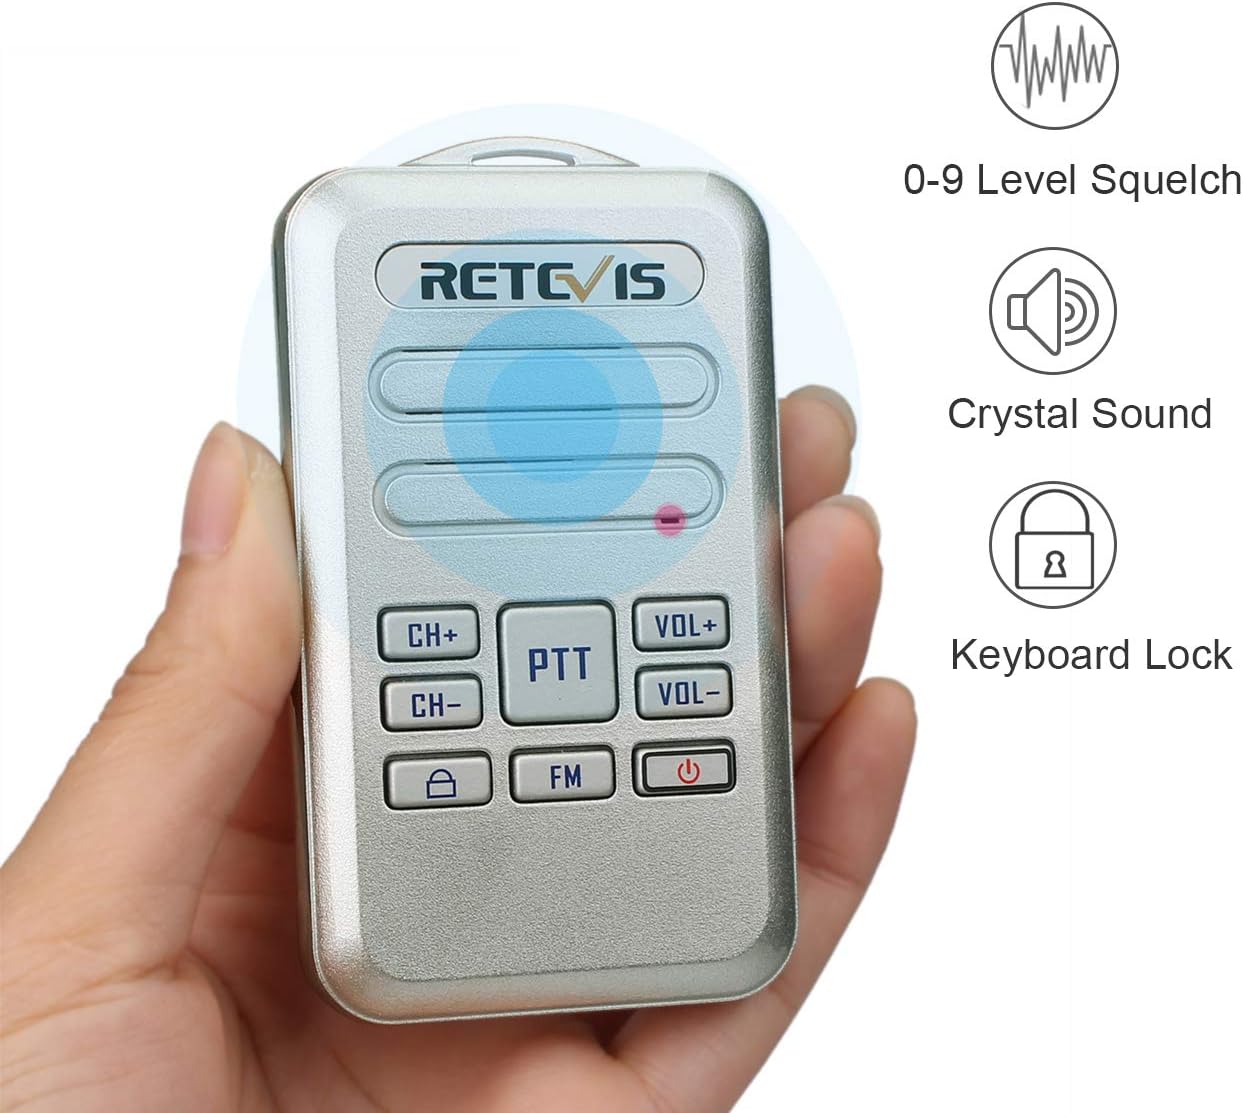
Figure 5.1: Key Features of the Retevis RT20.

Figure 5.2: Compact Size and Lightweight Design.
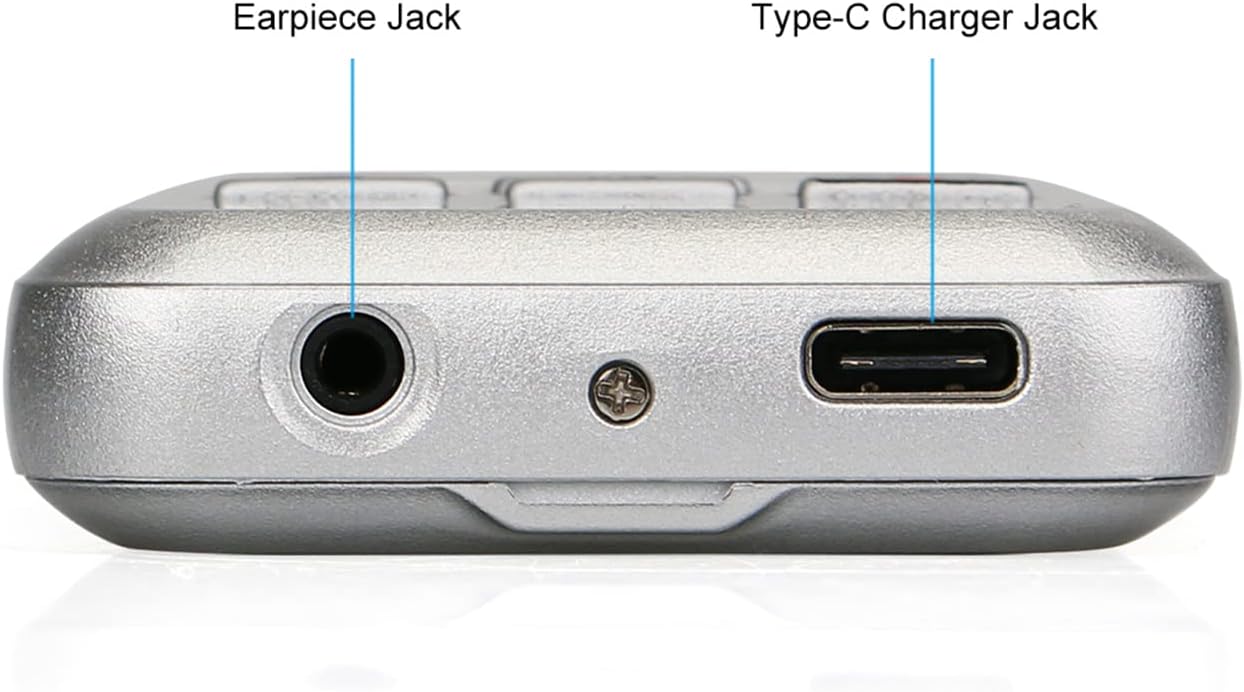
Figure 5.3: Earpiece and Charging Ports.
6. Specifications
| Attribute | Value |
|---|---|
| Product Dimensions | 3.5 x 2.01 x 0.59 inches |
| Item Weight | 5.9 ounces |
| Item Model Number | FA9138AX3 |
| Batteries | 3 Lithium Ion batteries required (included) |
| Brand | Retevis |
| Color | Silver |
| Number of Channels | 16 |
| Frequency Range | FRS |
| Voltage | 3.7 Volts |
| Water Resistance Level | Not Water Resistant |
7. Maintenance
- Keep the device clean by wiping it with a soft, dry cloth.
- Avoid exposing the walkie talkie to extreme temperatures, direct sunlight, or moisture.
- Do not attempt to disassemble or repair the device yourself, as this will void the warranty.
- Store the walkie talkie in a cool, dry place when not in use.
8. Troubleshooting
- No Power:
- Ensure the battery is fully charged.
- Verify the power button is pressed and held correctly.
- Cannot Communicate:
- Ensure both walkie talkies are on the same channel.
- Check that the keyboard lock is not activated on the transmitting unit.
- Verify both units are within range.
- Check battery levels on both units.
- Poor Sound Quality:
- Adjust the volume level.
- Ensure there are no obstructions between the units.
- Move closer to the other unit.
- VOX Not Working:
- Ensure VOX is enabled (long press VOL+ for 2 seconds).
- Confirm that the necessary software for VOX functionality has been installed if required.
- Speak clearly and close to the microphone.
9. Safety Information
- Do not operate the walkie talkie in explosive atmospheres (e.g., around flammable gases, dust, or powders).
- Keep the device away from medical devices to avoid interference.
- Use only approved accessories and chargers.
- Do not expose the battery to fire or extreme heat.
- Dispose of batteries properly according to local regulations.
10. Warranty & Support
Retevis offers protection plans for their products. For specific warranty details and customer support, please refer to the official Retevis website or contact their customer service directly.
- Protection Plans: 2-Year and 3-Year Protection Plans are available for purchase.
- Seller: Retevis Direct (via Amazon).
- Return Policy: 30-day refund/replacement policy.
- For further assistance, visit the Retevis Store on Amazon.
Ask a question about this manual
Ask about setup, troubleshooting, compatibility, parts, safety, or missing instructions. Manuals+ will review the question and use this page’s manual context to help answer it.