
Awenta WEB150H
Awenta 6" 150mm Wall-Mounted Extractor Fan User Manual
Model: WEB150H
1. Introduction
Thank you for choosing the Awenta 6" 150mm Wall-Mounted Extractor Fan. This fan is designed for efficient air extraction in bathrooms and kitchens, featuring a built-in timer and humidity sensor for automated operation. This manual provides comprehensive instructions for safe installation, operation, maintenance, and troubleshooting to ensure optimal performance and longevity of your device.

Image 1.1: Front view of the Awenta 6" 150mm Wall-Mounted Extractor Fan, showing its white finish and sleek design.
2. Important Safety Information
Please read all safety instructions carefully before installation and use. Failure to follow these instructions may result in electric shock, fire, or serious injury.
- Always disconnect power before installing, servicing, or cleaning the fan.
- Installation must be performed by a qualified electrician and comply with all local electrical codes and regulations.
- Do not install the fan in areas where flammable or explosive gases are present.
- Ensure the power supply voltage matches the fan's specifications (230V).
- Keep hands and foreign objects away from the fan blades during operation.
- This appliance is not intended for use by persons (including children) with reduced physical, sensory or mental capabilities, or lack of experience and knowledge, unless they have been given supervision or instruction concerning use of the appliance by a person responsible for their safety.
3. Package Contents
Verify that all components are present and undamaged upon opening the package:
- Awenta 6" 150mm Extractor Fan Unit (Model: WEB150H)
- User Manual (this document)
- Mounting Screws and Wall Plugs (typically included, verify upon unboxing)
4. Installation Guide
4.1. Before Installation
- Choose a suitable location on the wall or ceiling for optimal ventilation in your bathroom or kitchen.
- Ensure there is sufficient space for the fan and its ducting.
- Turn off the main power supply to the installation area at the circuit breaker.
4.2. Mounting the Fan
The fan is designed for wall mounting. Follow these general steps:
- Create an opening in the wall or ceiling of the appropriate diameter (150mm for the duct).
- Position the fan unit and mark the drilling points for the mounting screws.
- Drill holes and insert wall plugs.
- Secure the fan unit to the wall using the provided screws.

Image 4.1: Top-down view with internal dimensions (A, B, C, D) for mounting reference.
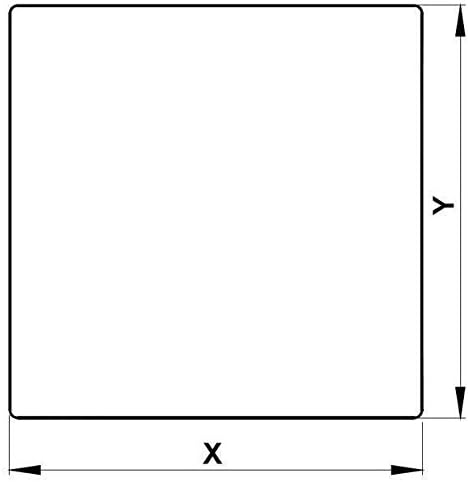
Image 4.2: Front plate dimensions (X, Y) for external fitting.

Image 4.3: Side view with depth dimensions (Z, W) and duct diameter (Ø).
4.3. Electrical Connection
Connect the fan to the main power supply according to the wiring diagram provided inside the fan's terminal block cover. The fan operates on 230 Volts and consumes 20 Watts. Ensure proper grounding. For models with timer and humidity sensor, additional connections may be required as per the internal diagram for these functions to operate correctly.
5. Operation
Once installed and connected to power, the fan is ready for operation.
5.1. Basic Function
The fan will activate when power is supplied. Depending on the model version (Standard, Pull Cord, Timer, Timer + Humidistat), its activation method will vary.
5.2. Timer Function
The integrated timer allows the fan to continue operating for a set period after the main power switch is turned off. This is ideal for clearing residual moisture or odors. The timer duration is typically adjustable via a small potentiometer located inside the fan's casing (refer to internal wiring diagram for exact location and adjustment instructions).
5.3. Humidity Sensor Function (for models with Humidistat)
The humidity sensor automatically activates the fan when the humidity level in the room exceeds a preset threshold. The fan will continue to operate until the humidity drops below the set level, or for the duration of the timer if both functions are active. The humidity threshold is typically adjustable via a small potentiometer located inside the fan's casing (refer to internal wiring diagram for exact location and adjustment instructions).
6. Maintenance and Cleaning
Regular maintenance ensures efficient and long-lasting operation of your extractor fan.
- Disconnect Power: Always turn off the power supply to the fan before any cleaning or maintenance.
- Exterior Cleaning: Wipe the exterior surface of the fan with a soft, damp cloth. Do not use abrasive cleaners or solvents.
- Grille Cleaning: Carefully remove the front grille (if detachable) and wash it with mild soap and water. Rinse thoroughly and allow it to dry completely before reattaching.
- Fan Blade Cleaning: If accessible, gently wipe the fan blades with a damp cloth to remove dust and debris. Be careful not to bend or damage the blades.
- Reassembly: Ensure all parts are dry and securely reassembled before restoring power.
7. Troubleshooting
If you encounter issues with your Awenta extractor fan, refer to the table below for common problems and solutions.
| Problem | Possible Cause | Solution |
|---|---|---|
| Fan does not turn on. | No power supply; Incorrect wiring; Faulty switch. | Check circuit breaker; Verify wiring connections; Test switch. |
| Fan runs continuously. | Timer set too long; Humidity sensor threshold too low; Incorrect wiring. | Adjust timer/humidity settings; Check wiring for continuous power connection. |
| Fan is noisy. | Loose mounting; Obstruction in fan blades; Worn bearings. | Ensure fan is securely mounted; Clean fan blades; Contact support if bearings are suspected. |
| Poor air extraction. | Blocked ducting; Dirty fan blades/grille. | Check ducting for obstructions; Clean fan blades and grille. |
8. Technical Specifications
Detailed specifications for the Awenta 6" 150mm Extractor Fan (Model: WEB150H).
| Specification | Value |
|---|---|
| Model Number | WEB150H |
| Brand | Awenta |
| Fan Design | Exhaust Fan |
| Power Source | Corded Electric |
| Voltage | 230 Volts |
| Wattage | 20 Watts |
| Special Features | Timer, Humidity Sensor (for relevant models) |
| Finish | Enamelled |
| Number of Items | 1 |
| Item Weight | 998 g (2.2 Pounds) |
| Room Type | Bathroom, Kitchen |
| Batteries Required | No |

Image 8.1: Detailed specification table for Awenta Escudo Ø150 models, including dimensions and electrical properties, along with a performance graph showing pressure (pc [Pa]) vs. volume (V [m³/h]).
9. Warranty and Customer Support
Specific warranty information for the Awenta WEB150H extractor fan is not provided in this manual. For details regarding warranty coverage, terms, and conditions, please refer to the product packaging or contact your point of purchase or the manufacturer directly.
For technical support, spare parts, or any other inquiries, please contact Awenta customer service or the authorized dealer from whom you purchased the product. Keep your purchase receipt as proof of purchase.
Ask a question about this manual
Ask about setup, troubleshooting, compatibility, parts, safety, or missing instructions. Manuals+ will review the question and use this page’s manual context to help answer it.