
1. Introduction
Thank you for choosing the RYOBI JS481LG 4.8 Amp Corded Variable Speed T-Shank Orbital Jig Saw. This manual provides essential information for the safe operation, setup, maintenance, and troubleshooting of your new tool. Please read this manual thoroughly before operating the jig saw and keep it for future reference.
The RYOBI JS481LG jig saw is designed for cutting various materials such as wood, metal, and plastic. It features a 4.8 Amp motor, variable speed control, orbital action, an integrated dust blower, and an LED lighting system for enhanced visibility.

Figure 1: RYOBI JS481LG 4.8 Amp Corded Variable Speed T-Shank Orbital Jig Saw. This image shows the overall design of the jig saw, highlighting its ergonomic grip and the speed match dial.
2. Important Safety Instructions
Always follow basic safety precautions when using electric tools to reduce the risk of fire, electric shock, and personal injury. Read and understand all instructions.
General Power Tool Safety Warnings:
- Work Area Safety: Keep your work area clean and well-lit. Cluttered or dark areas invite accidents. Do not operate power tools in explosive atmospheres, such as in the presence of flammable liquids, gases, or dust.
- Electrical Safety: Power tool plugs must match the outlet. Never modify the plug in any way. Avoid body contact with earthed or grounded surfaces such as pipes, radiators, ranges, and refrigerators.
- Personal Safety: Always wear eye protection. Use hearing protection when operating for extended periods. Dress properly; avoid loose clothing or jewelry. Secure long hair.
- Tool Use and Care: Do not force the power tool. Use the correct power tool for your application. Disconnect the plug from the power source before making any adjustments, changing accessories, or storing power tools.
Jig Saw Specific Safety:
- Hold Tool Firmly: Always hold the jig saw firmly with both hands during operation.
- Secure Workpiece: Clamp or otherwise secure the workpiece to a stable platform. Holding the workpiece by hand or against your body may lead to loss of control.
- Check for Obstructions: Before cutting, ensure there are no hidden wires, pipes, or other obstructions in the workpiece.
- Blade Selection: Use only T-shank blades designed for the material being cut. Ensure the blade is properly installed and secured before starting.
- Dust Management: The integrated dust blower helps keep the cut line clear. For extensive cutting, consider using a dust extraction system if available.
3. Product Overview and Components
Familiarize yourself with the various parts of your RYOBI JS481LG jig saw before operation.
- Variable Speed Dial: Adjusts strokes per minute (SPM).
- Orbital Action Selector: Controls the aggressiveness of the cut.
- On/Off Trigger: Activates the tool.
- Lock-On Button: For continuous operation.
- Tool-Free Blade Clamp: For quick and easy blade changes.
- Adjustable Footplate: Allows for bevel cuts up to 45 degrees.
- Dust Blower: Clears debris from the cut line.
- LED Light: Illuminates the work area.
- GripZone Over-mold: Provides a comfortable and secure grip.

Figure 2: Side view of the RYOBI JS481LG Jig Saw. This image provides a clear view of the tool's profile, including the handle and motor housing.
4. Setup
4.1 Blade Installation
- Ensure the jig saw is unplugged from the power source.
- Locate the tool-free blade clamp lever at the front of the saw.
- Push the blade clamp lever forward to open the clamp.
- Insert the T-shank blade into the blade holder with the teeth facing forward. Ensure the blade is fully seated.
- Release the blade clamp lever. Gently pull on the blade to confirm it is securely locked in place.
4.2 Adjusting the Footplate (Bevel Cuts)
- Unplug the tool.
- Locate the footplate adjustment lever or screws beneath the footplate.
- Loosen the lever/screws.
- Tilt the footplate to the desired angle (up to 45 degrees left or right). Use the angle markings on the footplate for reference.
- Tighten the lever/screws securely to lock the footplate in position.

Figure 3: Close-up of the RYOBI JS481LG Jig Saw's footplate. This image illustrates the mechanism for adjusting the footplate for bevel cuts.
5. Operation
5.1 Powering On/Off
- To start the jig saw, depress the On/Off trigger. The LED light will illuminate.
- For continuous operation, depress the trigger and then press the lock-on button. Release the trigger, and the tool will continue to run.
- To turn off from continuous operation, depress the trigger fully and then release it.
5.2 Variable Speed Control
The variable speed dial allows you to select the appropriate strokes per minute (SPM) for different materials and cutting tasks. Speeds range from 600-3,000 SPM.
- Rotate the speed dial to the desired setting. Lower speeds are suitable for harder materials like metal or for more precise cuts. Higher speeds are for softer materials like wood.
- Refer to the speed match guide on the tool for recommended settings based on material type.
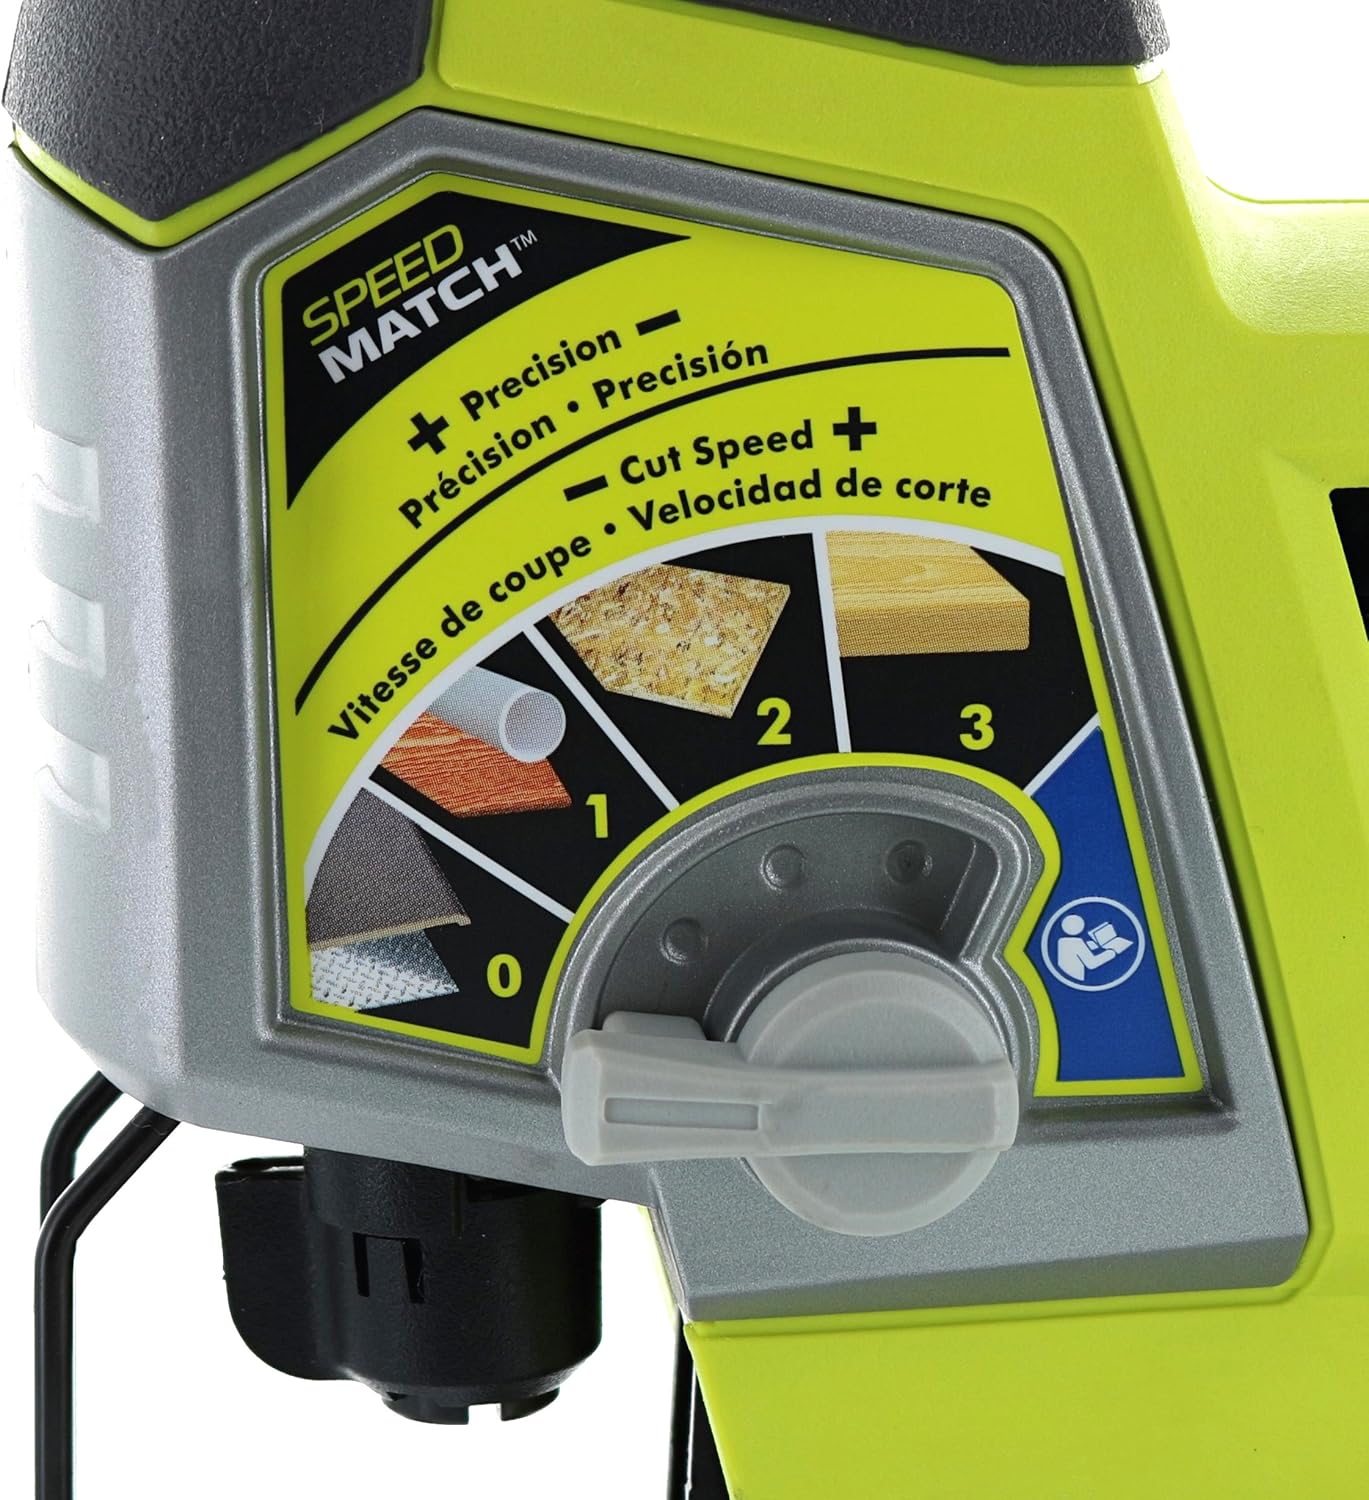
Figure 4: Close-up of the RYOBI JS481LG Jig Saw's Speed Match dial. This image shows the dial used to select variable speeds and orbital action settings.
5.3 Orbital Action Settings
The orbital action selector controls the blade's movement, influencing cut speed and finish quality.
- Setting 0 (No Orbital Action): For fine, precise cuts and cutting hard materials.
- Settings 1-3 (Orbital Action): For faster, more aggressive cuts in wood and softer materials. Higher numbers indicate more aggressive orbital action.
5.4 Cutting Techniques
- Starting a Cut: Place the front edge of the footplate on the workpiece, ensuring the blade is clear of the material. Start the saw, then slowly guide the blade into the material.
- Straight Cuts: Guide the saw along a marked line, applying steady, even pressure.
- Curved Cuts: Use a narrower blade for tighter curves. Guide the saw slowly, allowing the blade to follow the curve without forcing it.
- Plunge Cuts: For internal cuts without a pilot hole, tilt the saw forward so the front edge of the footplate rests on the workpiece. Start the saw, then slowly lower the blade into the material until the footplate is flat. This technique requires practice and caution.
6. Maintenance
Regular maintenance ensures optimal performance and extends the life of your tool. Always unplug the jig saw before performing any maintenance.
6.1 Cleaning
- Keep the ventilation openings clear to prevent overheating.
- Use a soft brush or compressed air to remove dust and debris from the tool, especially around the blade area and motor housing.
- Do not use water or chemical cleaners, as these can damage the tool.
6.2 Blade Replacement
Replace blades when they become dull or damaged to ensure efficient and safe cutting. Refer to section 4.1 for blade installation instructions.
6.3 Cord Inspection
Regularly inspect the power cord for any signs of damage, such as cuts, fraying, or exposed wires. If damaged, have it repaired by a qualified service technician.
6.4 Storage
Store the jig saw in a clean, dry place, out of reach of children and away from direct sunlight or extreme temperatures.
7. Troubleshooting
This section addresses common issues you might encounter with your jig saw.
| Problem | Possible Cause | Solution |
|---|---|---|
| Saw does not start | No power supply; Faulty power cord; Trigger not fully depressed | Check power outlet and connections; Inspect power cord for damage; Fully depress trigger. |
| Blade not cutting efficiently | Dull or incorrect blade; Incorrect speed/orbital setting | Replace blade; Ensure correct blade type for material; Adjust speed and orbital settings. |
| Blade not locking in place | Blade not fully inserted; Blade clamp mechanism obstructed | Ensure blade is fully seated in the clamp; Clear any debris from the clamp mechanism. |
| Excessive vibration | Loose blade; Damaged blade; Worn internal components | Check blade for secure installation; Replace damaged blade; If problem persists, contact service. |
8. Specifications
Technical data for the RYOBI JS481LG Jig Saw.
| Feature | Detail |
|---|---|
| Model Number | JS481LG |
| Motor | 4.8 Amp |
| Voltage | 127 Volts (AC) |
| Wattage | 69.12 watts |
| Strokes Per Minute (SPM) | 600 - 3,000 (Variable Speed) |
| Blade Type | T-Shank |
| Orbital Settings | 4 Positions |
| Bevel Capacity | Up to 45 Degrees (Left/Right) |
| Item Weight | 4.78 Pounds |
| Product Dimensions | 11"L x 3.1"W x 9.3"H |
| Included Components | Wood Cutting Blade |
| Power Source | Corded Electric |

Figure 5: Side view of the RYOBI JS481LG Jig Saw with visible specification label. This image displays some of the technical details directly on the tool's housing.
9. Warranty and Support
9.1 Manufacturer's Warranty
The RYOBI JS481LG Jig Saw is backed by a 3-Year Manufacturer's Limited Warranty. This warranty covers defects in material and workmanship under normal use. Please retain your proof of purchase for warranty claims.
9.2 Customer Support
For technical assistance, warranty service, or to register your product, please visit the official RYOBI website or contact customer service.
- Website: ryobitools.com/nation
- Customer Service: Refer to your product packaging or the RYOBI website for the most current contact information.


