1. Introduction
Thank you for choosing the Wiltec Automatic 112-Egg Incubator. This device is designed to provide optimal conditions for hatching various types of poultry and reptile eggs, featuring precise temperature and humidity control, as well as an automatic egg turning system. Please read this manual thoroughly before operation to ensure safe and efficient use of the incubator.

Image: The Wiltec Automatic 112-Egg Incubator, a device designed for controlled egg hatching.
2. Safety Instructions
- Always connect the incubator to a grounded power outlet.
- Do not immerse the incubator or any electrical components in water or other liquids.
- Keep the incubator away from direct sunlight, drafts, and extreme temperature fluctuations.
- Ensure proper ventilation around the unit.
- Unplug the incubator from the power supply before cleaning or performing any maintenance.
- This appliance is not intended for use by persons (including children) with reduced physical, sensory or mental capabilities, or lack of experience and knowledge, unless they have been given supervision or instruction concerning use of the appliance by a person responsible for their safety.
3. Package Contents
Please check that all items are present and undamaged upon opening the package:
- Wiltec Automatic 112-Egg Incubator Unit
- Power Cable
- Water Bottle/Filler
- Instruction Manual
4. Setup
- Unpacking: Carefully remove all components from the packaging.
- Placement: Place the incubator on a stable, level surface in a room with a consistent ambient temperature (ideally between 20-25°C) and away from direct sunlight or drafts.
- Water Channels: Fill the water channels at the bottom of the incubator with distilled water using the provided water bottle. Ensure the water level is appropriate for the desired humidity.
- Egg Trays: Insert the egg turning trays into the incubator.
- Power Connection: Connect the power cable to the incubator and then to a grounded electrical outlet. The display should illuminate.
5. Operating Instructions
5.1. Pre-heating and Initial Settings
Before placing eggs, operate the incubator for at least 24 hours to stabilize temperature and humidity.
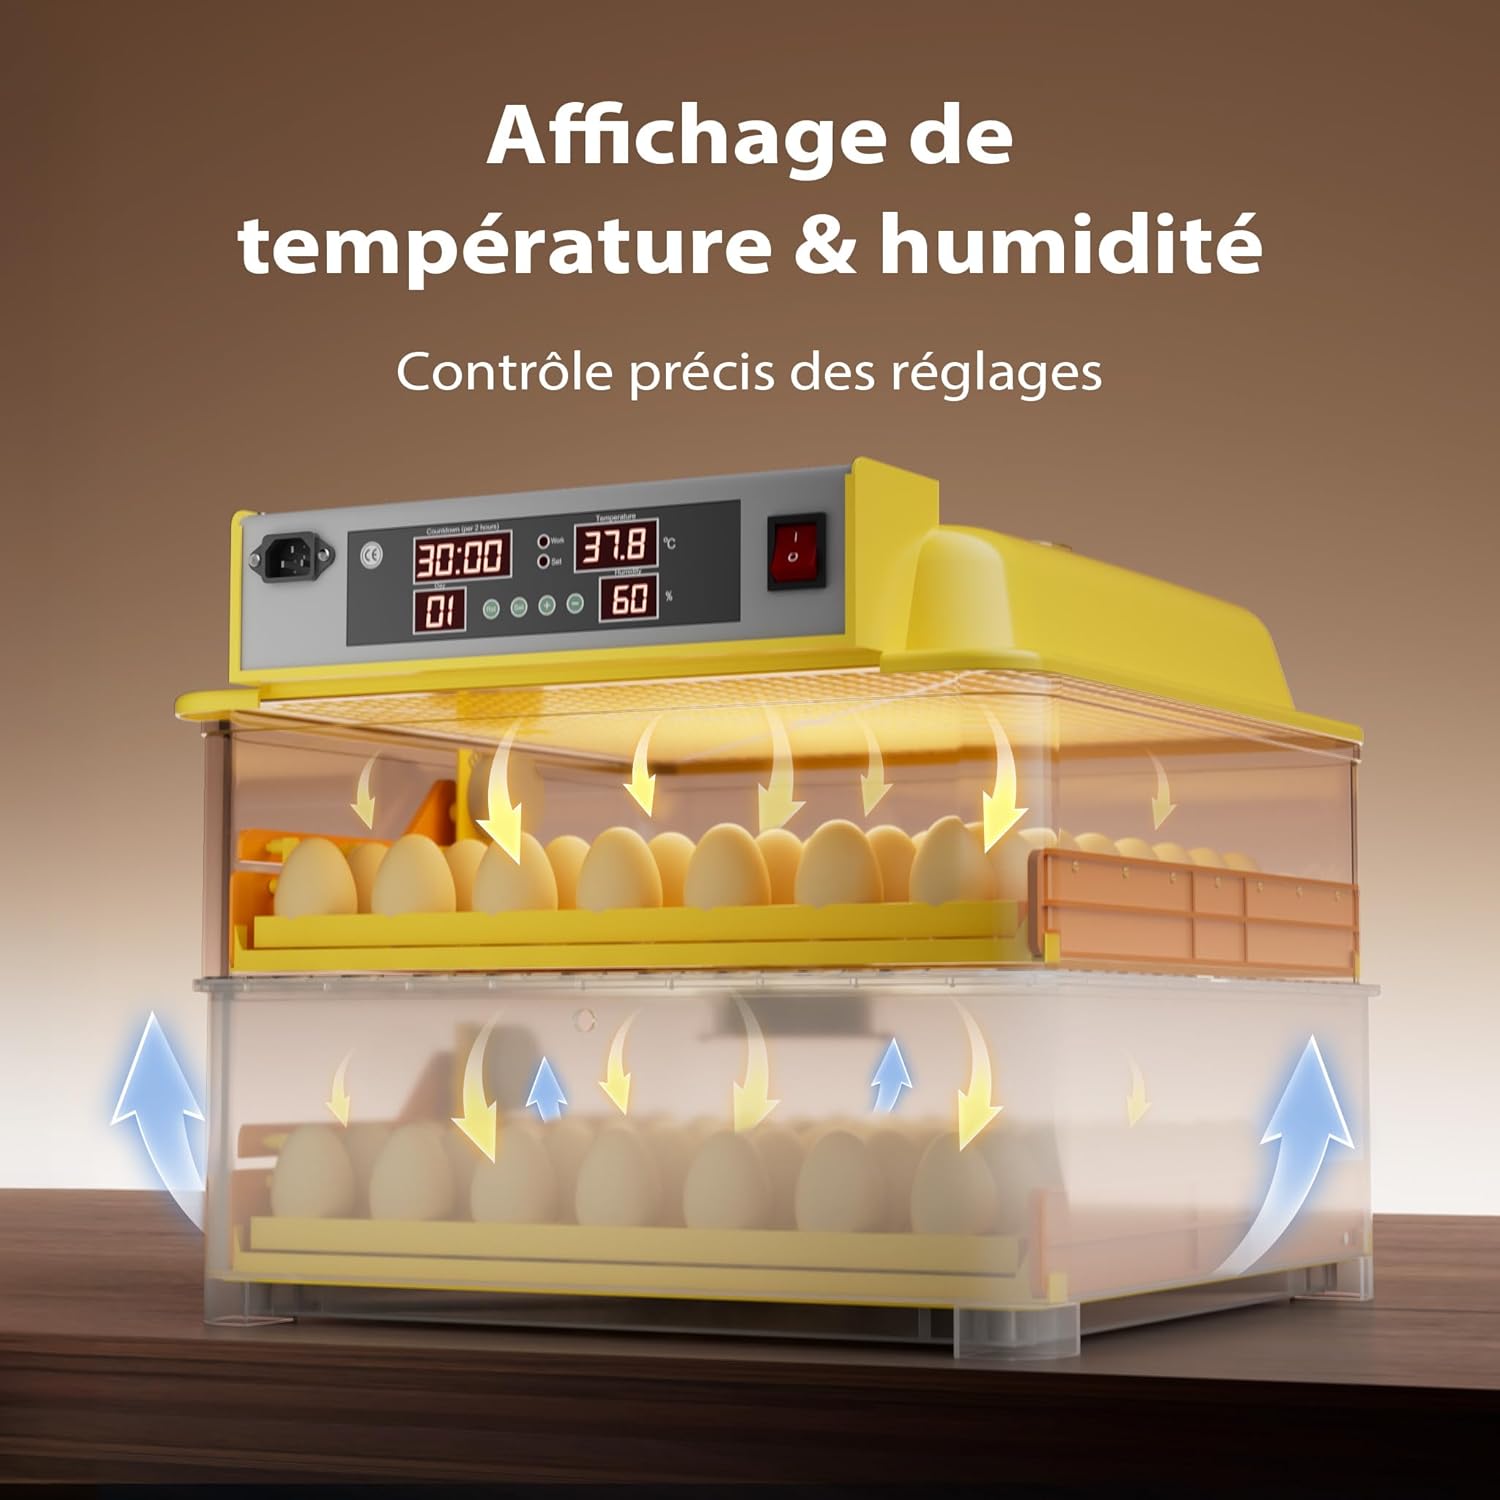
Image: The incubator's digital display, showing current temperature and humidity readings, and control buttons for precise adjustments.
- Temperature Setting: The incubator allows precise temperature adjustment between 25°C and 39.5°C. Refer to specific egg type requirements for optimal temperature. Use the control buttons on the display panel to set the desired temperature.
- Humidity Control: Humidity is primarily controlled by the amount of water in the channels. Monitor the humidity display and add water as needed.
5.2. Placing Eggs
Carefully place the fertilized eggs into the designated slots on the egg turning trays. The incubator can accommodate up to 112 eggs, suitable for chicken, quail, duck, and even reptile eggs.
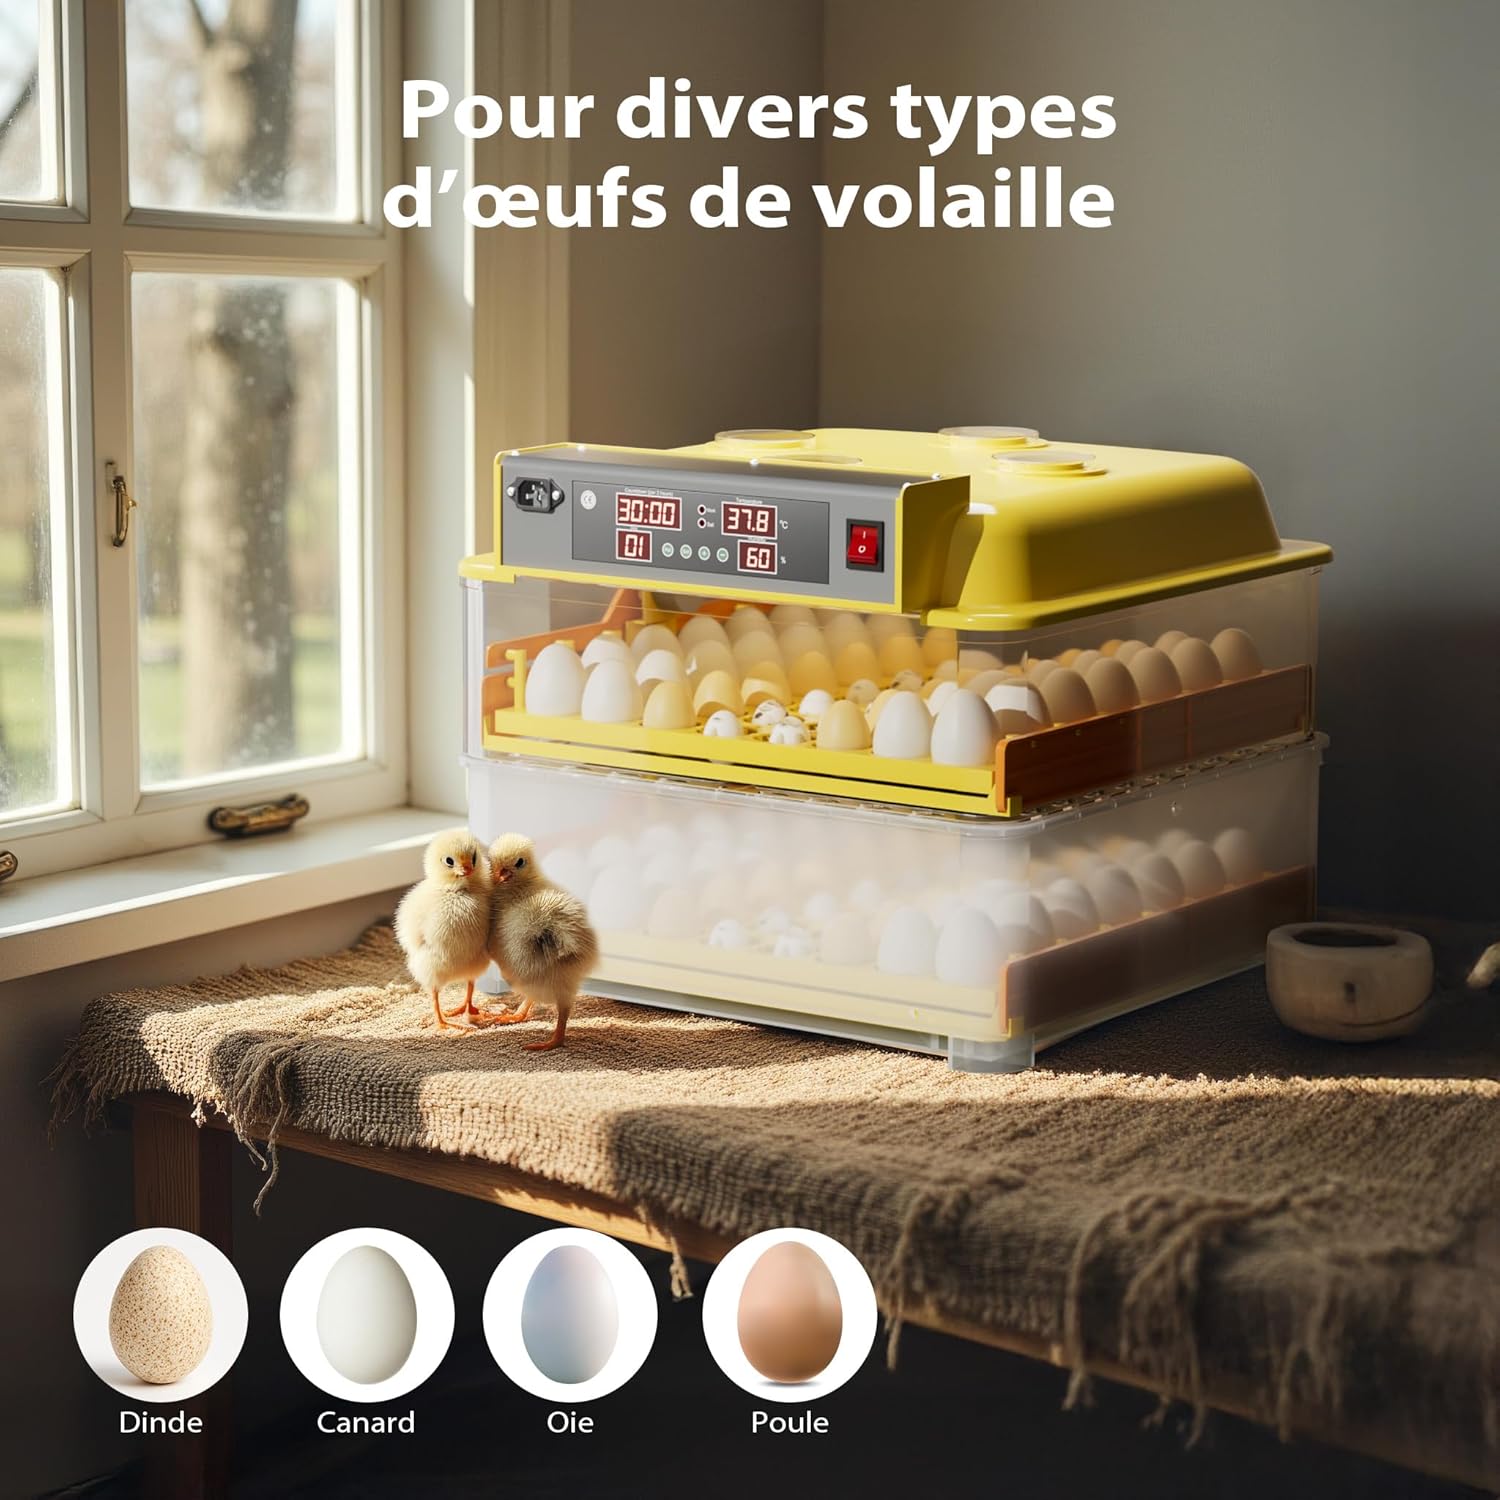
Image: An incubator containing different types of eggs, illustrating its versatility for various poultry and reptile species.
5.3. Automatic Egg Turning
The incubator is equipped with an automatic egg turning system that gently tilts the eggs back and forth. This simulates natural parental movements, preventing embryos from adhering to the shell and promoting healthy development.

Image: Close-up view of the automatic egg turning mechanism, showing eggs being gently rotated within their trays.
5.4. Monitoring and Ventilation
The incubator features a temperature control system with an alarm that signals any deviation from the set parameters, ensuring a constant and optimal internal environment. A built-in fan ensures optimal air circulation, reducing temperature fluctuations.

Image: The incubator's internal fan, illustrating how it circulates air to maintain consistent temperature and humidity throughout the unit.
Four large observation windows allow for constant monitoring of the eggs without opening the lid, maintaining stable internal conditions.

Image: A close-up of one of the incubator's observation windows, providing a clear view of the eggs inside.
5.5. Hatching Process
During the last 3 days before hatching, it is recommended to remove the egg turning trays and place the eggs directly on the bottom grid. Increase humidity slightly during this period. Avoid opening the incubator frequently during hatching to maintain stable conditions.
6. Maintenance
- Cleaning: After each hatch, unplug the incubator and clean all surfaces with a mild disinfectant solution. Ensure all parts are completely dry before reassembly or storage. The transparent plastic construction facilitates easy cleaning.
- Storage: Store the incubator in a clean, dry place when not in use.
7. Troubleshooting
| Problem | Possible Cause | Solution |
|---|---|---|
| Incubator not powering on | Power cable loose; no power from outlet | Check power cable connection; test outlet with another device. |
| Temperature fluctuations | Room temperature unstable; incubator lid not sealed properly; fan obstructed | Move incubator to a stable environment; ensure lid is securely closed; check for fan obstructions. |
| Humidity too low/high | Insufficient/excessive water in channels; room humidity too low/high | Adjust water level in channels; consider using a room humidifier/dehumidifier. |
| Eggs not turning | Egg turning motor malfunction; trays incorrectly installed | Check tray installation; contact customer support if motor issue persists. |
| Alarm sounding | Temperature/humidity outside set parameters | Check display for specific alarm code; adjust temperature/humidity as needed. |
8. Specifications
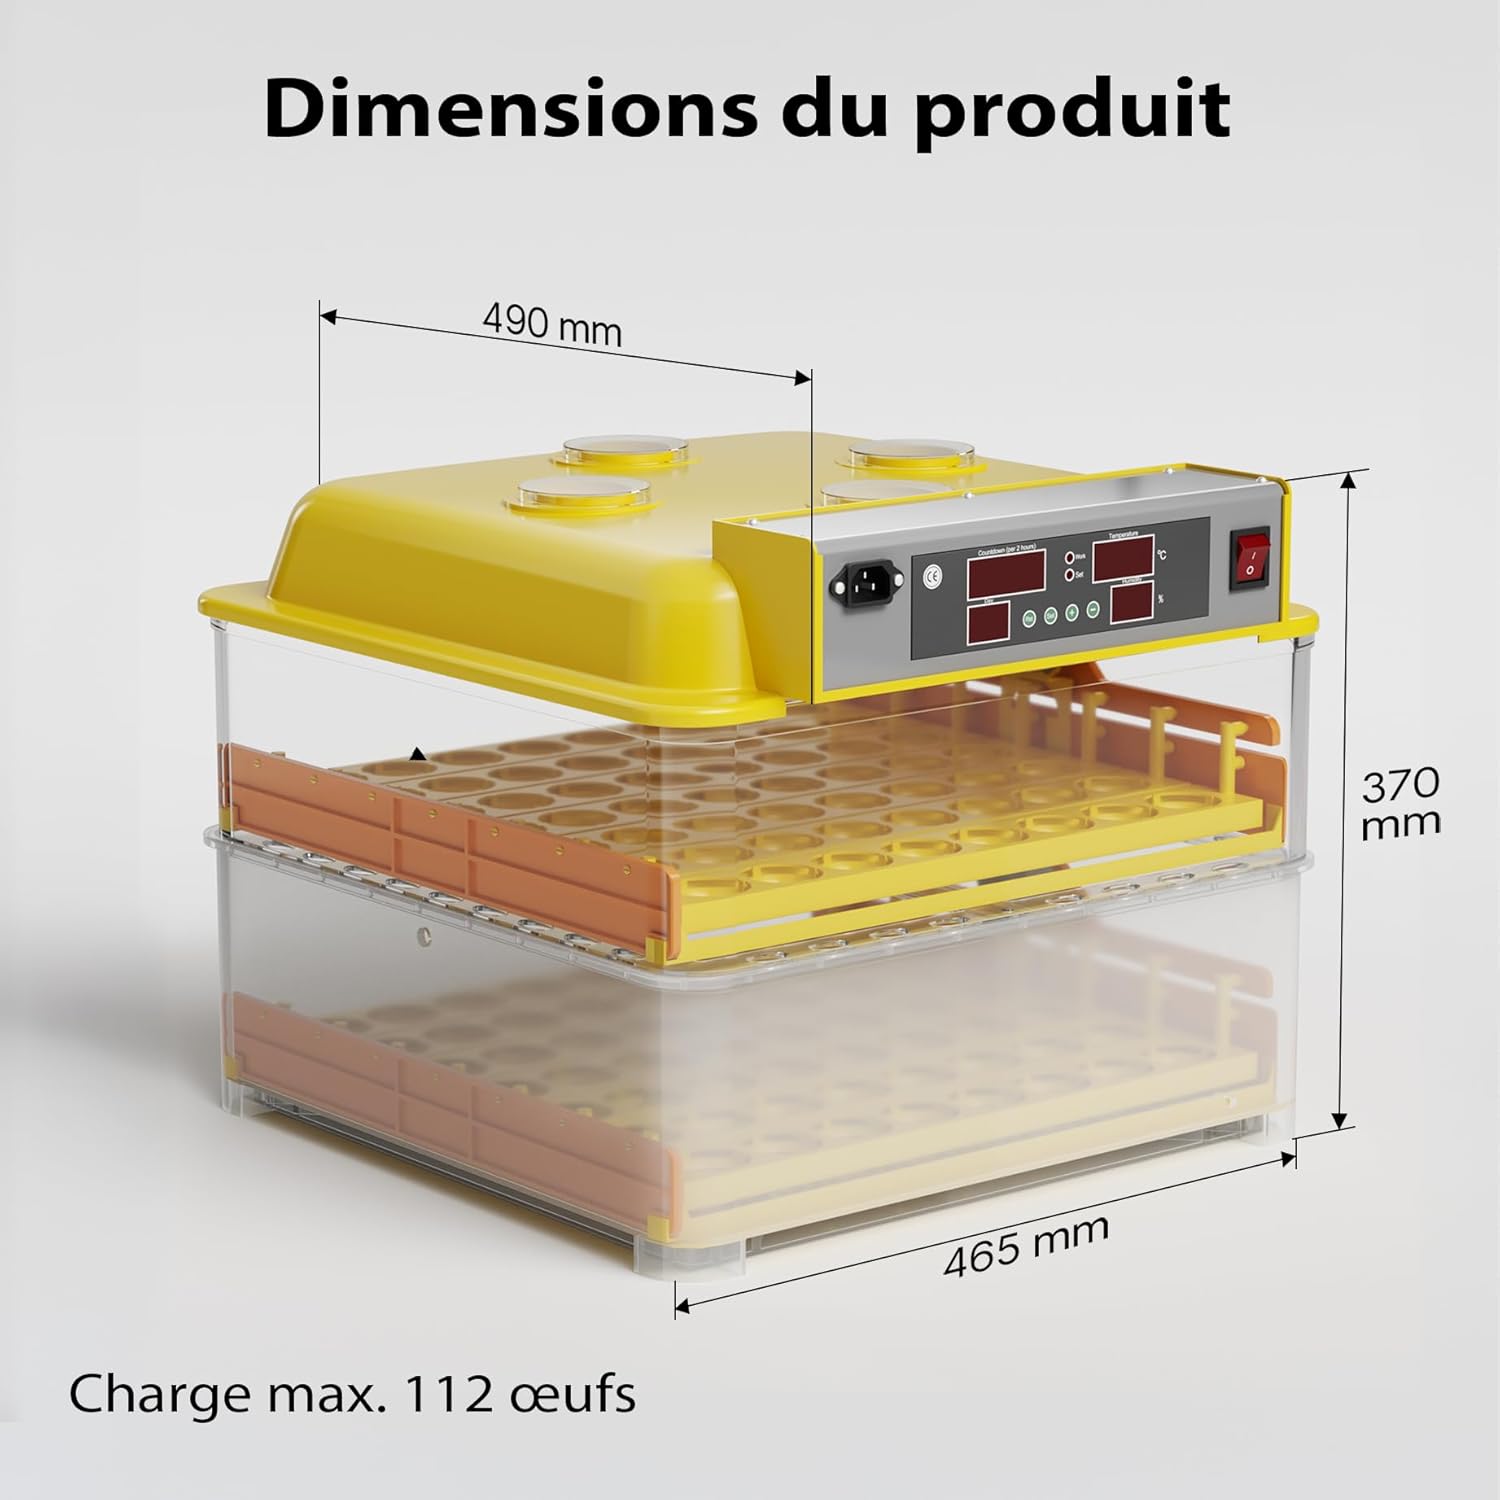
Image: Diagram illustrating the dimensions of the Wiltec Automatic 112-Egg Incubator, with measurements in millimeters.
- Model Number: 51274
- Brand: WilTec
- Capacity: Up to 112 eggs (chicken, quail, duck, reptile)
- Temperature Range: 25°C - 39.5°C (adjustable)
- Dimensions (L x W x H): 46.5 x 49 x 37 cm
- Weight: 5.96 kg
- Features: Automatic egg turning, digital temperature/humidity display, temperature alarm, optimal air circulation fan, observation windows.
9. Warranty and Support
Information regarding specific warranty terms and customer support contact details was not available in the provided product data. Please refer to the product packaging or the manufacturer's official website for the most current warranty information and support options.
For general inquiries or technical assistance, you may visit the WilTec brand store: WilTec Store on Amazon.


