1. Introduction
Thank you for purchasing the DIGITNOW Wooden Retro Turntable, Model FBA_606. This unit combines a classic turntable with modern features, including built-in stereo speakers, an AM/FM stereo radio, and an audio line-in function. This manual provides detailed instructions to ensure proper setup, operation, and care of your device.
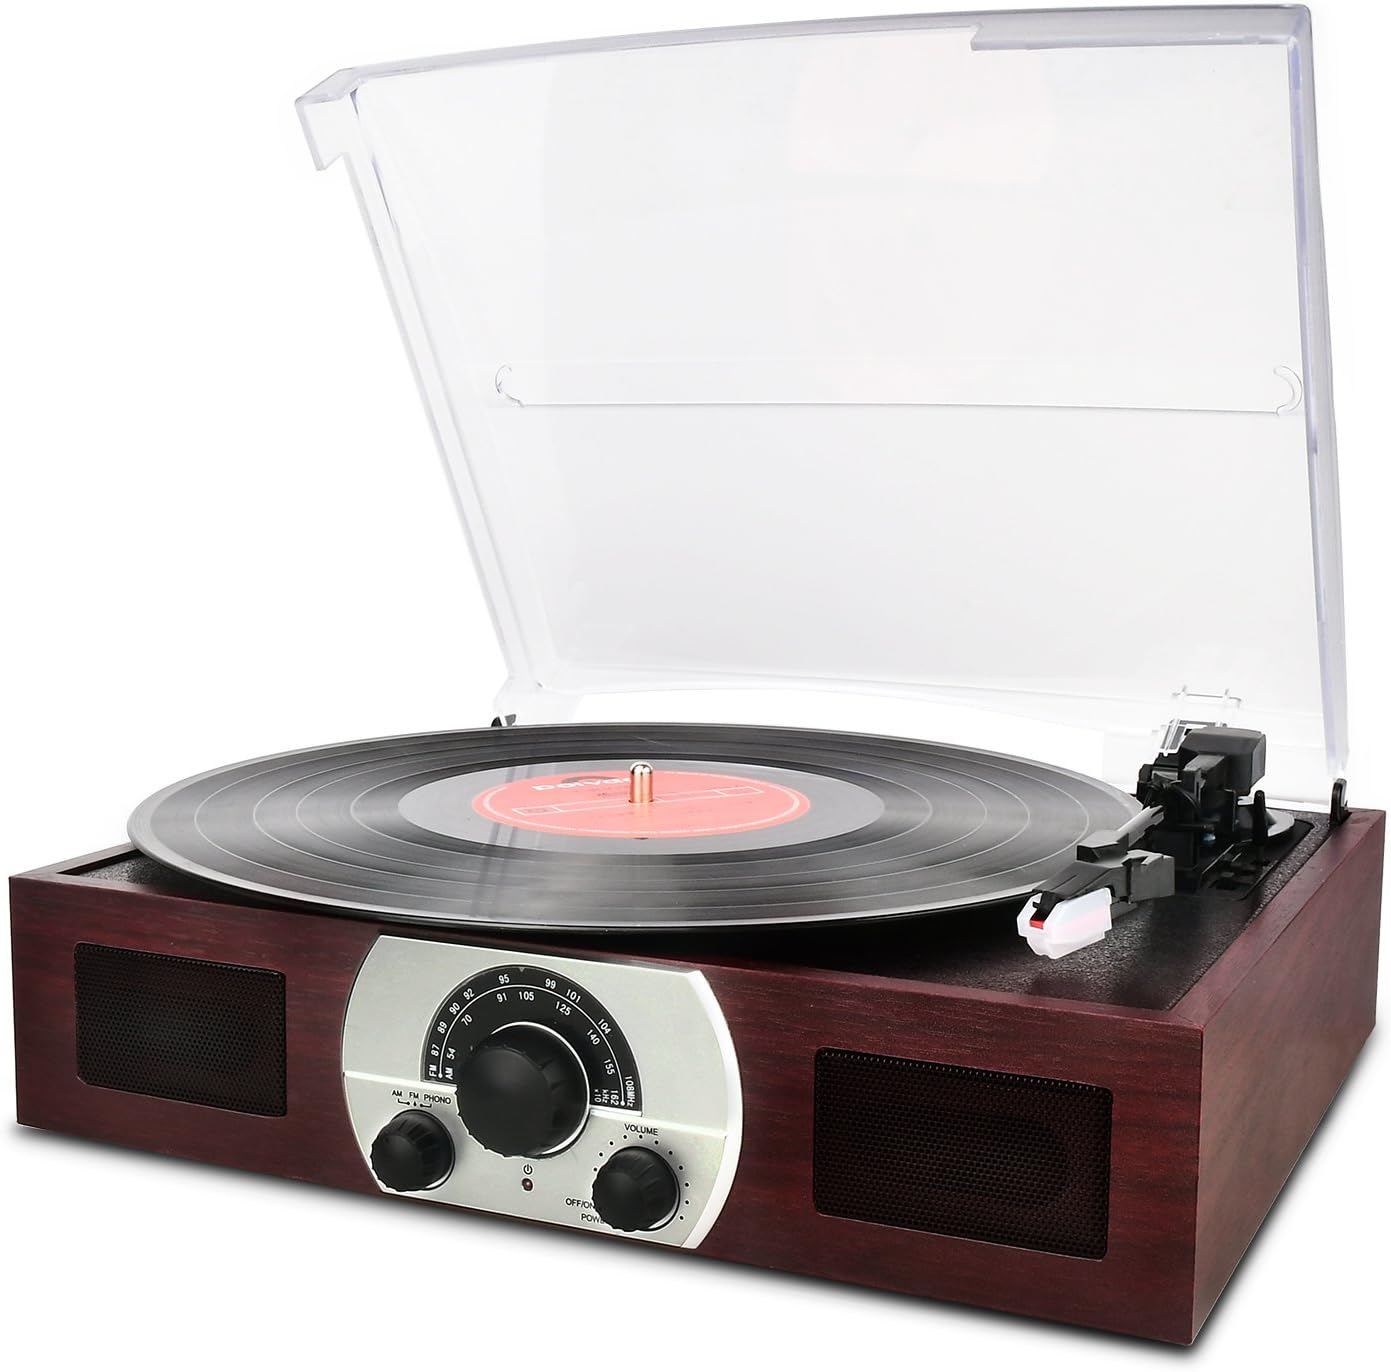
Figure 1: Front view of the DIGITNOW Wooden Retro Turntable with a record playing.
2. Product Features
- 3-Speed Turntable: Supports 33 1/3, 45, and 78 RPM records.
- Belt-Drive System: Ensures stable platter rotation.
- Semi-Automatic Tone Arm: Features a lift lever and auto/manual stop control.
- Ceramic Stereo Cartridge: Equipped with a jewel stylus for clear audio playback.
- Built-in 45 RPM Adapter: Conveniently located for playing 45 RPM singles.
- Integrated Stereo Speakers: Full-range dynamic stereo speakers for direct audio output.
- Analog AM/FM Stereo Radio: Tune into your favorite radio stations.
- Audio Source Line-In (AUX-in): Connect external audio devices like smartphones or CD players.
- Removable Dust Cover: Transparent plastic cover protects the turntable from dust.
- Classic Wooden Appearance: Designed with a retro aesthetic.
3. Parts Identification
Familiarize yourself with the various components of your turntable using the diagram below.
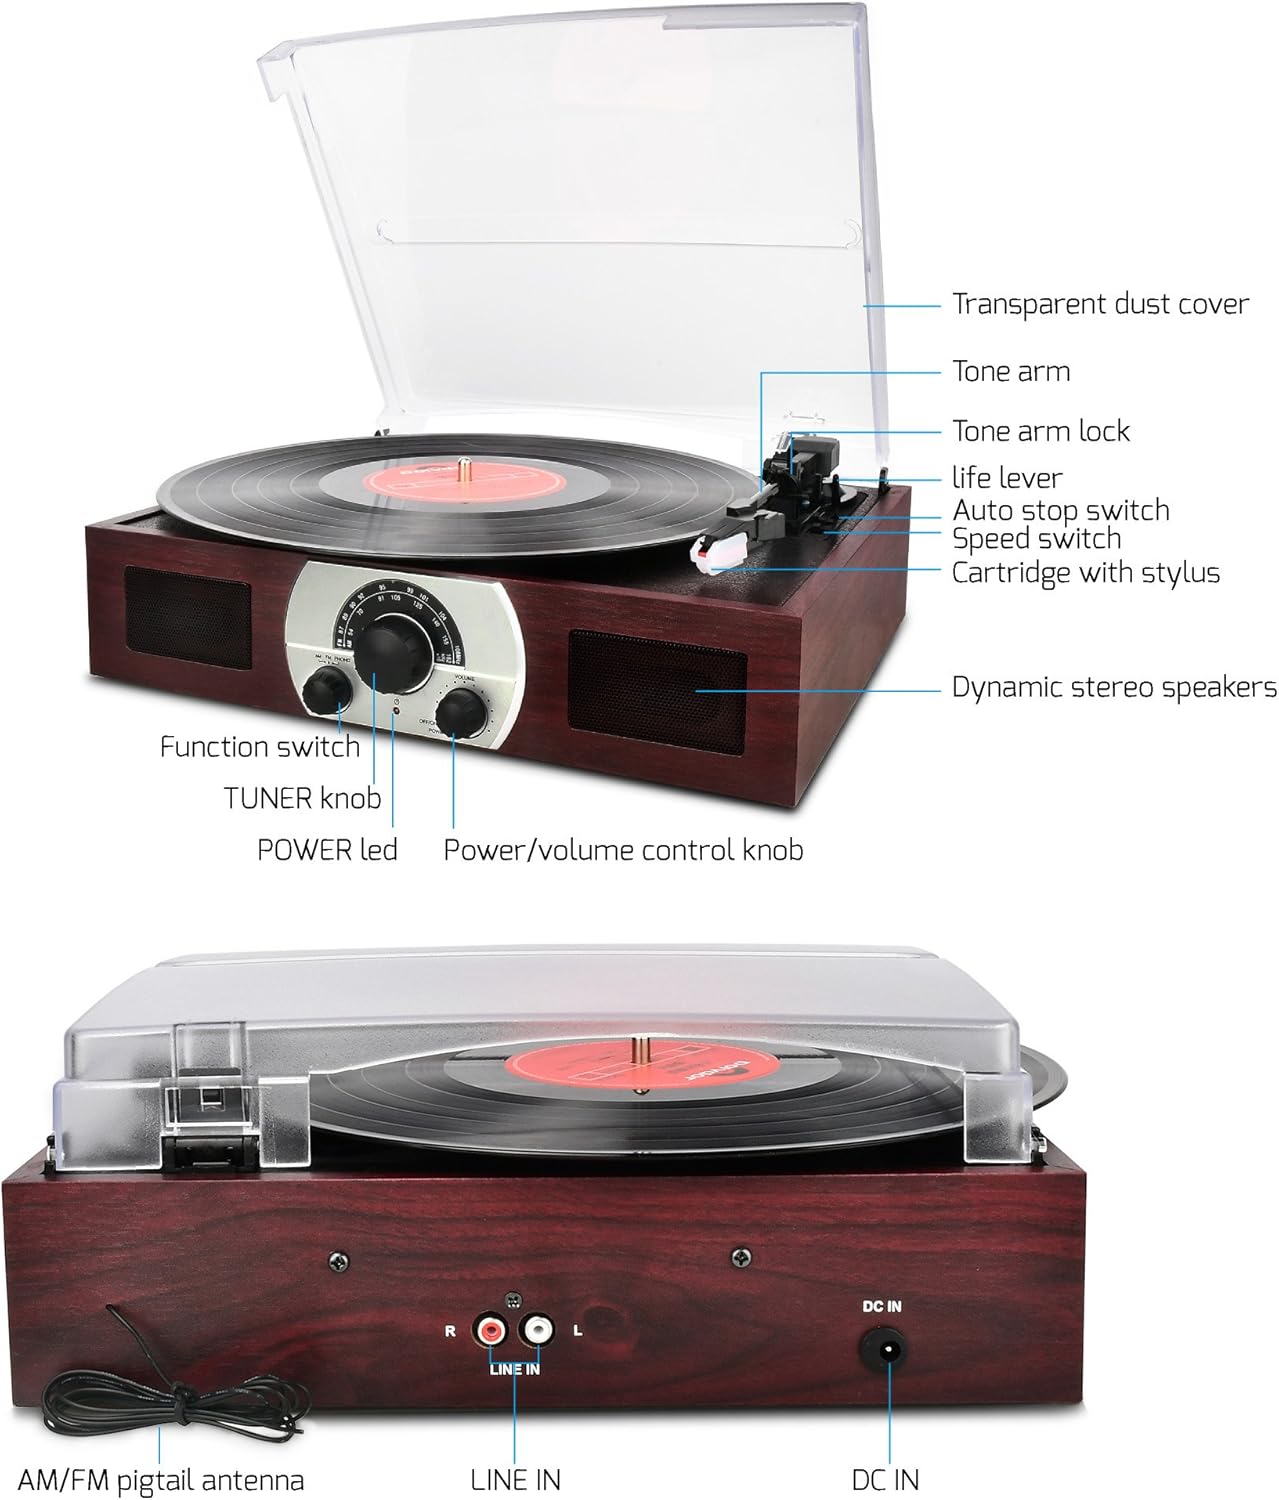
Figure 2: Labeled diagram of the turntable components.
- Transparent Dust Cover: Protects the platter and tone arm.
- Tone Arm: Holds the cartridge and stylus.
- Tone Arm Lock: Secures the tone arm when not in use.
- Life Lever: Raises and lowers the tone arm.
- Auto Stop Switch: Controls automatic platter stop at the end of a record.
- Speed Switch: Selects playback speed (33, 45, 78 RPM).
- Cartridge with Stylus: Reads the grooves of the record.
- Dynamic Stereo Speakers: Built-in speakers for audio output.
- Function Switch: Selects between AM, FM, and PHONO modes.
- TUNER Knob: Adjusts radio frequency.
- POWER LED: Indicates power status.
- Power/Volume Control Knob: Turns the unit on/off and adjusts volume.

Figure 3: Rear view of the turntable showing connections.
- AM/FM Pigtail Antenna: For radio reception.
- LINE IN (R/L): RCA input jacks for external audio sources.
- DC IN: Power input jack (12V).
4. Setup
Follow these steps for initial setup:
- Unpacking: Carefully remove the turntable from its packaging. Retain packaging for future transport or storage.
- Placement: Place the unit on a stable, level surface away from direct sunlight, heat sources, and excessive dust or vibration.
- Dust Cover: The transparent dust cover can be removed or kept open during operation. Ensure it is properly seated if closed.
- Power Connection: Connect the provided power adapter to the DC IN 12V jack on the rear of the unit (refer to Figure 3). Plug the other end into a standard wall outlet.
- Antenna Connection (for Radio): For optimal AM/FM reception, extend the AM/FM pigtail antenna located at the back of the unit (refer to Figure 3). Position it for the best signal.
- Initial Power On: Turn the Power/Volume Control Knob clockwise to power on the unit. The POWER LED will illuminate.
5. Operating Instructions
5.1 Turntable Operation (PHONO Mode)
- Select PHONO Mode: Turn the Function Switch to the 'PHONO' position.
- Prepare Record: Place a vinyl record on the turntable platter. If playing a 45 RPM single with a large center hole, place the included 45 RPM adapter on the center spindle first.
- Select Speed: Set the Speed Switch to the appropriate speed (33 1/3, 45, or 78 RPM) for your record.
- Unlock Tone Arm: Release the Tone Arm Lock.
- Raise Tone Arm: Gently push the Life Lever backward to raise the tone arm.
- Position Tone Arm: Manually move the tone arm over the desired starting groove of the record.
- Lower Tone Arm: Gently push the Life Lever forward to slowly lower the tone arm onto the record. Playback will begin.
- Adjust Volume: Use the Power/Volume Control Knob to adjust the listening volume.
- Auto Stop Feature: The Auto Stop Switch controls whether the platter stops automatically at the end of a record. For most modern records, set it to 'ON'. For some older or specific records, you may need to set it to 'OFF' to ensure the record plays to the end.
- Stopping Playback: At the end of the record (if auto-stop is on) or when you wish to stop, gently push the Life Lever backward to raise the tone arm. Return the tone arm to its rest and secure it with the Tone Arm Lock.

Figure 4: Detail of the tone arm and platter during operation.
5.2 AM/FM Radio Operation
- Power On: Ensure the unit is powered on using the Power/Volume Control Knob.
- Select Radio Mode: Turn the Function Switch to either 'AM' or 'FM' position.
- Tune Station: Rotate the TUNER Knob to select your desired radio station.
- Adjust Volume: Use the Power/Volume Control Knob to adjust the listening volume.
- Optimize Reception: For best FM reception, extend and adjust the position of the AM/FM pigtail antenna at the back of the unit.
- Turn Off Radio: To turn off the radio, switch the Function Switch to any other position (e.g., 'PHONO') or turn off the unit.

Figure 5: Front panel controls including the radio tuner.
5.3 Line-In (AUX-in) Operation
The Line-In function allows you to connect external audio devices and play their audio through the turntable's speakers.
- Connect External Device: Using an RCA audio cable (not included), connect the audio output of your external device (e.g., CD player, smartphone with an adapter) to the LINE IN (R/L) jacks on the rear of the turntable (refer to Figure 3).
- Select PHONO Mode: Important: When using the Line-In as a stereo speaker, the Function Switch must be set to the 'PHONO' position.
- Play Audio: Start playback on your external audio device.
- Adjust Volume: Use the Power/Volume Control Knob on the turntable to adjust the overall volume. You may also need to adjust the volume on your external device.
6. Maintenance
Proper care will extend the life and performance of your turntable.
- Cleaning the Unit: Wipe the exterior of the unit with a soft, dry cloth. Do not use abrasive cleaners, waxes, or solvents.
- Dust Cover: Clean the transparent dust cover with a soft, slightly damp cloth. Avoid harsh chemicals that could scratch or cloud the plastic.
- Stylus Care: The stylus (needle) is a delicate component. Clean it periodically with a soft brush, brushing gently from back to front. Avoid touching the stylus with your fingers. A worn or damaged stylus can harm your records and degrade sound quality; replace it if necessary.
- Record Care: Keep your records clean and free of dust. Store them vertically in their sleeves to prevent warping.
- Storage: If storing the unit for an extended period, ensure the tone arm is locked in place and the dust cover is closed. Disconnect the power adapter.
7. Troubleshooting
If you encounter issues, refer to the following common problems and solutions:
| Problem | Possible Cause | Solution |
|---|---|---|
| No power | Power adapter not connected; outlet not working; unit off. | Ensure power adapter is securely connected to unit and a working outlet. Turn the Power/Volume knob clockwise to power on. |
| No sound from speakers | Volume too low; incorrect function mode; stylus not on record. | Increase volume. Ensure Function Switch is set to 'PHONO' for records or 'AM/FM' for radio. Lower tone arm onto record. |
| Poor sound quality / Skipping record | Dusty record/stylus; worn stylus; unit not level; record damaged. | Clean record and stylus. Replace stylus if worn. Ensure unit is on a level surface. Try a different record. |
| Radio reception is poor | Antenna not extended/positioned correctly; weak signal. | Extend and adjust the AM/FM pigtail antenna for better reception. Try moving the unit to a different location. |
| Line-In not working | Incorrect function mode; cable not connected; external device issue. | Ensure Function Switch is set to 'PHONO'. Check RCA cable connections. Verify external device is playing audio and its volume is up. |
8. Specifications
| Feature | Detail |
|---|---|
| Model Name | FBA_606 |
| Brand | DIGITNOW |
| Product Dimensions | 14 x 10.7 x 2.85 inches |
| Item Weight | 4.3 pounds |
| Material | Plastic (with wooden appearance) |
| Style | Retro |
| Color | BROWN |
| Compatible Devices | Headphone, Speaker (via Line-In) |
| Motor Type | DC Motor |
| Signal Format | Analog |
| Voltage | 12 Volts |
9. Warranty and Support
This product is covered by a manufacturer's warranty. Please refer to the warranty card included with your purchase for specific terms and conditions. For technical support, troubleshooting assistance beyond this manual, or warranty claims, please contact DIGITNOW customer service through their official website or the retailer where the product was purchased. Keep your purchase receipt as proof of purchase.


