Introduction
This manual provides detailed instructions for the installation, operation, and maintenance of your Rain Bird 1800 Series Spray Head, Model 1806. The 1800 Series is designed for reliable and efficient irrigation in various landscape applications. Please read these instructions carefully before proceeding with installation or operation to ensure optimal performance and longevity of your product.
Product Features
- Exclusive Co-Molded Wiper Seal: Features an encased plastic "cage" for unmatched resistance to grit, pressure, and environmental factors, ensuring a long-lasting seal.
- Precision Controlled Flush: Clears debris from the unit during pop-down, ensuring positive stem retraction in all soil types.
- Strong Stainless Steel Spring: Provides reliable and consistent stem retraction.
- Two-Piece Ratchet Mechanism: Allows for easy nozzle pattern alignment without tools and enhances durability.
- Pre-installed 1800 Pop-Top Flush Plug: Blocks debris from entering the sprinkler body after flushing, maintaining internal cleanliness.
- Side Inlet: Designed for flexible connection options.
Setup and Installation
Proper installation is crucial for the efficient operation of your Rain Bird 1806 spray head. Follow these steps carefully:
- Prepare the Trench: Dig a trench to the desired depth, ensuring it is wide enough for the pipe and sprinkler body.
- Connect to Lateral Line: Attach the spray head to the lateral irrigation line. The 1806 model features a side inlet for connection. Use appropriate fittings and thread sealant to ensure a watertight connection.
- Install Nozzle: Remove the pre-installed flush plug. Screw the desired Rain Bird nozzle onto the riser stem. Hand-tighten only.
- Adjust Alignment: Once the nozzle is installed, the two-piece ratchet mechanism allows for easy alignment of the spray pattern. Rotate the top of the sprinkler to direct the spray as needed.
- Backfill: Carefully backfill the trench, ensuring the top of the spray head is flush with the ground level to prevent tripping hazards and allow for proper pop-up and retraction.
- Test System: Turn on the water supply to the irrigation zone and check for leaks and proper spray pattern coverage. Make any necessary adjustments.
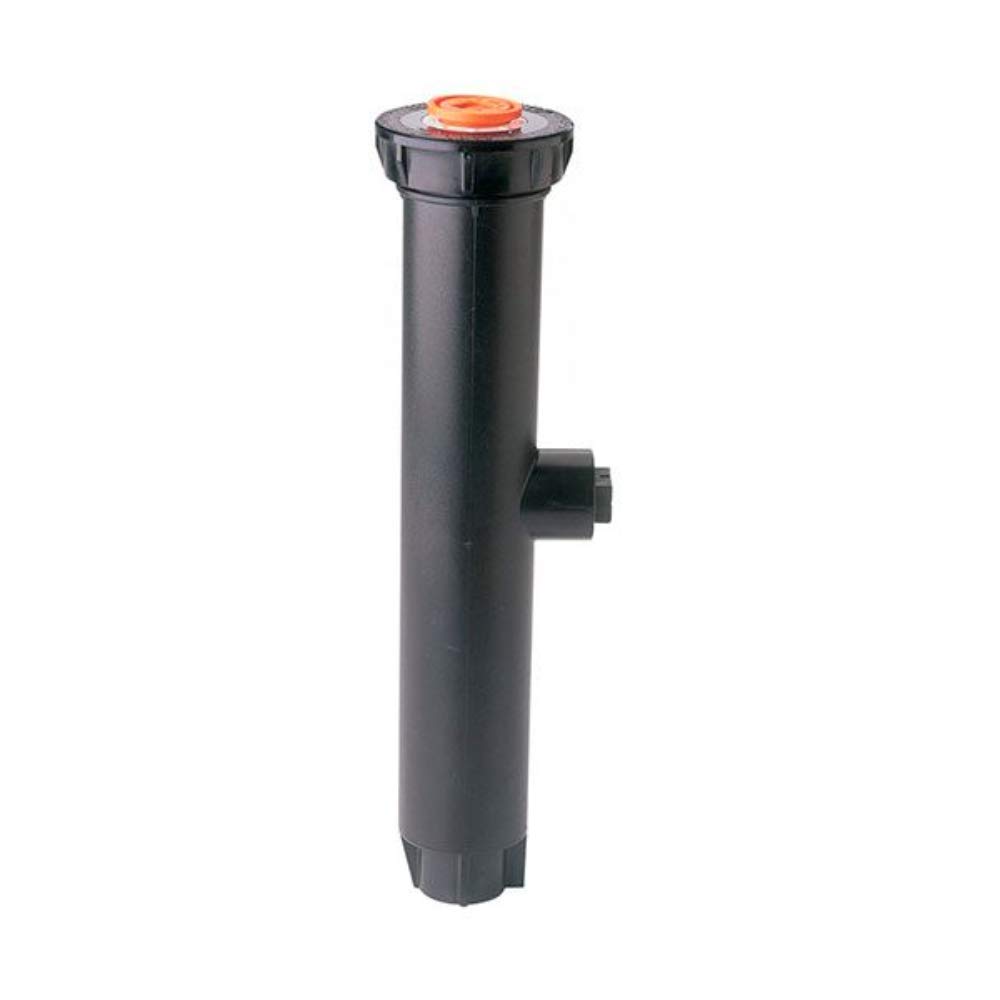
Image: Rain Bird 1806 Spray Head. This image shows the compact design and the side inlet connection point of the sprinkler head.
Operation
The Rain Bird 1806 spray head operates automatically when water pressure is supplied to the irrigation zone. The internal spring mechanism causes the riser to pop up when pressurized and retract flush with the ground when the water is turned off.
- Water Pressure: Ensure your irrigation system operates within the recommended pressure range for optimal nozzle performance. The maximum flow rate for this unit is 15 gallons per minute.
- Nozzle Adjustment: If your nozzle allows for arc or radius adjustment, refer to the specific nozzle's instructions. The 1806 body itself provides a ratcheting mechanism for directional alignment.
Maintenance
Regular maintenance helps ensure the longevity and efficient operation of your spray heads.
- Wiper Seal Inspection: Periodically inspect the co-molded wiper seal for any signs of wear or damage. While designed for durability, extreme conditions or debris can affect it.
- Debris Removal: If the spray head is not popping up or retracting properly, carefully unscrew the top cap and remove any accumulated dirt or debris from around the riser stem and internal components.
- Winterization: In regions subject to freezing temperatures, it is essential to properly winterize your irrigation system, including blowing out the lines with compressed air, to prevent damage to the spray heads and piping.
Troubleshooting
Here are some common issues and their potential solutions:
| Problem | Possible Cause | Solution |
|---|---|---|
| Sprinkler head not popping up. | Low water pressure, debris in the riser, damaged spring. | Check system pressure. Clean debris from inside the sprinkler body. Replace the spray head if the spring is damaged. |
| Water leaking from the top of the head. | Damaged wiper seal, debris under the seal. | Clean or replace the wiper seal. |
| Uneven spray pattern. | Clogged nozzle, incorrect nozzle, low pressure. | Clean or replace the nozzle. Check system pressure. |
| Head not retracting fully. | Debris around the riser, soil buildup, damaged spring. | Clear debris and soil. Replace the spray head if the spring is damaged. |
Specifications
| Feature | Detail |
|---|---|
| Model Number | 1806 |
| Inlet Connection Size | 6 Inches (Side Inlet) |
| Material | Plastic, Stainless Steel |
| Style | Pop Up |
| Maximum Flow Rate | 15 Gallons Per Minute |
| Product Dimensions (L x W x H) | 9.89 x 2.25 x 2.25 inches |
| Item Weight | 3.2 ounces |
| UPC / GTIN | 753800000410 |
Warranty Information
Rain Bird products are manufactured to high-quality standards and are backed by a manufacturer's warranty. For specific warranty terms and conditions applicable to your 1806 spray head, please refer to the official Rain Bird website or contact their customer support. Keep your proof of purchase for warranty claims.
Customer Support
If you require further assistance, have questions about your Rain Bird 1806 spray head, or need to troubleshoot an issue not covered in this manual, please contact Rain Bird customer support. Visit the official Rain Bird website for contact information, FAQs, and additional resources.
You can often find support resources at: www.rainbird.com


