
1. Product Overview
The Tork SmartOne Toilet Roll Dispenser T8 is designed for high-traffic washrooms, offering a modern and efficient solution for toilet paper dispensing. This wall-mounted unit utilizes single-sheet dispensing to help reduce paper consumption and improve hygiene. Its robust design and locking feature help prevent pilferage and ensure durability.

Image 1.1: Front view of the Tork SmartOne Toilet Roll Dispenser. This image shows the dispenser in its closed, wall-mounted position, highlighting its sleek white design and the Tork SmartOne branding.
Key Features:
- Single-Sheet Dispensing: Reduces paper consumption and improves hygiene by allowing users to touch only the paper they take.
- High Capacity: Designed to accommodate large Tork SmartOne T8 toilet rolls, minimizing refill frequency.
- Robust Design: Constructed from durable plastic for longevity in demanding environments.
- Locking Mechanism: Helps prevent unauthorized access and pilferage.
- Wall-Mounted: Space-saving and secure installation.
2. Setup and Installation
Proper installation ensures optimal performance and security of your Tork SmartOne dispenser. This dispenser is designed for wall mounting.
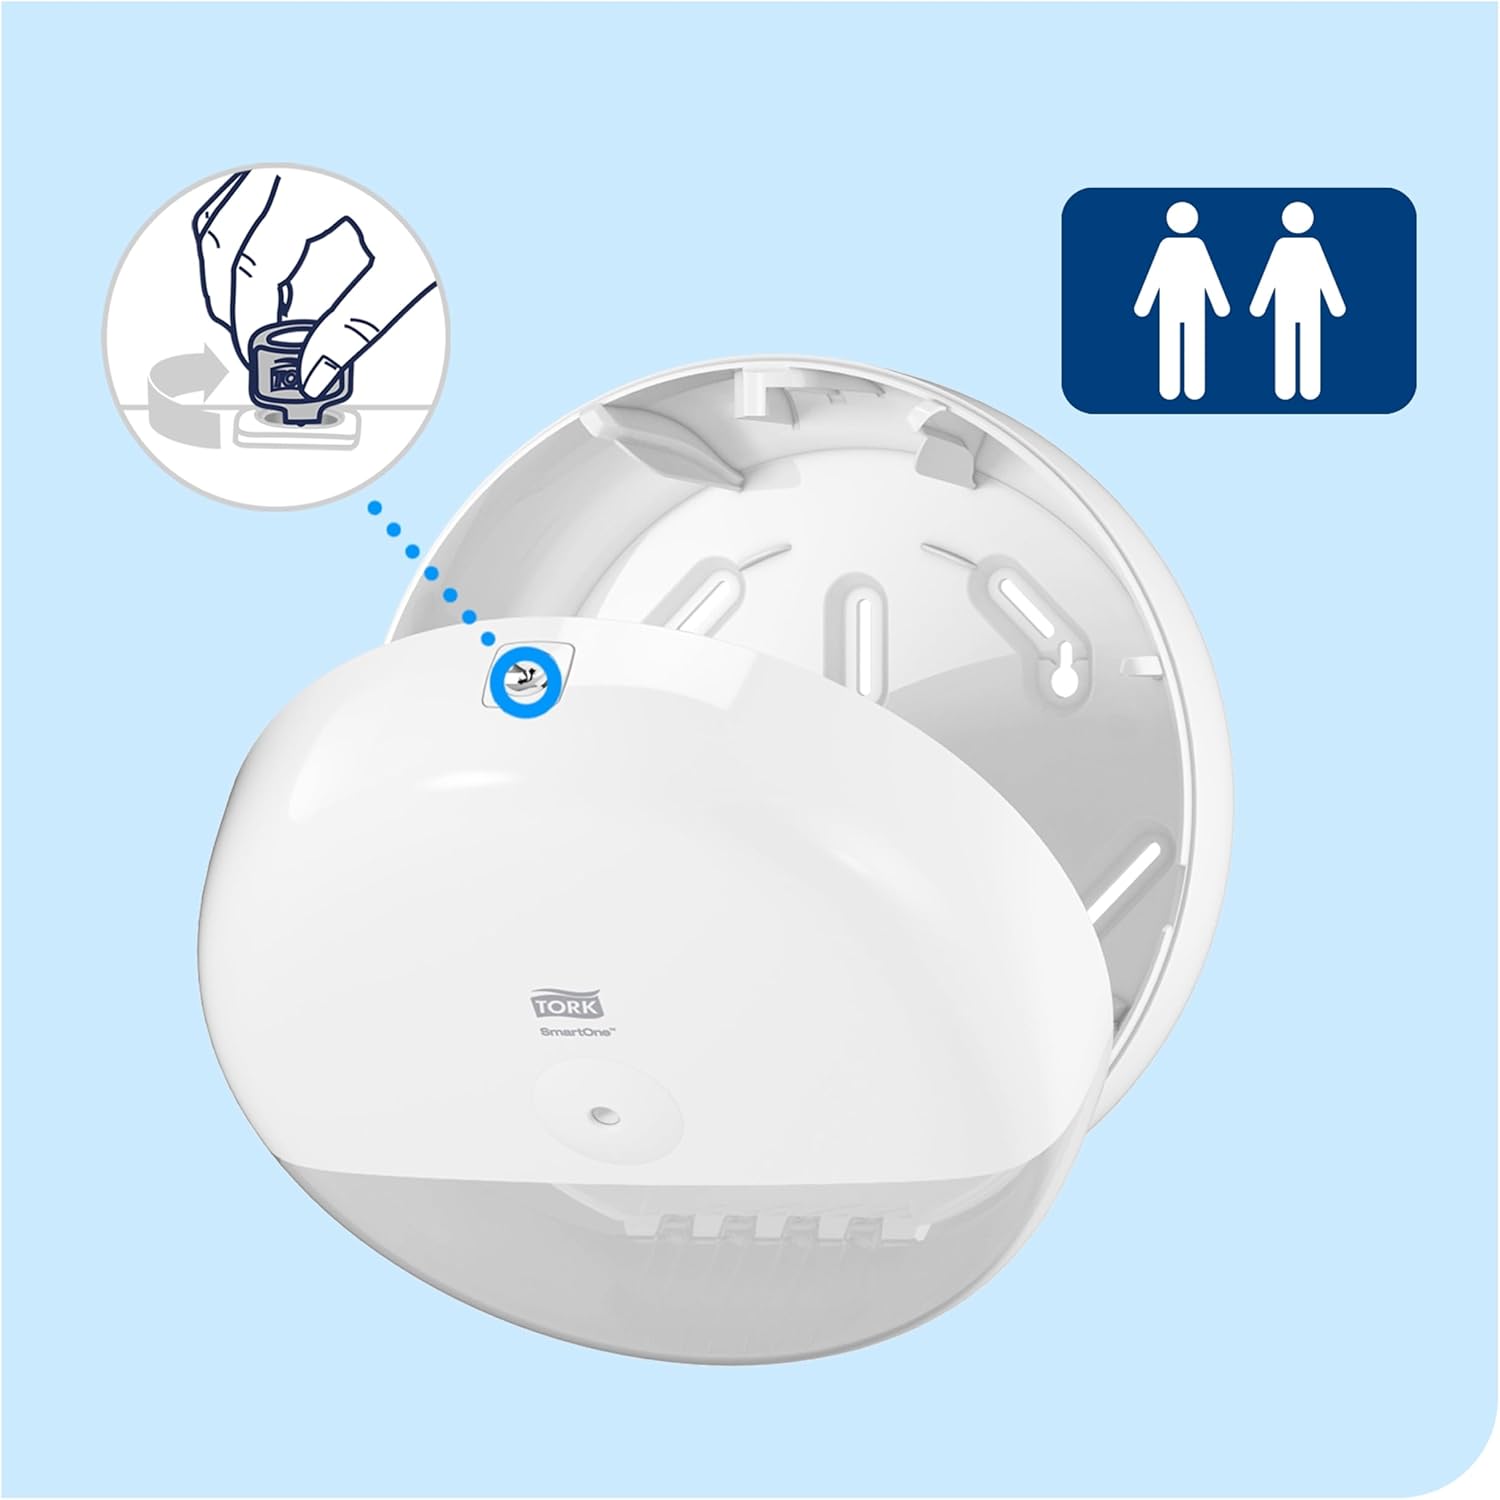
Image 2.1: The Tork SmartOne Dispenser shown open, revealing the internal structure, mounting points, and the keyhole for access. This view is essential for understanding the installation process.
Installation Steps:
- Select Location: Choose a suitable wall location, ensuring it is at an appropriate height and clear of obstructions.
- Open Dispenser: Use the provided key to unlock and open the dispenser cover.
- Mark Drilling Points: Hold the dispenser base against the wall at the desired height. Use a pencil to mark the positions for the mounting screws through the designated holes on the back plate.
- Drill Holes: Drill holes at the marked positions. Ensure the drill bit size is appropriate for the wall plugs (if required for your wall type).
- Insert Wall Plugs: Insert wall plugs into the drilled holes, if necessary.
- Mount Dispenser: Align the dispenser with the drilled holes and secure it to the wall using appropriate screws. Ensure the dispenser is firmly attached and level.
- Close Dispenser: Once mounted, the dispenser is ready for roll loading.
3. Operating Instructions
This section details how to load the toilet roll and how the single-sheet dispensing mechanism operates.

Image 3.1: A person demonstrating the refilling process of the Tork SmartOne Dispenser, showing the insertion of a new toilet roll and the SmartCore removal. This image illustrates the ease of loading.
Loading the Toilet Roll:
- Open Dispenser: Use the key to unlock and open the dispenser cover.
- Remove Empty Core (if applicable): If an empty roll is present, remove its core. The Tork SmartOne system features SmartCore removal for easy disposal.
- Insert New Roll: Place a new Tork SmartOne T8 toilet roll onto the central spindle. Ensure the paper feeds from the bottom of the roll towards the dispensing opening.
- Feed Paper: Gently pull the leading edge of the paper through the dispensing mechanism until it is visible at the outlet.
- Close Dispenser: Close the dispenser cover and lock it with the key.

Image 3.2: Packaging of Tork SmartOne Toilet Rolls, indicating compatibility with the T8 system. This image confirms the correct type of refill rolls required for the dispenser.
Single-Sheet Dispensing:
- The dispenser is designed to release one sheet of toilet paper at a time when pulled from the opening.
- This mechanism helps control consumption and ensures users only touch the paper they intend to use, promoting better hygiene.
4. Maintenance
Regular cleaning and maintenance will ensure the longevity and hygienic operation of your Tork SmartOne dispenser.
- Cleaning: Wipe the exterior of the dispenser with a soft cloth dampened with a mild cleaning solution. Avoid abrasive cleaners or solvents that could damage the plastic finish.
- Interior Cleaning: Periodically open the dispenser and wipe down the interior surfaces to remove any dust or paper residue.
- Inspection: Regularly check the dispenser for any signs of damage or wear. Ensure the locking mechanism functions correctly.
5. Troubleshooting
If you encounter issues with your Tork SmartOne dispenser, refer to the following common problems and solutions:
| Problem | Possible Cause | Solution |
|---|---|---|
| Paper not dispensing | Roll is empty or jammed; paper not properly fed through mechanism. | Open dispenser, check if roll needs replacement. Ensure paper is correctly threaded and not jammed. |
| Dispenser not locking | Key mechanism obstructed; cover not fully closed. | Ensure the cover is completely closed and aligned. Check for any debris obstructing the lock. |
| Excessive paper usage | Incorrect paper type used. | Ensure only Tork SmartOne T8 toilet rolls are used, as they are designed for single-sheet dispensing. |
6. Specifications
Detailed specifications for the Tork SmartOne Toilet Roll Dispenser Model 680000:
| Attribute | Value |
|---|---|
| Brand | Tork |
| Model Number | 680000 |
| Material | Plastic |
| Color | White |
| Installation Type | Wall-Mounted |
| Product Dimensions | 4.15 x 2.42 x 0.99 inches (10.54 x 6.15 x 2.51 cm) |
| Item Weight | 1.71 pounds (0.78 Kilograms) |
| Compatible Refills | Tork SmartOne T8 Toilet Rolls |
7. Warranty and Support
For warranty information, please refer to the documentation provided with your purchase or contact the retailer from whom you purchased the Tork SmartOne dispenser. Specific warranty terms may vary by region and retailer.
For additional support, product information, or to explore other Tork products, please visit the official Tork website or the Tork Store on Amazon:


