1. Introduction
This user manual provides comprehensive instructions for the safe and efficient installation, operation, and maintenance of your ACOVA ACA50040040 Cotona 1000 Watts Electric Fluid Inertia Radiator. Please read this manual thoroughly before installation and use, and retain it for future reference. Proper adherence to these instructions will ensure optimal performance and longevity of your appliance.
2. Safety Instructions
Always observe the following safety precautions to prevent personal injury or damage to the appliance:
- Ensure the power supply voltage matches the rating specified on the radiator's label.
- Do not operate the radiator with a damaged cord or plug. Contact qualified personnel for repairs.
- Keep flammable materials, such as curtains and furniture, at a safe distance from the radiator.
- Do not cover the radiator, as this can lead to overheating.
- Avoid placing the radiator directly below an electrical outlet.
- This appliance is not intended for use by persons (including children) with reduced physical, sensory or mental capabilities, or lack of experience and knowledge, unless they have been given supervision or instruction concerning use of the appliance by a person responsible for their safety.
- Children should be supervised to ensure that they do not play with the appliance.
- Disconnect the power supply before cleaning or performing any maintenance.
3. Product Overview
The ACOVA ACA50040040 Cotona is a 1000 Watts electric fluid inertia radiator designed for efficient and comfortable heating. It features an aluminum body, a thermoactive fluid for gentle and homogeneous heat distribution, and an integrated LCD screen for control.

Figure 1: Front view of the ACOVA ACA50040040 Cotona Electric Fluid Inertia Radiator. This image displays the radiator's white aluminum panels and the integrated control panel on the right side.

Figure 2: Close-up view of the LCD control panel. The panel shows a digital temperature display (19.0°C), mode buttons (+, -, MODE, RESET), and a power button, along with indicators for programming and consumption.
4. Setup and Installation
Installation of this electric radiator should be performed by a qualified electrician or competent person in accordance with local wiring regulations and building codes.
4.1. Unpacking
Carefully remove the radiator from its packaging. Inspect for any signs of damage. Retain packaging materials for potential future transport or return.
4.2. Mounting Location
Choose a suitable wall location, ensuring sufficient clearance from furniture, curtains, and other obstructions. The radiator should be mounted securely to a solid wall structure.
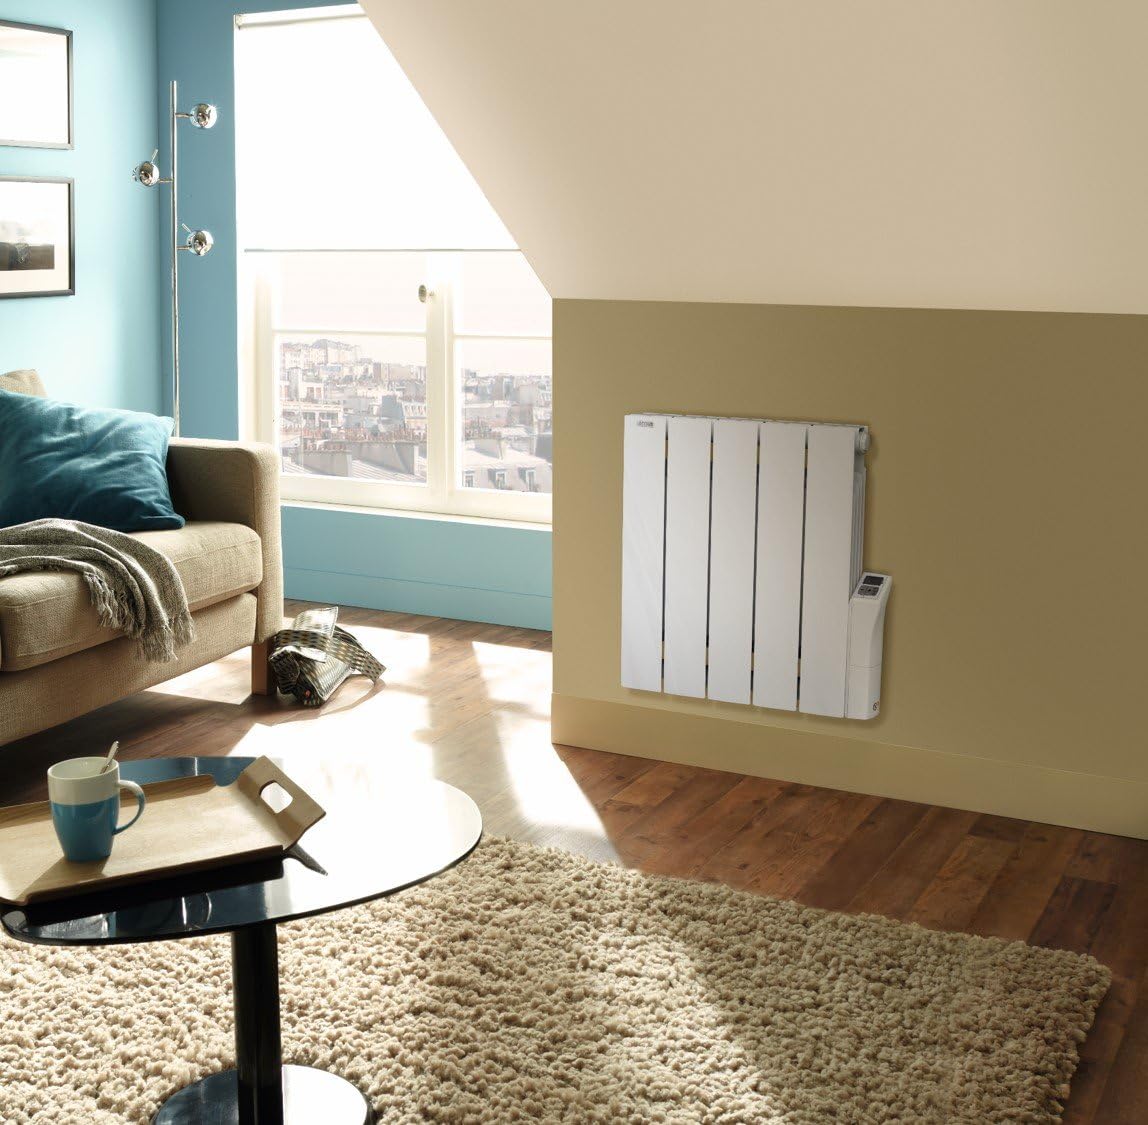
Figure 3: The ACOVA ACA50040040 radiator installed on a wall in a living space, demonstrating typical placement and size relative to a room.
4.3. Electrical Connection
Connect the radiator to a dedicated electrical circuit as per the manufacturer's instructions and local electrical codes. Ensure proper grounding. Do not use extension cords.
5. Operating Instructions
The ACOVA ACA50040040 radiator features an intuitive LCD control panel for easy operation.
5.1. Power On/Off
Press the Power button (usually marked with a circle and vertical line symbol) on the control panel to turn the radiator on or off.
5.2. Temperature Adjustment
Use the + and - buttons to increase or decrease the desired room temperature. The set temperature will be displayed on the LCD screen.
5.3. Programming Modes
The radiator offers both pre-recorded and customizable programs:
- Pre-recorded Programs: Press the MODE button to cycle through available pre-set heating schedules. Refer to the on-screen indicators for program selection.
- Free Programs: Consult the detailed programming section in the manufacturer's full manual (not included here) for instructions on creating and saving custom heating schedules.
5.4. Digital Consumption Indicator
The LCD screen includes a digital consumption indicator. This feature provides an estimate of the radiator's energy usage, allowing for better energy management. Refer to the display for real-time or accumulated consumption data.
5.5. Window Open/Close Detector
This radiator is equipped with a window open/close detector. If a sudden drop in temperature is detected (indicating an open window), the radiator may temporarily reduce its output to conserve energy. Normal operation resumes once the window is closed or after a set period.
6. Maintenance
Regular maintenance ensures the efficient and safe operation of your radiator.
6.1. Cleaning
Before cleaning, ensure the radiator is switched off and disconnected from the power supply. Allow it to cool completely. Wipe the exterior surfaces with a soft, damp cloth. Do not use abrasive cleaners, solvents, or harsh chemicals, as these can damage the finish. Ensure no liquid enters the control panel or electrical components.
6.2. Inspection
Periodically inspect the power cord and plug for any signs of damage. If damage is found, discontinue use and contact a qualified technician for repair.
7. Troubleshooting
If you encounter issues with your radiator, refer to the following common problems and solutions:
| Problem | Possible Cause | Solution |
|---|---|---|
| Radiator does not heat | No power supply; Power button off; Thermostat set too low; Window detector activated. | Check power connection and circuit breaker; Press power button; Increase set temperature; Close windows/doors. |
| Radiator is not heating efficiently | Radiator covered; Room too large for wattage; Drafts. | Remove any covers; Ensure radiator wattage is appropriate for room size; Seal drafts. |
| LCD screen is blank | No power supply; Radiator is off. | Check power connection; Press power button. |
If the problem persists after attempting these solutions, contact a qualified service technician.
8. Specifications
| Feature | Specification |
|---|---|
| Brand | Acova |
| Model Reference | ACA50040040 |
| Color | Cotona |
| Power Output | 1000 Watts |
| Material | Aluminum |
| Heating Type | Electric Fluid Inertia |
| Control Type | LCD Screen |
| Included Components | Electric fluid radiator |
| Batteries Required | No |
| Weight | 11 Kilograms |
| ASIN | B01G6HQP86 |
| First Available Date | 25 May 2016 |
9. Warranty and Support
For detailed warranty information, please refer to the official documentation provided with your product at the time of purchase or visit the ACOVA official website. Keep your proof of purchase for warranty claims.
For technical support, service, or spare parts, please contact your retailer or an authorized ACOVA service center. Do not attempt to repair the appliance yourself.


