
1. Introduction
This instruction manual provides detailed information for the proper installation, operation, and maintenance of the Ford DG1Z-13008-A Headlamp Assembly. This genuine Ford part is designed for specific Ford Taurus models, ensuring optimal fit and performance.
Product Compatibility:
- Vehicle: Ford Taurus
- Model Years: 2013, 2014, 2015, 2016
- Side: Right Hand (RH), Passenger Side (Front-Right)
Please read this manual thoroughly before proceeding with installation or any maintenance procedures.

Figure 1.1: Front view of the Ford DG1Z-13008-A Headlamp Assembly. This image displays the clear polycarbonate lens, integrated turn signal, and main headlamp projector, characteristic of the passenger side unit.
2. Safety Information
Always prioritize safety when working on your vehicle. Failure to follow safety precautions may result in injury or damage to the vehicle.
- Disconnect Battery: Before beginning any electrical work, disconnect the vehicle's negative battery terminal to prevent electrical shock or short circuits.
- Wear Protective Gear: Always wear safety glasses and gloves to protect against debris and sharp edges.
- Vehicle Stability: Ensure the vehicle is parked on a level surface with the parking brake engaged. If lifting the vehicle, use appropriate jack stands.
- Hot Components: Allow the engine and existing headlamp bulbs to cool down before handling to avoid burns.
- Professional Installation: If you are not comfortable performing this installation, it is recommended to seek assistance from a qualified automotive technician.
3. Package Contents
Upon opening the package, verify that all components are present and undamaged. The standard package for the Ford DG1Z-13008-A Headlamp Assembly typically includes:
- One (1) Ford DG1Z-13008-A Headlamp Assembly (Right Hand, Passenger Side)
- Note: Bulbs and wiring harnesses may be included or sold separately depending on the specific product offering. Refer to your purchase details.

Figure 3.1: Exploded view diagram illustrating the headlamp assembly and its individual components, including various bulbs and sockets. Part #1 represents the main headlamp assembly housing.
4. Setup and Installation
This section outlines the general steps for replacing a headlamp assembly. Specific procedures may vary slightly depending on your vehicle's trim level and any aftermarket modifications.
4.1. Tools Required (Typical)
- Socket wrench set
- Screwdriver set (Phillips and flathead)
- Plastic trim removal tools
- Safety glasses and gloves
4.2. Installation Steps
- Preparation: Park the vehicle on a level surface, engage the parking brake, and turn off the engine. Disconnect the negative terminal of the vehicle's battery.
- Access the Headlamp: Depending on your Ford Taurus model year, it may be necessary to partially remove the front bumper cover, grille, or fender liner to gain full access to the headlamp assembly mounting bolts. Use appropriate trim removal tools to avoid damage.
- Disconnect Wiring: Locate and disconnect all electrical connectors attached to the rear of the existing headlamp assembly. This typically includes connectors for the main headlamp, turn signal, and any auxiliary lights.
- Remove Old Assembly: Identify and remove the mounting bolts or clips securing the headlamp assembly to the vehicle frame. Carefully pull the old headlamp assembly out of its housing.
- Transfer Components (if necessary): If your new headlamp assembly does not include bulbs or specific bulb sockets, carefully transfer them from the old assembly to the new one. Ensure bulbs are handled by their base to avoid contamination from skin oils.
- Install New Assembly: Position the new Ford DG1Z-13008-A Headlamp Assembly into the vehicle's housing. Ensure it seats correctly and align the mounting points. Secure the assembly with the previously removed bolts or clips. Do not overtighten.
- Connect Wiring: Reconnect all electrical connectors to the corresponding ports on the new headlamp assembly. Ensure connections are secure and fully seated.
- Reassemble Vehicle: Reinstall any bumper covers, grilles, or fender liners that were removed to access the headlamp.
- Reconnect Battery: Reconnect the negative battery terminal.
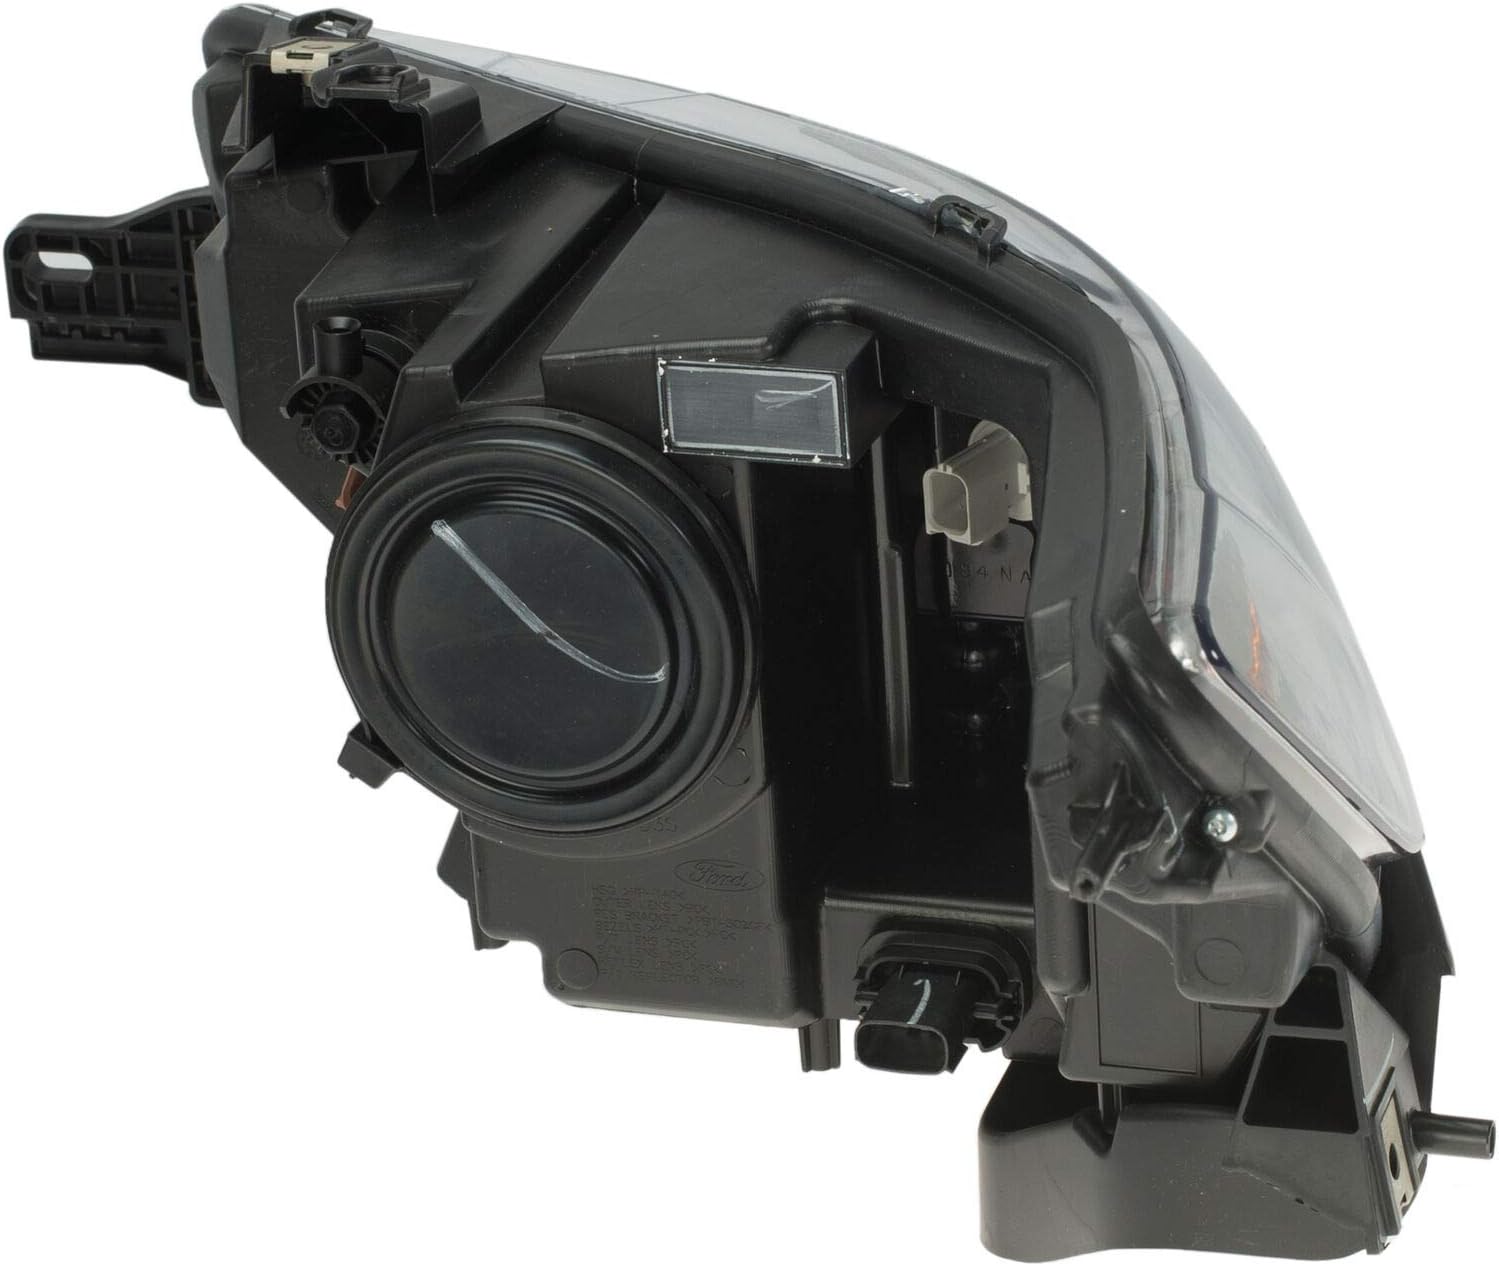
Figure 4.1: Rear view of the headlamp assembly, illustrating the locations of the electrical connectors and access points for bulb replacement. These points are crucial during installation and maintenance.
5. Operating
After installation, it is important to verify the proper function and alignment of the headlamp assembly.
5.1. Functional Check
- Turn on the vehicle's ignition and activate the headlamps.
- Verify that both low beam and high beam functions operate correctly.
- Check the operation of the turn signal and any other integrated lights.
5.2. Headlamp Aiming
Proper headlamp aiming is critical for safe driving and to avoid blinding oncoming traffic. If the headlamp aim appears incorrect after installation, it should be adjusted.
- Refer to your vehicle's owner's manual for specific headlamp aiming procedures and specifications.
- Typically, aiming involves parking the vehicle on a level surface facing a wall at a specified distance and adjusting screws on the headlamp assembly to align the light beam.
- If unsure, have the headlamps professionally aimed.
6. Maintenance
Regular maintenance helps ensure the longevity and optimal performance of your headlamp assembly.
6.1. Cleaning the Lens
- Clean the exterior of the headlamp lens regularly with a soft cloth and mild automotive soap or glass cleaner.
- Avoid abrasive cleaners or harsh chemicals, as these can damage the polycarbonate lens material.
6.2. Bulb Replacement
If a bulb fails, it can typically be replaced without removing the entire headlamp assembly. Access is usually from the rear of the assembly.
- Identify Bulb Type: Consult your vehicle's owner's manual or the existing bulb for the correct replacement bulb type (e.g., H11 for low beam, 9005 for high beam).
- Access Bulb: Disconnect the electrical connector from the bulb socket. Twist or unclip the bulb socket from the headlamp assembly.
- Remove and Replace: Carefully remove the old bulb. Insert the new bulb, ensuring it is properly seated. Avoid touching the glass of the new bulb with bare hands.
- Reassemble: Reinstall the bulb socket into the headlamp assembly and reconnect the electrical connector.
7. Troubleshooting
This section addresses common issues you might encounter with your headlamp assembly.
| Problem | Possible Cause | Solution |
|---|---|---|
| Headlamp not working | Blown bulb, loose electrical connection, blown fuse, faulty wiring. | Check and replace bulb. Ensure all electrical connectors are secure. Inspect vehicle fuse box and replace blown fuse. Consult a technician for wiring issues. |
| Dim or poor light output | Dirty lens, incorrect bulb type, misaligned headlamp. | Clean the headlamp lens. Verify correct bulb type is installed. Adjust headlamp aim (refer to Section 5.2). |
| Condensation inside headlamp | Normal temperature/humidity changes, seal compromise. | Minor condensation that dissipates quickly is normal. If excessive or persistent, check for cracks in the housing or improper sealing. Consult a technician if seals are compromised. |
| Flickering headlamp | Loose electrical connection, faulty bulb, voltage fluctuation. | Check and secure all electrical connections. Replace the bulb. Consult a technician for electrical system diagnosis. |
8. Specifications
Key technical specifications for the Ford DG1Z-13008-A Headlamp Assembly:
- Brand: Ford
- Model Number: DG1Z-13008-A
- OEM Part Number: DG1Z-13008-A
- Specific Uses For Product: Head Lights
- Vehicle Service Type: Car
- Automotive Fit Type: Vehicle Specific Fit
- Lens Material: Polycarbonate
- Lens Color: Clear
- Special Feature: Waterproof
- Assembly Required: No (refers to the headlamp unit itself, not its installation into the car)
- Item Weight: Approximately 14.9 ounces (0.42 kg)
9. Warranty and Support
For warranty information, please refer to the terms and conditions provided by your original point of purchase or contact Ford customer service directly. Warranty coverage typically applies to manufacturing defects and does not cover damage resulting from improper installation, accidents, or normal wear and tear.
For technical support or further assistance, please contact your authorized Ford dealer or a certified automotive service center.