
Introduction
This manual provides detailed instructions for replacing the De'Longhi 7313286129 Valve and associated pump in compatible De'Longhi espresso machines. This is an authorized OEM replacement part designed to restore proper function to your appliance, addressing issues such as low pressure or improper water flow.
Safety Information
- Always unplug the espresso machine from the power outlet before performing any maintenance or repair.
- Allow the machine to cool completely before handling internal components.
- Wear appropriate personal protective equipment, such as gloves and eye protection, if necessary.
- If you are unsure about any step, consult a qualified technician.
Tools Required
- T20 Security Torx bit (with a hole in the center)
- Small pick tool
- Small pliers
- Phillips head screwdriver
- Replacement spring clamp (if original steam hose clamp is damaged)
Disassembly Instructions
Follow these steps carefully to disassemble your De'Longhi espresso machine and access the valve and pump for replacement.
- Remove Rear Screws: Locate and remove the two screws on the back of the machine using a Phillips head screwdriver.
- Remove Top Cover: Lift the rear of the top cover and slide it backward to detach. Disconnect the ribbon cable and remove the steam handle.
- Remove Steam Hose: Carefully remove the crimp clamp securing the steam hose. A pick tool and pliers may be needed. If the clamp is damaged, a replacement will be required during reassembly.
- Remove Internal Screws: Unfasten approximately eight screws located inside the machine's top section.
- Remove Bottom Cover: Turn the machine over. Remove the six screws securing the bottom cover using the T20 Security Torx bit.
- Detach Water Inlet Line: With the bottom cover removed, unscrew the three Phillips head screws holding the water inlet line. Push out the inner assembly.
- Remove Overpressure Valve: Locate the overpressure valve. Remove the retention clip on its outlet using a pick tool. The line will then pull out.
- Separate Valve from Pump: The valve is now free from lines. Unscrew it from the pump.
- Retrieve O-ring: Carefully remove the small O-ring located inside the outlet port of the old valve. This O-ring will need to be reused with the new valve.
- Remove Pump: The pump can now be pulled straight out. Detach the inlet line and spring, power connections, and the thermistor located behind them.
- Remove Silicone Sleeve: The pump is housed within a silicone sleeve. Gently pull the sleeve off the pump.
Installation Instructions
Reassemble the machine by reversing the disassembly steps. Pay close attention to the following details:
- Install New Pump: Place the new pump into the silicone sleeve and secure it in its housing. Reattach the thermistor, power connections, and the inlet line with its spring.
- Attach New Valve: Screw the new De'Longhi 7313286129 Valve onto the pump. Ensure the previously removed O-ring is correctly seated in the outlet port of the new valve.
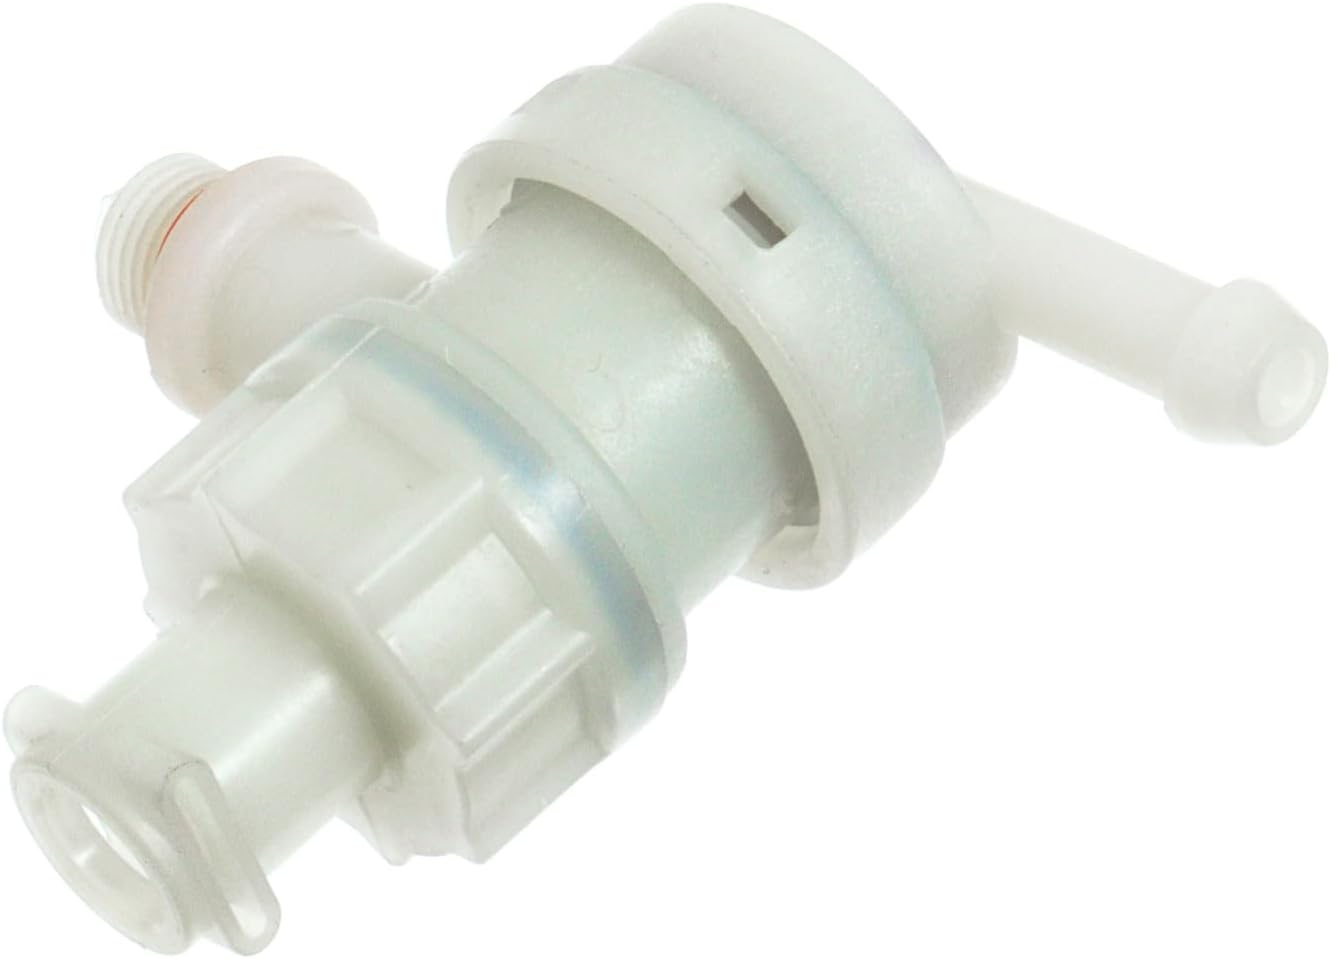
Figure 1: The De'Longhi 7313286129 Valve, an essential component for proper water pressure and flow in compatible espresso machines.

Figure 2: Side view of the De'Longhi 7313286129 Valve, showing its connection points.

Figure 3: Close-up of the De'Longhi 7313286129 Valve, highlighting the O-ring location for secure sealing.

Figure 4: Angled view of the De'Longhi 7313286129 Valve, illustrating its compact design.
- Reattach Water Inlet Line: Push the inner assembly back into place and secure the water inlet line with its three Phillips head screws.
- Reattach Bottom Cover: Secure the bottom cover with the six T20 Security Torx screws.
- Reattach Steam Hose: Secure the steam hose with a new or reused clamp.
- Reattach Top Cover: Connect the ribbon cable, reattach the steam handle, and slide the top cover into place, ensuring it clicks securely.
- Replace Water Reservoir: Place the water reservoir back into its designated location.
Testing After Repair
After reassembly, perform a test run to ensure proper functionality:
- Fill the water reservoir.
- Plug in the machine and power it on.
- Run a cycle without coffee to check for leaks and proper water flow.
- If no issues are detected, proceed with brewing coffee to confirm pressure and extraction.
Troubleshooting Common Issues
- Low or No Water Flow: If the machine produces only a "sad little dribble" or no water at all, re-check the installation of the new valve and pump. Ensure all connections are secure and the O-ring is properly seated.
- Leaking: Leaks often indicate an improperly seated O-ring or loose connections. Disassemble the relevant section and re-secure components.
- Unbrewed Coffee Puck: If the coffee puck is soupy and unbrewed, it suggests insufficient pressure, which could be related to the valve or pump. Verify the correct installation of both components.
Specifications
| Part Number | 7313286129 |
| Brand | De'Longhi |
| Material | Brass |
| Item Dimensions (L x W x H) | 5 x 3 x 1 inches |
| Item Weight | 0.96 ounces |
| Inlet Connection Type | Compression |
| Outlet Connection Type | Compression |
| Number of Ports | 1 |
| Specification Met | CSA, ETL |
Warranty and Support
As an authorized aftermarket product, this De'Longhi valve is designed to meet original equipment specifications. For specific warranty details regarding this replacement part or for further technical support, please refer to the documentation provided with your purchase or contact De'Longhi customer service directly.
You can visit the official De'Longhi store for more information: De'Longhi Store