1. Introduction
This manual provides detailed instructions for the safe and effective operation of the OWON XDS3102 Digital Oscilloscope. The XDS3102 is a versatile 4-in-1 instrument, combining the functions of a digital storage oscilloscope, datalogger, multimeter, and waveform generator. It features a 100 MHz bandwidth, 1 GS/s sample rate, and an 8-bit resolution ADC for precise waveform analysis.
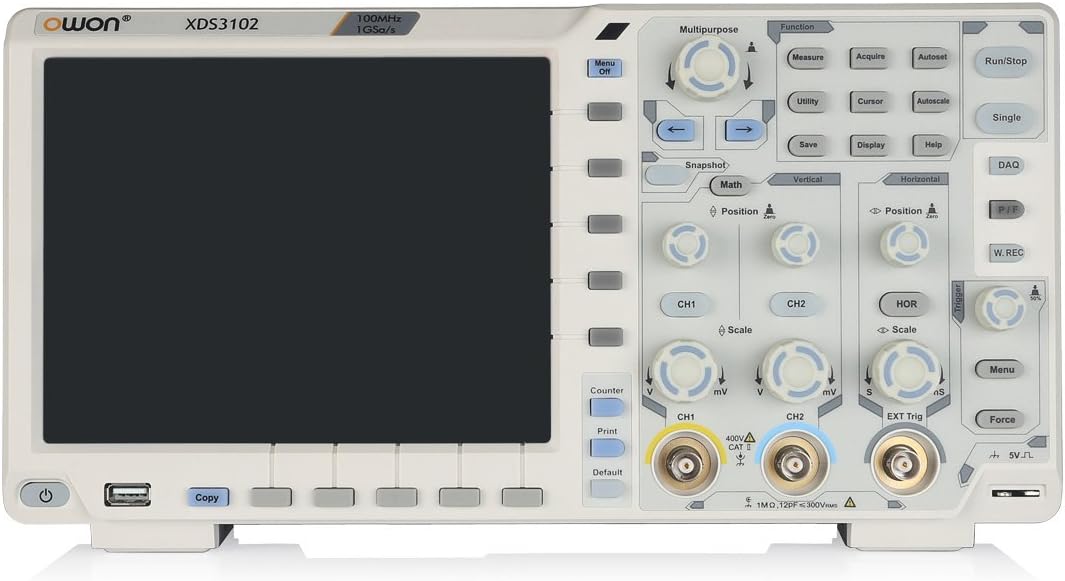
Figure 1: Front view of the OWON XDS3102 Digital Oscilloscope, showing the display, control panel, and input connectors.
2. Key Features
- Bandwidth: 100 MHz
- Sample Rate: 1 GS/s
- Resolution: 8-bit ADC for detailed waveform restoration
- Channels: 2
- Vertical Sensitivity: 1 mV/div - 10 V/div with low background noise
- Display: 8-inch 800 x 600 high-resolution LCD
- Multi-functionality: Digital Storage Oscilloscope, Datalogger, Multimeter, Waveform Generator
- Advanced Triggering: Xvisual multi-trigger functions
- Bus Decoding: Supports various bus decoding functions (optional: RS232, SPI, I2C, CAN)
3. Package Contents
Verify that all items listed below are present in the package:

Figure 2: OWON XDS3102 Oscilloscope with its standard accessories, including probes, power cord, USB cable, and software CD.
- OWON XDS3102 Digital Oscilloscope Unit
- Power Cord
- Software CD
- USB Cable
- Probe (1x)
- Probe Adjust Tool
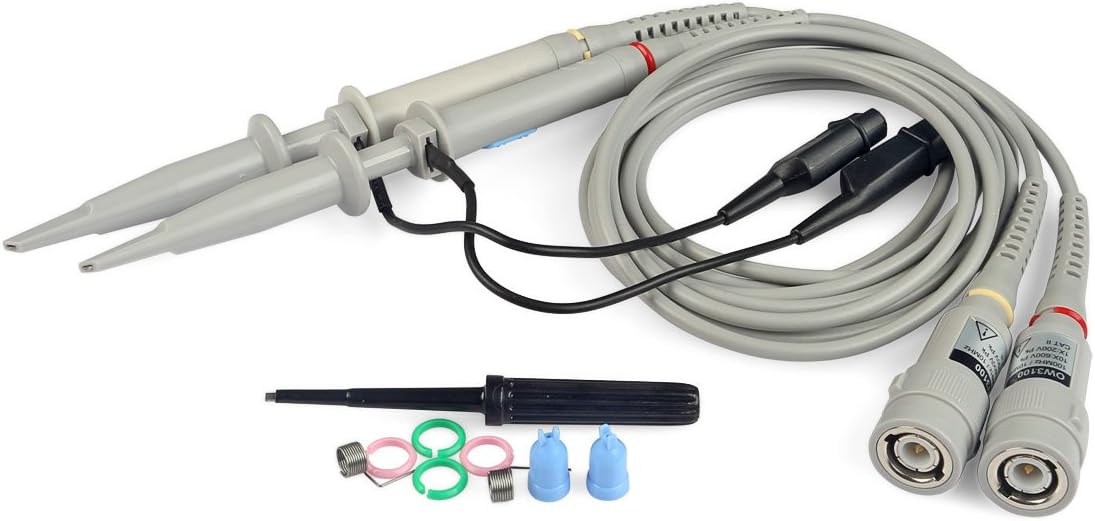
Figure 3: Close-up of the included oscilloscope probes and adjustment tool.
4. Setup
4.1 Power Connection
- Ensure the oscilloscope is placed on a stable, level surface with adequate ventilation.
- Connect the provided power cord to the AC power inlet on the rear panel of the oscilloscope.
- Plug the other end of the power cord into a grounded AC power outlet. The device supports 100V-240V, 50/60Hz.
- Press the power button located on the front panel to turn on the device.

Figure 4: Rear panel of the oscilloscope, highlighting the power input, USB device port, and LAN port.
4.2 Probe Connection
- Connect the BNC connector of the oscilloscope probe to the desired input channel (CH1 or CH2) on the front panel.
- Ensure the connection is secure.
- Attach the probe tip to the circuit point you wish to measure.
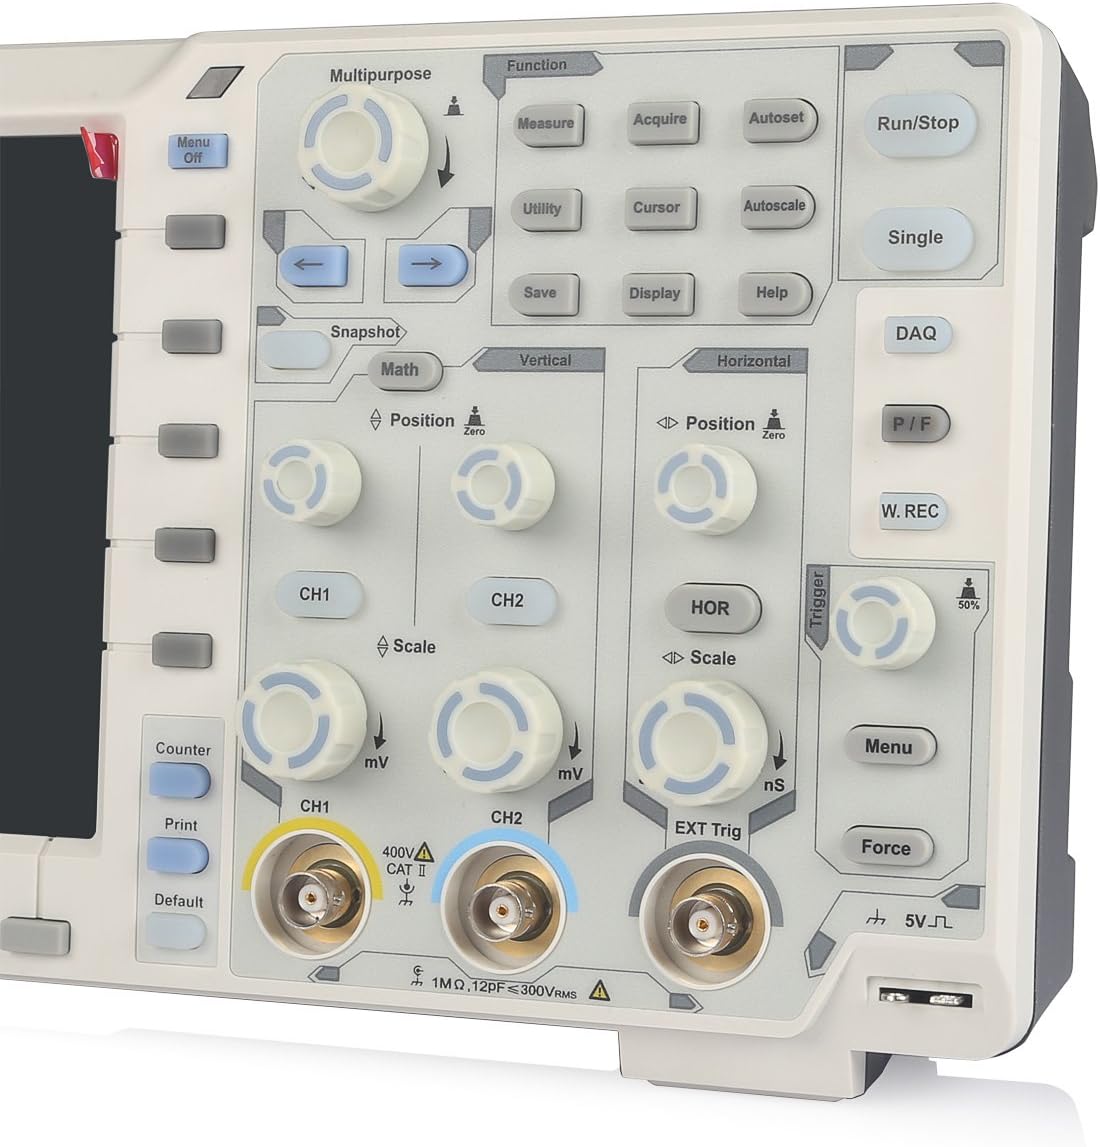
Figure 5: Detailed view of the front panel, showing CH1 and CH2 BNC input connectors and associated controls.
5. Operating Instructions
5.1 Basic Oscilloscope Operation
- Power On/Off: Use the power button on the lower left of the front panel.
- Autoset: Press the Autoset button to automatically adjust vertical, horizontal, and trigger settings for a stable waveform display.
- Vertical Controls (CH1/CH2): Use the Position knob to adjust vertical position and the Scale knob to adjust vertical sensitivity (V/div).
- Horizontal Controls: Use the Position knob to adjust horizontal position and the Scale knob to adjust time base (s/div).
- Trigger Controls: Adjust the trigger level using the dedicated knob. Press the Menu button in the trigger section to access trigger settings.
- Measurement: Press the Measure button to display automatic measurements of waveform parameters.
- Save: Use the Save button to store waveforms or settings.
5.2 Multi-functionality (Datalogger, Multimeter, Waveform Generator)
The XDS3102 can function as a Datalogger, Multimeter, and Waveform Generator. Access these functions via the Multipurpose or Function buttons on the control panel. Specific instructions for each mode are detailed in the full software manual provided on the included CD.
Optional Functions: The device supports various optional functions such as VGA+AV output, Wi-Fi connectivity, 1CH 25M waveform generator, DMM digital multimeter, capacitive touch screen, and decoding kits (RS232, SPI, I2C, CAN). These functions require additional modules or software and are not included in the standard package.
6. Maintenance
- Cleaning: Use a soft, dry cloth to clean the exterior of the oscilloscope. For stubborn dirt, a lightly dampened cloth with mild detergent can be used. Avoid abrasive cleaners or solvents.
- Storage: When not in use, store the oscilloscope in a clean, dry environment, away from direct sunlight and extreme temperatures.
- Probe Care: Handle probes carefully. Avoid bending or stressing the cables. Regularly check for damage to the probe tips and connectors.
- Internal Components: The device contains no user-serviceable components inside. Do not attempt to open the casing. Refer servicing to qualified personnel.

Figure 6: Close-up of the rear warning label, emphasizing not to open the device and to refer servicing to qualified personnel.
7. Troubleshooting
| Problem | Possible Cause | Solution |
|---|---|---|
| Device does not power on. | Power cord not connected; power outlet faulty; internal fuse blown. | Check power cord connection. Test power outlet. If problem persists, contact support. |
| No waveform displayed. | Probe not connected; input signal too small/large; trigger settings incorrect. | Ensure probe is connected to input and circuit. Use Autoset. Adjust vertical scale (V/div) and trigger level. |
| Unstable waveform. | Incorrect trigger settings; noisy signal. | Adjust trigger level and mode. Ensure proper grounding of the circuit and oscilloscope. |
| Display issues (e.g., flickering, no image). | Software glitch; hardware malfunction. | Restart the device. If problem persists, contact support. |
8. Specifications
| Specification | Value |
|---|---|
| Manufacturer | OWON |
| Model Number | XDS3102 |
| Item Weight | 7.38 pounds |
| Package Dimensions | 16.14 x 11.18 x 7.01 inches |
| Material | Plastic |
| Item Package Quantity | 1 |
| Batteries Included | No |
| Batteries Required | No |
| Voltage Range | 100V - 240V, 50/60Hz |
| Max Power | 15W |
| Optional Battery | 4.2V |
9. Warranty and Support
OWON products are designed for reliability and performance. For warranty information, please refer to the warranty card included with your product or visit the official OWON website. For technical support, troubleshooting assistance, or inquiries regarding optional features, please contact OWON customer service or your authorized dealer.
OWON Official Website: www.owon.com.cn


