1. Introduction
This manual provides comprehensive instructions for the proper installation, operation, and maintenance of the Eclipse 705-006-BK-20 BNC Connector for RG6/U. This professional-grade connector is designed for reliable signal transmission in various electrical and video applications, ensuring secure and high-quality connections.
2. Safety Information
Always adhere to the following safety guidelines when handling and installing the BNC connector:
- Disconnect Power: Always ensure that all power sources to the equipment are disconnected before beginning any installation or maintenance work.
- Use Proper Tools: Utilize appropriate crimping or compression tools designed for BNC connectors and RG6/U cables to ensure a secure and reliable connection.
- Inspect Components: Before installation, inspect the connector and cable for any signs of damage or defects. Do not use damaged components.
- Professional Assistance: If you are unsure about any step of the installation process, consult a qualified electrical professional.
- Environmental Conditions: Install connectors in dry, clean environments. Avoid exposure to moisture or extreme temperatures unless the product is specifically rated for such conditions.
3. Product Overview
The Eclipse 705-006-BK-20 is a high-quality BNC connector specifically designed for use with RG6/U coaxial cables. It features a robust construction for durability and a bayonet coupling mechanism for quick and secure connections.
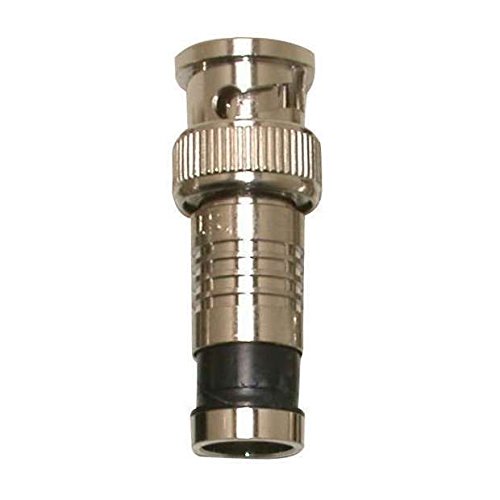
This image displays the Eclipse 705-006-BK-20 BNC Connector, a silver-colored coaxial connector with a black rubber boot at the base, designed for RG6/U cables. It features a bayonet coupling mechanism for secure connections.
4. Setup and Installation
Follow these steps to properly install the BNC connector onto an RG6/U coaxial cable:
- Prepare the Cable: Using a coaxial cable stripper, carefully strip the RG6/U cable to the recommended lengths for the center conductor, dielectric, and outer jacket, exposing the braided shield. Ensure the braid is folded back neatly over the outer jacket.
- Insert Center Conductor: Insert the prepared cable into the BNC connector, ensuring the center conductor slides fully into the connector's pin. The dielectric should butt up against the connector's internal stop.
- Crimp or Compress: Depending on the connector type (crimp or compression), use the appropriate tool. For crimp connectors, place the connector into the crimping tool and apply firm, even pressure until the crimp is complete. For compression connectors, place the connector into the compression tool and compress until the connector is fully seated onto the cable.
- Verify Connection: After installation, gently pull on the connector to ensure it is securely attached to the cable. There should be no movement or looseness.
5. Operating
Once the BNC connector is installed on the cable, connecting and disconnecting it is straightforward:
- Connecting: Align the two bayonet lugs on the BNC connector with the corresponding slots on the mating BNC receptacle. Push the connector onto the receptacle and then twist clockwise approximately a quarter turn until it locks securely into place.
- Disconnecting: To disconnect, twist the connector counter-clockwise approximately a quarter turn to unlock the bayonet mechanism. Then, pull the connector straight off the receptacle.
6. Maintenance
Proper maintenance ensures the longevity and performance of your BNC connectors:
- Cleaning: Keep the connector ends clean and free of dust, dirt, and debris. Use a soft, lint-free cloth. For stubborn grime, a small amount of isopropyl alcohol can be applied to the cloth, ensuring the connector is dry before use.
- Inspection: Periodically inspect the connector for any signs of wear, corrosion, or physical damage. Check for bent pins, cracked insulation, or loose connections.
- Storage: When not in use, store connectors in a clean, dry environment to prevent oxidation and damage.
7. Troubleshooting
If you experience issues with your BNC connection, consider the following troubleshooting steps:
- No Signal or Intermittent Signal:
- Ensure the connector is fully seated and locked onto the receptacle.
- Check the cable for any kinks, cuts, or damage along its length.
- Verify that the BNC connector was properly installed onto the cable (e.g., correct crimp/compression, no short circuits between center conductor and shield).
- Test with a known good cable and connector to isolate the problem.
- Loose Connection:
- Ensure the connector is twisted fully clockwise until it clicks into place.
- Inspect the bayonet lugs on the connector and the slots on the receptacle for damage or wear.
- Difficulty Connecting/Disconnecting:
- Check for any debris or foreign objects in the connector or receptacle.
- Ensure proper alignment before pushing and twisting. Do not force the connection.
8. Specifications
| Attribute | Detail |
|---|---|
| Manufacturer | Eclipse |
| Part Number | 705-006-BK-20 |
| Item Weight | 1.4 pounds |
| Package Dimensions | 8 x 5 x 3 inches |
| Item Model Number | 705-006-BK-20 |
| Size | One Size |
| Color | Multi |
| Item Package Quantity | 1 |
| Batteries Required? | No |
| ASIN | B01E9FU46G |
| Date First Available | April 14, 2016 |
9. Warranty and Support
For information regarding product warranty, technical support, or any other inquiries, please contact Eclipse Tools directly. You can typically find contact information and warranty details on the official Eclipse Tools website or through your product retailer.
Eclipse Tools is committed to providing professional quality products and exceptional support for electrical professionals.


