
Ariete 1389A
Contents
Ariete Espresso Vintage 1389 Coffee Machine User Manual
Model: 1389A
Introduction
Welcome to the Ariete Espresso Vintage 1389 Coffee Machine user manual. This guide provides essential information for the safe and efficient operation, maintenance, and troubleshooting of your new espresso machine. Please read all instructions carefully before first use and keep this manual for future reference.
The Ariete Espresso Vintage 1389 is designed to bring the authentic taste of Italian espresso and creamy cappuccinos to your home. Featuring an elegant vintage design, 15 bars of pressure, and an 850W aluminum boiler, it is compatible with both ground coffee and ESE pods.
Safety Instructions
Always follow basic safety precautions when using electrical appliances to reduce the risk of fire, electric shock, and/or injury to persons, including the following:
- Read all instructions.
- Do not touch hot surfaces. Use handles or knobs.
- To protect against fire, electric shock, and personal injury, do not immerse cord, plugs, or appliance in water or other liquid.
- Close supervision is necessary when any appliance is used by or near children.
- Unplug from outlet when not in use and before cleaning. Allow to cool before putting on or taking off parts, and before cleaning the appliance.
- Do not operate any appliance with a damaged cord or plug or after the appliance malfunctions, or has been damaged in any manner.
- The use of accessory attachments not recommended by the appliance manufacturer may result in fire, electric shock, or personal injury.
- Do not use outdoors.
- Do not let cord hang over edge of table or counter, or touch hot surfaces.
- Do not place on or near a hot gas or electric burner, or in a heated oven.
- Always attach plug to appliance first, then plug cord into the wall outlet. To disconnect, turn any control to "off", then remove plug from wall outlet.
- Do not use appliance for other than intended use.
Product Overview and Components
Familiarize yourself with the various parts of your Ariete Espresso Vintage 1389 coffee machine.

Image: Ariete Espresso Vintage 1389 with key components labeled, including the manometer, cappuccino device, water tank, drip tray, and filter holder for ESE pods and ground coffee.
- Manometer: Displays the pressure during coffee extraction.
- Cappuccino Device (Steam Wand): Used for frothing milk for cappuccinos and lattes.
- Water Tank: Removable tank for water supply. Capacity: 0.9 liters.
- Filter Holder: Holds the coffee filter for ground coffee or ESE pods.
- Drip Tray: Collects excess liquid and is removable for easy cleaning.
- Control Buttons: For power, espresso brewing, and steam function.

Image: Front view of the Ariete Espresso Vintage 1389 coffee machine in pastel green, showcasing its vintage design and compact form.
Setup
- Unpacking: Carefully remove the machine from its packaging. Retain packaging for future transport or storage.
- Placement: Place the machine on a stable, flat, heat-resistant surface, away from water sources and heat. Ensure adequate ventilation.
- Initial Cleaning: Before first use, clean all removable parts (water tank, filter holder, drip tray) with warm water and mild detergent. Rinse thoroughly.
- Fill Water Tank:

Image: The transparent, removable water tank being detached from the side of the Ariete Espresso Vintage 1389 for refilling.
Remove the water tank from the back of the machine. Fill it with fresh, cold water up to the MAX level indicator. Reinsert the tank securely.
- First Use Cycle (Priming):
- Ensure the filter holder is empty and correctly inserted.
- Place a cup under the filter holder and another under the steam wand.
- Plug the machine into a grounded electrical outlet.
- Turn on the machine using the power button. The indicator lights will illuminate.
- Once the machine reaches operating temperature (indicator light stops flashing), press the coffee brewing button to dispense water through the filter holder. Let it run for about 30 seconds.
- Turn the steam knob to open the steam wand and let water flow out for about 15 seconds. Close the steam knob.
- Repeat this process once or twice to ensure the internal circuits are primed and clean.
Operating Instructions
Making Espresso with Ground Coffee
- Prepare the Filter Holder:

Image: The filter holder disassembled, showing the 1-cup filter, 2-cup filter, and ESE pod filter, along with ESE pods.
Select the appropriate filter (1-cup or 2-cup) and insert it into the filter holder. Add finely ground espresso coffee. For a single espresso, use about 7g of coffee; for a double, use about 14g. Tamp the coffee lightly and evenly.
- Attach Filter Holder: Insert the filter holder into the group head of the machine and turn it firmly to the right until it is securely locked.
- Place Cup: Place your espresso cup(s) on the drip tray, directly under the filter holder spouts.
- Brew Espresso: Ensure the machine is preheated (indicator light solid). Press the coffee brewing button. The machine will start dispensing espresso. Press the button again to stop the flow when your desired volume is reached.
- Remove and Clean: After brewing, carefully remove the filter holder (it will be hot). Discard the used coffee grounds and rinse the filter holder and filter under running water.
Making Espresso with ESE Pods
- Prepare the Filter Holder: Insert the ESE pod filter into the filter holder. Place one ESE pod into the filter, ensuring it lies flat.
- Attach Filter Holder: Insert the filter holder into the group head and turn it firmly to the right until it is securely locked.
- Place Cup: Place your espresso cup on the drip tray, directly under the filter holder spout.
- Brew Espresso: Ensure the machine is preheated. Press the coffee brewing button. Press the button again to stop the flow.
- Remove and Clean: Carefully remove the filter holder. Discard the used ESE pod and rinse the filter holder and filter.
Making Cappuccino (Frothing Milk)

Image: Close-up of the cappuccino device (steam wand) creating rich, creamy milk foam in a cup, ready for a cappuccino.
- Prepare Milk: Fill a stainless steel frothing pitcher with cold milk (dairy or non-dairy) to about one-third full.
- Activate Steam Function: Press the steam button on the machine. Wait for the steam indicator light to illuminate steadily, indicating the machine has reached steaming temperature.
- Purge Steam Wand: Briefly open the steam knob to release any condensed water from the wand into the drip tray or a separate cup. Close the knob.
- Froth Milk: Immerse the tip of the steam wand just below the surface of the milk. Open the steam knob slowly. Move the pitcher up and down gently to create foam. Once the milk has doubled in volume and reached the desired temperature (around 60-70°C or 140-160°F), close the steam knob.
- Clean Steam Wand: Immediately after frothing, wipe the steam wand with a damp cloth to remove any milk residue. Briefly open the steam knob again to clear any milk from inside the wand.
- Combine: Pour the frothed milk over your freshly brewed espresso to create a cappuccino.
Maintenance
Daily Cleaning
- Drip Tray:

Image: The drip tray and its grid removed from the Ariete Espresso Vintage 1389, showing the internal compartment for easy cleaning.
Empty and clean the drip tray and grid daily. It is removable for easy access. Wash with warm, soapy water and rinse thoroughly.
- Water Tank: Rinse the water tank daily and refill with fresh water. Clean with mild detergent weekly.
- Filter Holder and Filters: After each use, remove the filter holder, discard coffee grounds/pods, and rinse the filter holder and filter under hot water.
- Steam Wand: As mentioned in the operating instructions, wipe and purge the steam wand immediately after each use.
- Exterior: Wipe the exterior of the machine with a soft, damp cloth. Do not use abrasive cleaners or immerse the machine in water.
Descaling
Over time, mineral deposits (limescale) can build up in your machine, affecting performance and coffee taste. Descale your machine every 2-3 months, or more frequently if you have hard water or use the machine often.
- Prepare Descaling Solution: Use a commercial descaling solution specifically designed for coffee machines, following the manufacturer's instructions for dilution. Fill the water tank with the solution.
- Run Descaling Cycle:
- Place a large container under the filter holder and another under the steam wand.
- Turn on the machine. Once heated, run about half of the descaling solution through the coffee brewing function.
- Then, open the steam knob and run the remaining solution through the steam wand.
- Turn off the machine and let it sit for 15-20 minutes to allow the solution to work.
- Rinse Cycle: Empty and thoroughly rinse the water tank. Fill it with fresh, clean water. Run several full tanks of clean water through both the coffee brewing function and the steam wand to rinse out any descaling solution residue.
Troubleshooting
| Problem | Possible Cause | Solution |
|---|---|---|
| No coffee dispenses / Slow flow |
|
|
| Coffee is watery / Lacks crema |
|
|
| Steam wand not producing steam |
|
|
| Water leaking from machine |
|
|
Specifications
| Brand | Ariete |
| Model Name | Vintage 1389 |
| Item Model Number | 1389A |
| Coffee Maker Type | Espresso Machine |
| Power | 850 Watts |
| Voltage | 220 Volts |
| Output Pressure | 15 Bars |
| Water Tank Capacity | 0.9 Liters (Removable) |
| Coffee Type Compatibility | Ground Coffee, ESE Pods |
| Special Features | Milk Frother (Cappuccino Device), Removable Water Tank, Removable Drip Tray |
| Material | Plastic (Exterior Finish: Metallic, Matte) |
| Item Weight | 3.8 Kilograms |
| Product Dimensions (L x W x H) | 23 x 31 x 28 cm (9.06 x 12.2 x 11.02 inches) |
| Included Components | Filter Holder, Cappuccino Lance |
| Country of Origin | China |
| Dishwasher Safe | No |
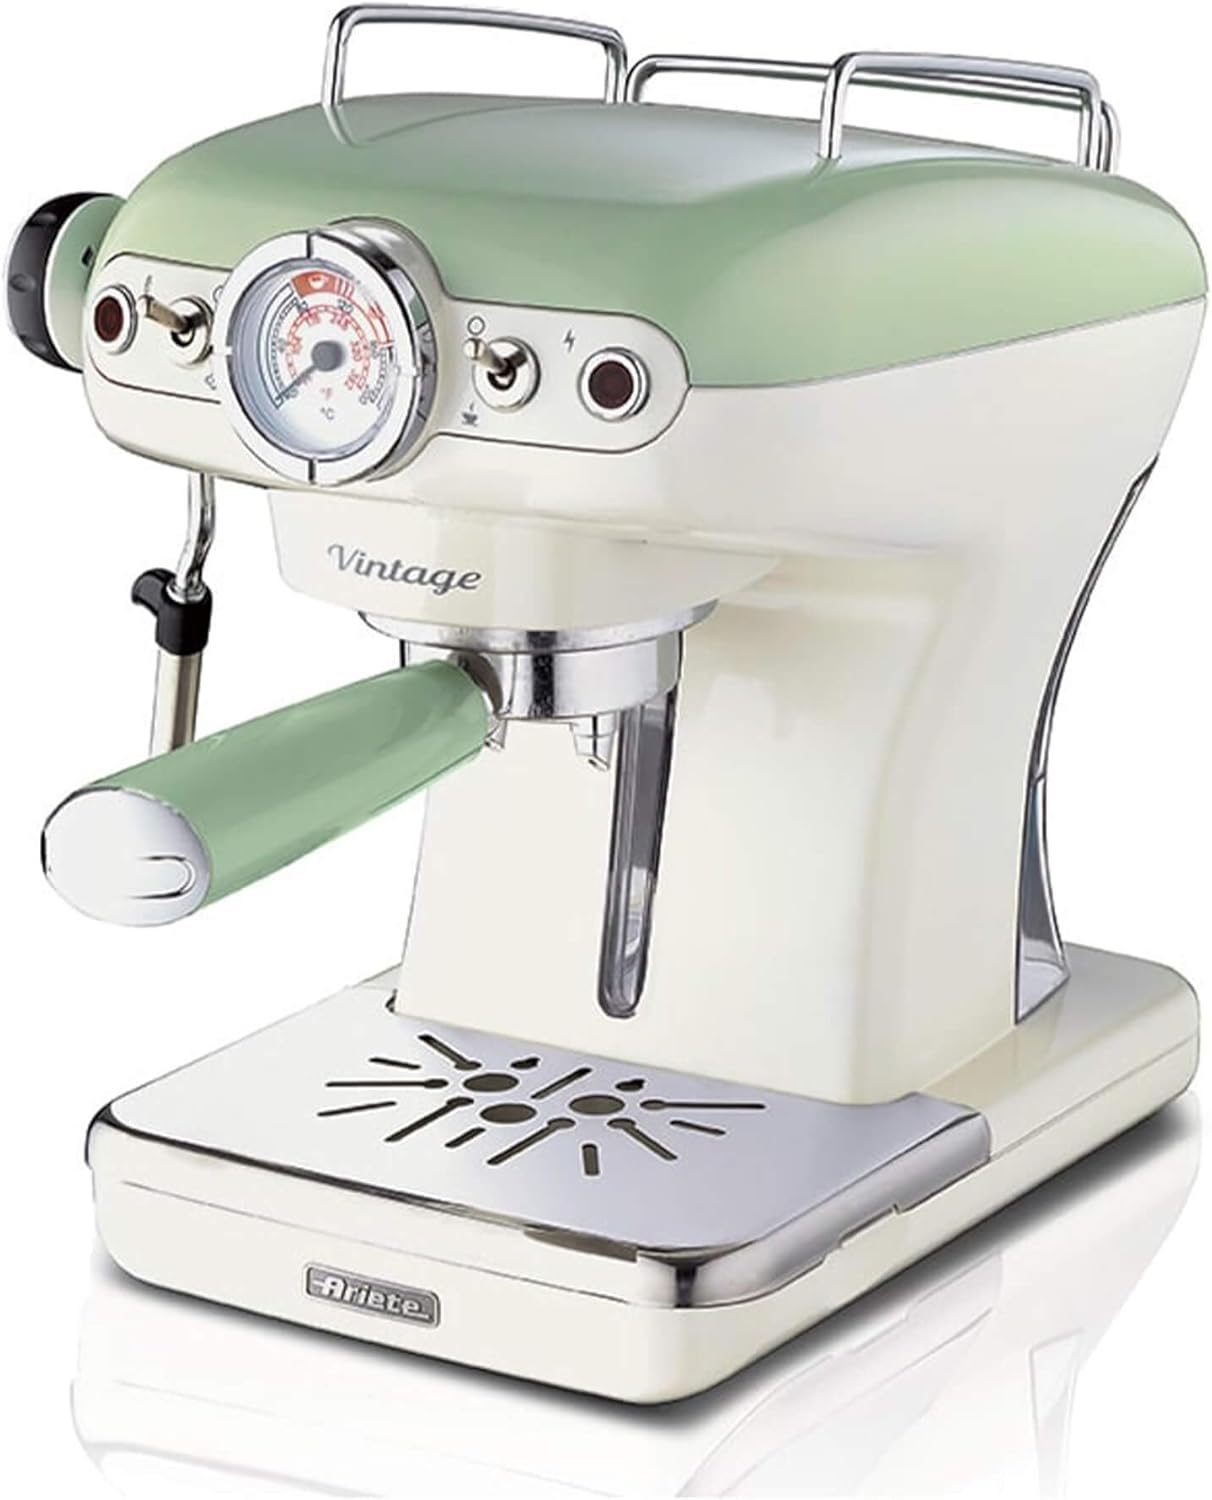
Image: The Ariete Espresso Vintage 1389 coffee machine with an overlay indicating its dimensions: Length 23 cm, Width 28 cm, Height 31 cm.
Warranty and Support
For warranty information and customer support, please refer to the official Ariete website or contact your local distributor. Keep your proof of purchase for warranty claims.
Online Resources: For additional support, FAQs, and product registration, visit the official Ariete website: www.ariete.net
Contact Support: If you encounter issues not covered in this manual, please contact Ariete customer service. Contact details can typically be found on the manufacturer's website or your product packaging.
Ask a question about this manual
Ask about setup, troubleshooting, compatibility, parts, safety, or missing instructions. Manuals+ will review the question and use this page’s manual context to help answer it.