1. Introduction
The Sole Fitness SR400 Rower is designed as a compact yet powerful addition to your home fitness equipment. It offers a smooth and effective full-body workout, combining air and magnetic resistance for a realistic rowing experience. This manual provides essential information for the safe and efficient use, assembly, maintenance, and troubleshooting of your SR400 Rower.

Figure 1.1: The Sole Fitness SR400 Rower, showcasing its compact design and robust frame.
2. Key Features
The SR400 Rower is equipped with several features designed to enhance your workout experience:
- Aluminum Rail Frame: Provides superior strength and durability for long-lasting performance.
- 5.5-inch Backlit LCD Display: A vibrant blue backlit console for easy visibility and tracking of workout progress.
- Magnetic and Air Current Resistance: Offers a dual resistance system for a smooth and challenging workout.
- Realistic Water Feel: Engineered to simulate the natural feel of rowing on water.
- Handlebar Resistance Adjustments: Conveniently adjust resistance levels directly from the handlebar for uninterrupted workouts.
3. Setup and Assembly
Before using your SR400 Rower, proper assembly and placement are crucial for safety and optimal performance.
3.1 Unpacking and Component Check
Carefully remove all components from the packaging. Verify that all parts listed in the assembly guide (typically included in the box) are present. The main components include the rower frame, seat, handlebars, and console.
3.2 Assembly Instructions
Follow the step-by-step instructions provided in the separate assembly manual. Ensure all bolts and fasteners are securely tightened. Do not overtighten. It is recommended to have two people for assembly.
3.3 Placement
Place the rower on a flat, stable, and level surface. Ensure there is ample clear space around the rower for safe operation, especially at the front and rear for the full range of motion during rowing. Avoid placing it near water or in excessively humid environments.
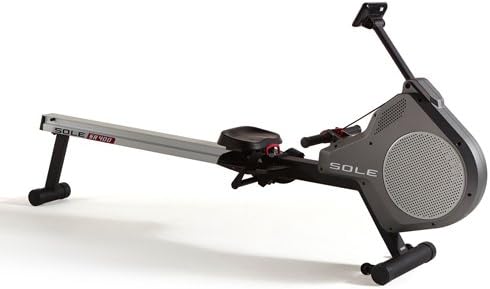
Figure 3.1: Side view of the SR400 Rower, illustrating its full length and stable base.
4. Operating the SR400 Rower
Understanding the console and resistance adjustments will help you maximize your workout.
4.1 Console Functions
The 5.5-inch backlit LCD display provides real-time feedback on your workout. It typically shows metrics such as time, strokes per minute, distance, calories burned, and resistance level. Refer to the console manual (if separate) for detailed navigation and program selection.

Figure 4.1: The SR400 Rower's LCD console, displaying various workout metrics and control buttons.
4.2 Adjusting Resistance
The SR400 Rower features both air and magnetic resistance, which can be adjusted directly from the handlebars. Use the 'UP' and 'DOWN' buttons on the handlebar controls to increase or decrease the resistance level during your workout. This allows for seamless intensity changes without interrupting your rowing rhythm.

Figure 4.2: Close-up of the SR400 Rower's handlebar, showing the integrated resistance adjustment buttons.
4.3 Proper Rowing Technique
For an effective and safe workout, maintain proper rowing form. This involves a sequence of 'catch', 'drive', 'finish', and 'recovery'. Keep your back straight, engage your core, and use your legs, core, and arms in sequence. Consult fitness resources for detailed technique guides.
4.4 Storage
The SR400 Rower can be stored upright to save space. Consult your assembly manual for specific instructions on how to safely fold and store the unit. Ensure it is stable and secured in the upright position to prevent accidental tipping.

Figure 4.3: The SR400 Rower shown in its upright storage position, demonstrating its space-saving capability.
5. Maintenance
Regular maintenance ensures the longevity and optimal performance of your SR400 Rower.
- Cleaning: Wipe down the frame, seat, and handlebars with a damp cloth after each use to remove sweat and dust. Avoid abrasive cleaners.
- Rail Cleaning: Keep the aluminum rail clean and free of debris to ensure smooth seat movement.
- Inspecting Fasteners: Periodically check all bolts and nuts to ensure they are tight. Retighten if necessary.
- Strap/Cord Inspection: Inspect the rowing strap/cord for any signs of wear or fraying. Replace if damaged.
- Lubrication: Refer to your assembly manual for any specific lubrication requirements for moving parts.
6. Troubleshooting
This section addresses common issues you might encounter with your SR400 Rower.
- Console Not Displaying: Ensure the console batteries (if applicable) are correctly installed and charged. Check all cable connections to the console.
- Resistance Issues: If resistance feels inconsistent or too weak/strong, check the resistance adjustment mechanism on the handlebar and ensure no obstructions are affecting the air or magnetic systems.
- Noisy Operation: Check for loose bolts or components. Ensure the seat rollers are clean and the rail is free of debris.
- Seat Sticking/Rough Movement: Clean the aluminum rail thoroughly. Inspect seat rollers for damage or wear.
If you encounter issues not listed here or if problems persist, please contact customer support.
7. Specifications
| Feature | Specification |
|---|---|
| Model Name | SR400 |
| Model Number | SR400-2015 |
| Frame Material | Aluminum |
| Resistance Type | Air and Magnetic |
| Display | 5.5-inch Backlit LCD |
| Maximum Weight Capacity | 300 lbs (136 kg) |
| Product Dimensions (L x W x H) | 94 x 18 x 44 inches (238.76 x 45.72 x 111.76 cm) |
| Product Weight | 75 lbs (34.02 kg) |
| Included Components | Rower |
8. Warranty Information
Sole Fitness products typically come with a limited warranty covering manufacturing defects. The specific terms and duration of your warranty may vary. Please refer to the warranty card included with your product or visit the official Sole Fitness website for detailed warranty information and registration.
9. Customer Support
For technical assistance, parts replacement, or any questions regarding your Sole Fitness SR400 Rower, please contact Sole Fitness customer support. You can usually find contact information on the official Sole Fitness website or in your product's packaging.
Website: www.solefitness.com (Note: This is a generic placeholder. Please refer to your product documentation for the exact support website or contact details.)


