1. Introduction
Thank you for choosing the TX 12V Warm White LED Strip Light. This product is designed to provide versatile and efficient lighting for various indoor and outdoor applications. Featuring 300 high-quality 5050 SMD LEDs on a black PCB board, this 16.4ft (5m) strip delivers a warm white light at 3000K-3400K. Its IP65 waterproof rating, flexibility, and strong adhesive backing make it suitable for a wide range of decorative and functional lighting needs.

Image 1.1: The TX 12V Warm White LED Strip Light, showcasing its coiled form and illuminated section.
2. Safety Information
Please read all safety instructions carefully before installation and use. Failure to follow these instructions may result in electric shock, fire, or other hazards.
- Power Supply: This LED strip operates on 12V DC. Do not connect it directly to 120V AC power. Use a compatible 12V DC power adapter (not included) with a minimum output of 5A for the 16.4ft strip.
- Heat Dissipation: The LED strip must be fully unrolled and unfolded during operation to ensure proper heat dissipation. Operating the strip while coiled can lead to overheating and damage.
- Waterproof Rating: The strip is IP65 waterproof, suitable for outdoor use. However, ensure all electrical connections (power adapter, dimmer, and end tail) are protected from water and moisture, either indoors or within waterproof enclosures.
- Cutting: Only cut the LED strip at designated cut marks (every 3 LEDs). Cutting elsewhere will damage the circuit and render that section unusable.
- Installation Surface: Ensure the installation surface is clean, dry, and smooth for optimal adhesive performance.
- Children and Pets: Keep the product and its components out of reach of children and pets.
3. Package Contents
The package includes the following items:
- 1 x 16.4ft (5m) TX Warm White 5050 300LEDs Waterproof LED Strip Light
Note: A 12V 5A power adapter and dimmer are not included and must be purchased separately.
4. Specifications
| Feature | Specification |
|---|---|
| Color | Warm White |
| Color Temperature | 3000-3400K |
| LED Type | 5050 SMD |
| PCB Board Color | Black |
| Length | 16.4 ft (5 meters) |
| LED Quantity | 300 LEDs (60 LEDs/meter) |
| Operating Voltage | DC 12V |
| Waterproof Rating | IP65 |
| Working Power | 60W (for 16.4ft) |
| Luminous Flux | 4000-4500 Lumens (for 16.4ft) |
| Lifespan | 50,000+ hours |
| Dimensions (L x W x T) | 500CM x 1.0CM x 0.30CM (16.4ft x 0.4in x 0.12in) |
| Cuttable Interval | Every 3 LEDs (approx. 5cm / 2 inches) |
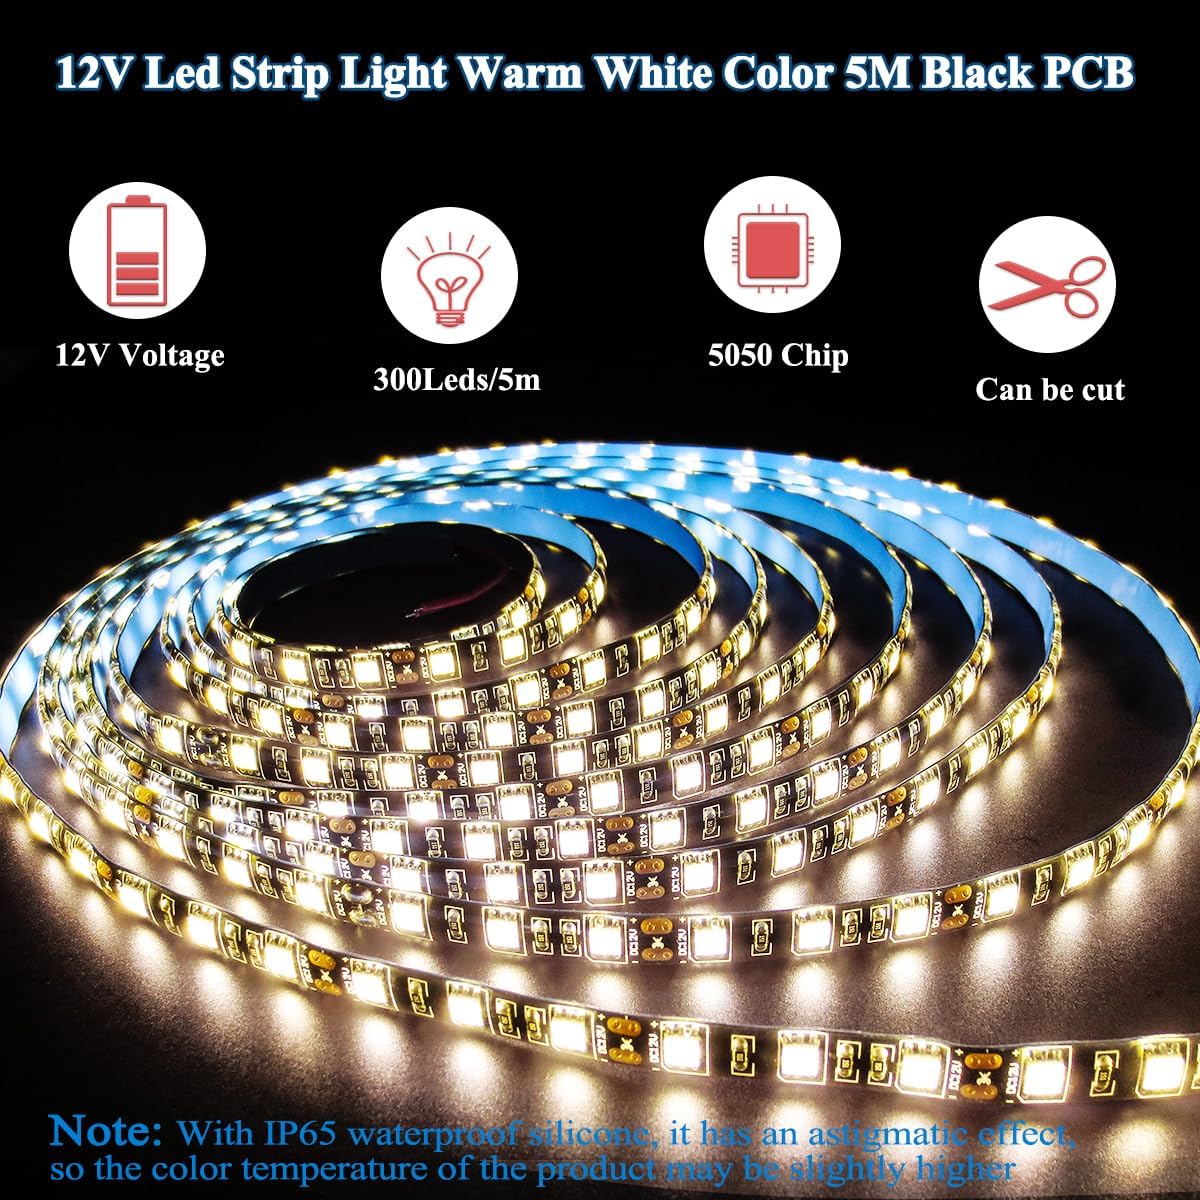
Image 4.1: Overview of the LED strip's main technical features.
5. Installation Guide
Follow these steps for proper installation of your LED strip light:
- Prepare the Surface: Clean the desired installation surface thoroughly. Ensure it is dry, smooth, and free of dust, oil, or debris. This is crucial for the adhesive to bond effectively.
- Plan the Layout: Unroll the LED strip completely and lay it out to plan your desired path. Avoid sharp bends that could damage the strip.
- Cut (Optional): If a shorter length is required, cut the LED strip only at the designated cut marks, indicated by copper pads and a scissor icon. Each cut point is typically every 3 LEDs.
- Connect Power (Initial Test): Before final adhesion, connect the LED strip to a compatible 12V DC power adapter (not included). If using a dimmer (not included), connect it between the power adapter and the LED strip. Briefly test the strip to ensure it lights up correctly.
- Apply Adhesive: Peel off a small section of the protective backing from the adhesive tape on the back of the LED strip. Carefully press the exposed section onto the prepared surface. Continue peeling and pressing firmly along the entire length of the strip, ensuring good contact.
- Secure Connections: For outdoor installations, ensure all power connections and the end tail of the strip are housed in waterproof junction boxes or kept indoors to prevent water damage.
- Final Power Connection: Once the strip is securely installed and all connections are protected, plug the power adapter into a suitable electrical outlet.

Image 5.1: Illustration of the cuttable sections on the LED strip.

Image 5.2: Features of the LED strip including flexibility, black PCB, and strong adhesive.

Image 5.3: The LED strip's IP65 waterproof capability.
6. Operation
Operating the TX LED Strip Light is straightforward:
- Power On/Off: Once connected to a power source, the LED strip will illuminate. To turn it off, disconnect the power adapter or use a switch if one is integrated into your power setup.
- Dimming (Optional): If you have connected an external 12V dimmer (not included), use its controls to adjust the brightness of the LED strip to your desired level.
The warm white light is ideal for creating inviting atmospheres in various settings:
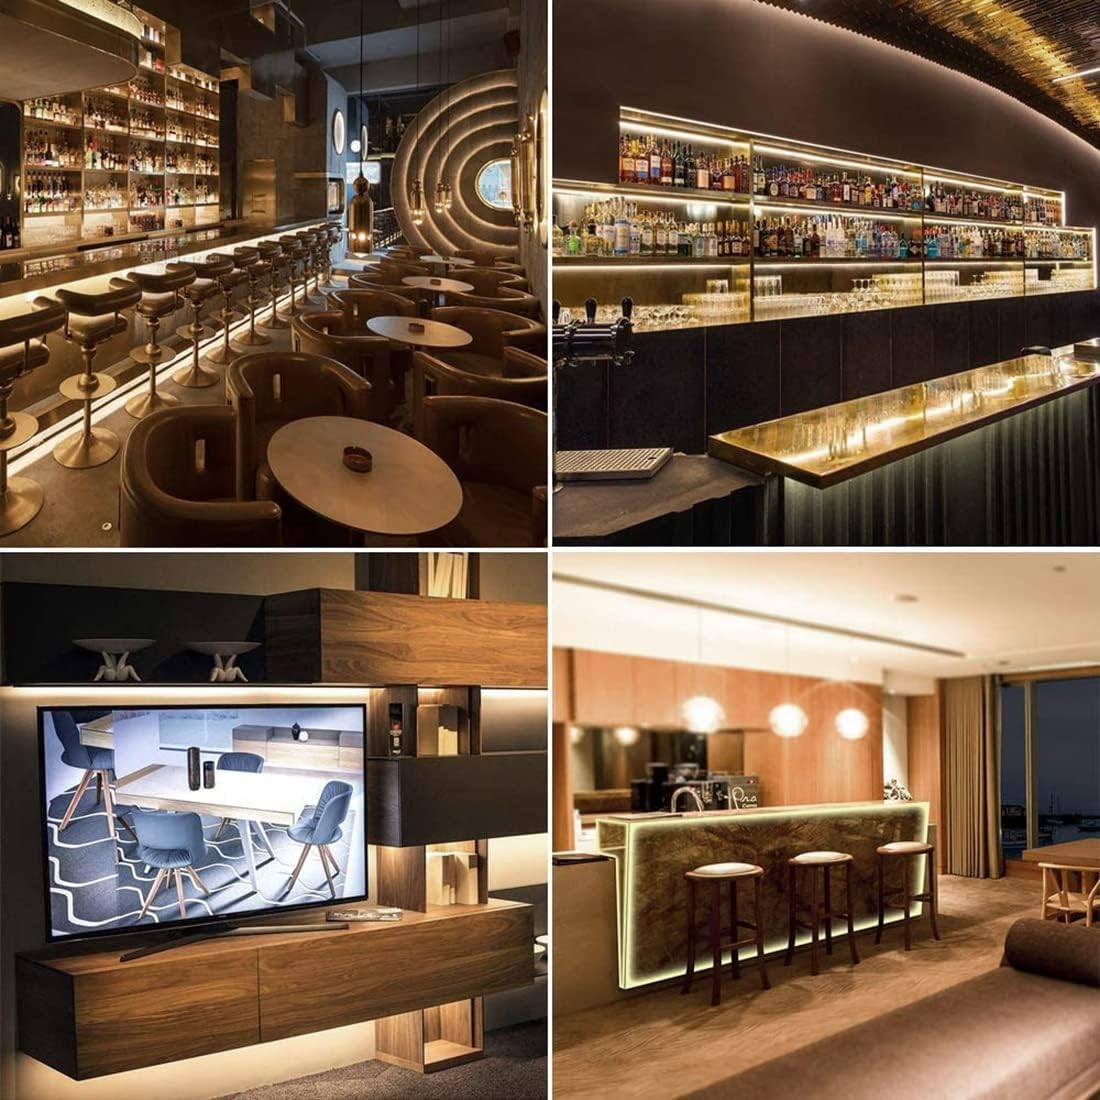
Image 6.1: Examples of the LED strip in various decorative applications.
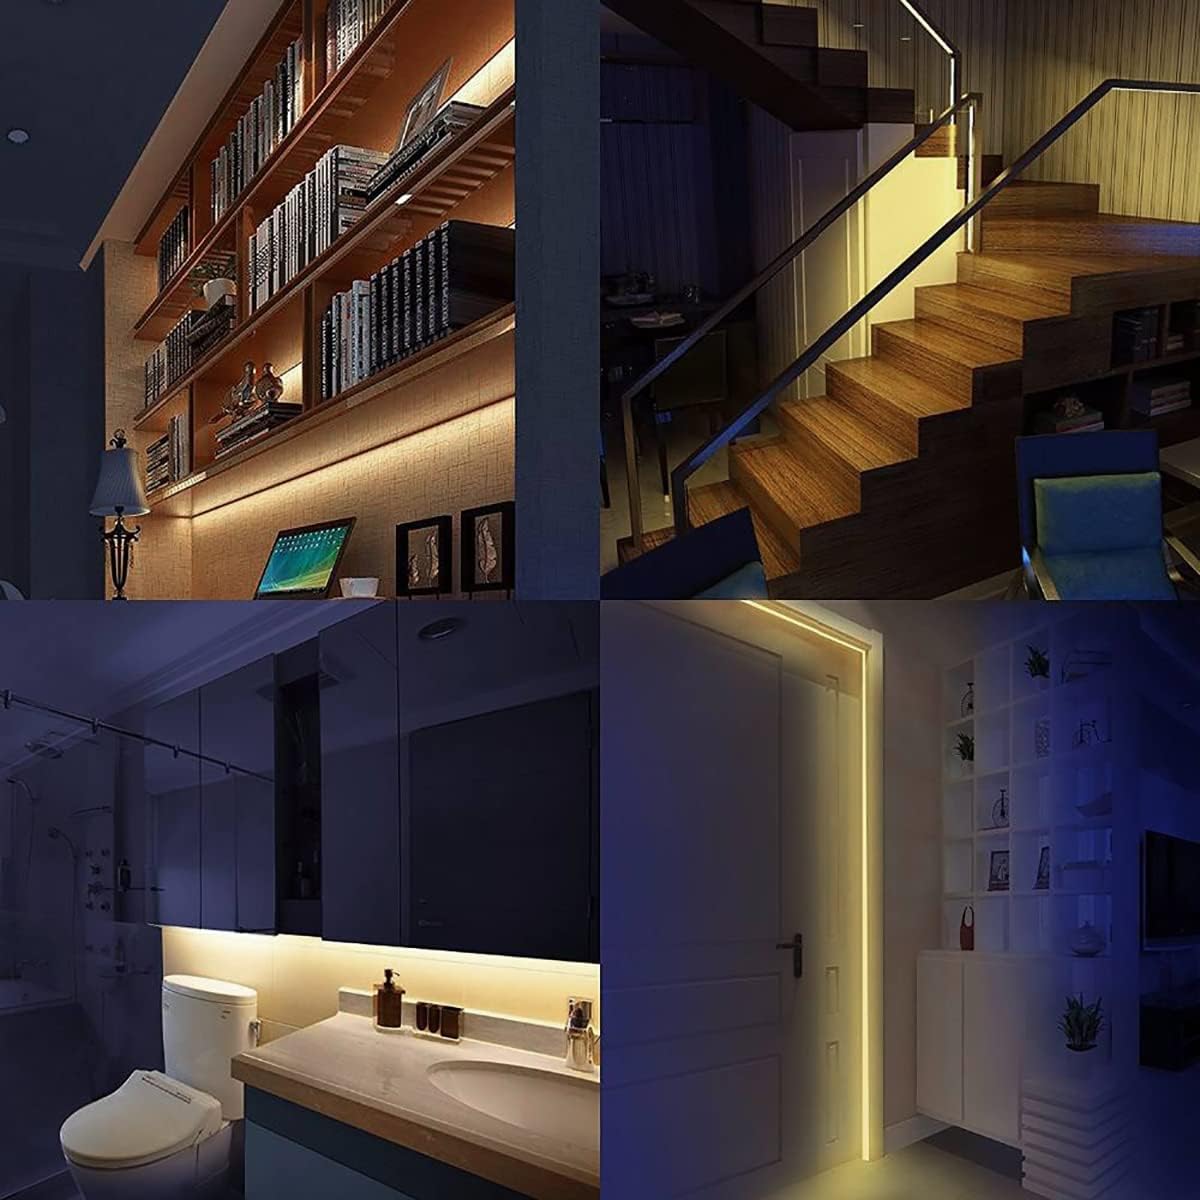
Image 6.2: Further examples of the LED strip enhancing different home areas.
7. Maintenance
The TX LED Strip Light requires minimal maintenance:
- Cleaning: Ensure the power is disconnected before cleaning. Gently wipe the LED strip with a soft, dry cloth. For stubborn dirt, a slightly damp cloth can be used, but ensure no water enters the electrical connections.
- Inspection: Periodically inspect the strip for any signs of damage, such as cuts, frayed wires, or loose connections. Address any issues promptly to prevent further damage or safety hazards.
- Adhesion: If the adhesive begins to lose its grip over time, you may reinforce it with additional adhesive clips or a suitable waterproof sealant, especially in outdoor or high-humidity environments.
8. Troubleshooting
If you encounter issues with your LED strip light, refer to the following common problems and solutions:
| Problem | Possible Cause | Solution |
|---|---|---|
| LED strip does not light up. |
|
|
| LED strip flickers or is dim. |
|
|
| Adhesive is not holding. |
|
|
9. Warranty and Support
For warranty information or technical support, please refer to the retailer's return policy or contact TX customer service through the official product page or your purchase platform. Please have your product model number (810) and purchase details ready when contacting support.
You can visit the TX Store on Amazon for more information.