
1. Introduction
Thank you for choosing the Flame King YSNHT600 2-Burner Built-in RV Cooktop Propane Stove. This appliance is designed for efficient and convenient cooking in recreational vehicles and other suitable mobile applications. It features two powerful burners, a self-igniting system, and a protective cover for safe storage and travel. This manual provides essential information for the safe installation, operation, maintenance, and troubleshooting of your cooktop.

Figure 1: Flame King YSNHT600 2-Burner RV Cooktop with cover open, showing both burners and control knobs.
2. Safety Information
WARNING: Improper installation, adjustment, alteration, service, or maintenance can cause property damage, injury, or death. Read the installation, operating, and maintenance instructions thoroughly before installing or servicing this equipment.
- This cooktop is intended to be used with the RV's self-contained LP gas system. Do not connect to an unregulated high-pressure gas source.
- Always ensure adequate ventilation when operating the cooktop to prevent carbon monoxide buildup.
- Check all gas connections for leaks using a soapy water solution before initial use and after any gas cylinder replacement. Never use an open flame to check for leaks.
- Maintain proper clearance from combustible materials as specified in the installation section.
- Keep children and pets away from the cooktop during operation and while it is cooling down.
- Surfaces can become extremely hot during use. Use caution and appropriate protective gear.
- Do not store flammable materials or liquids near the cooktop.
3. Components and Features
The Flame King YSNHT600 cooktop is designed for ease of use and durability. Key components and features include:
- Two Burners: One 7200 BTU oval burner and one 5200 BTU circular burner for versatile cooking.
- Piezo Igniter: Integrated self-igniting system for quick and convenient burner ignition.
- Adjustable Flame Control Knobs: Allow precise control over flame intensity for each burner.
- Protective Cover: A sturdy cover is included to protect the cooktop when not in use and during travel. It also features wind guards.
- Durable Construction: Made with alloy steel and plastic components for lightweight yet robust performance.

Figure 2: Top view illustrating the two distinct burners and the control panel.
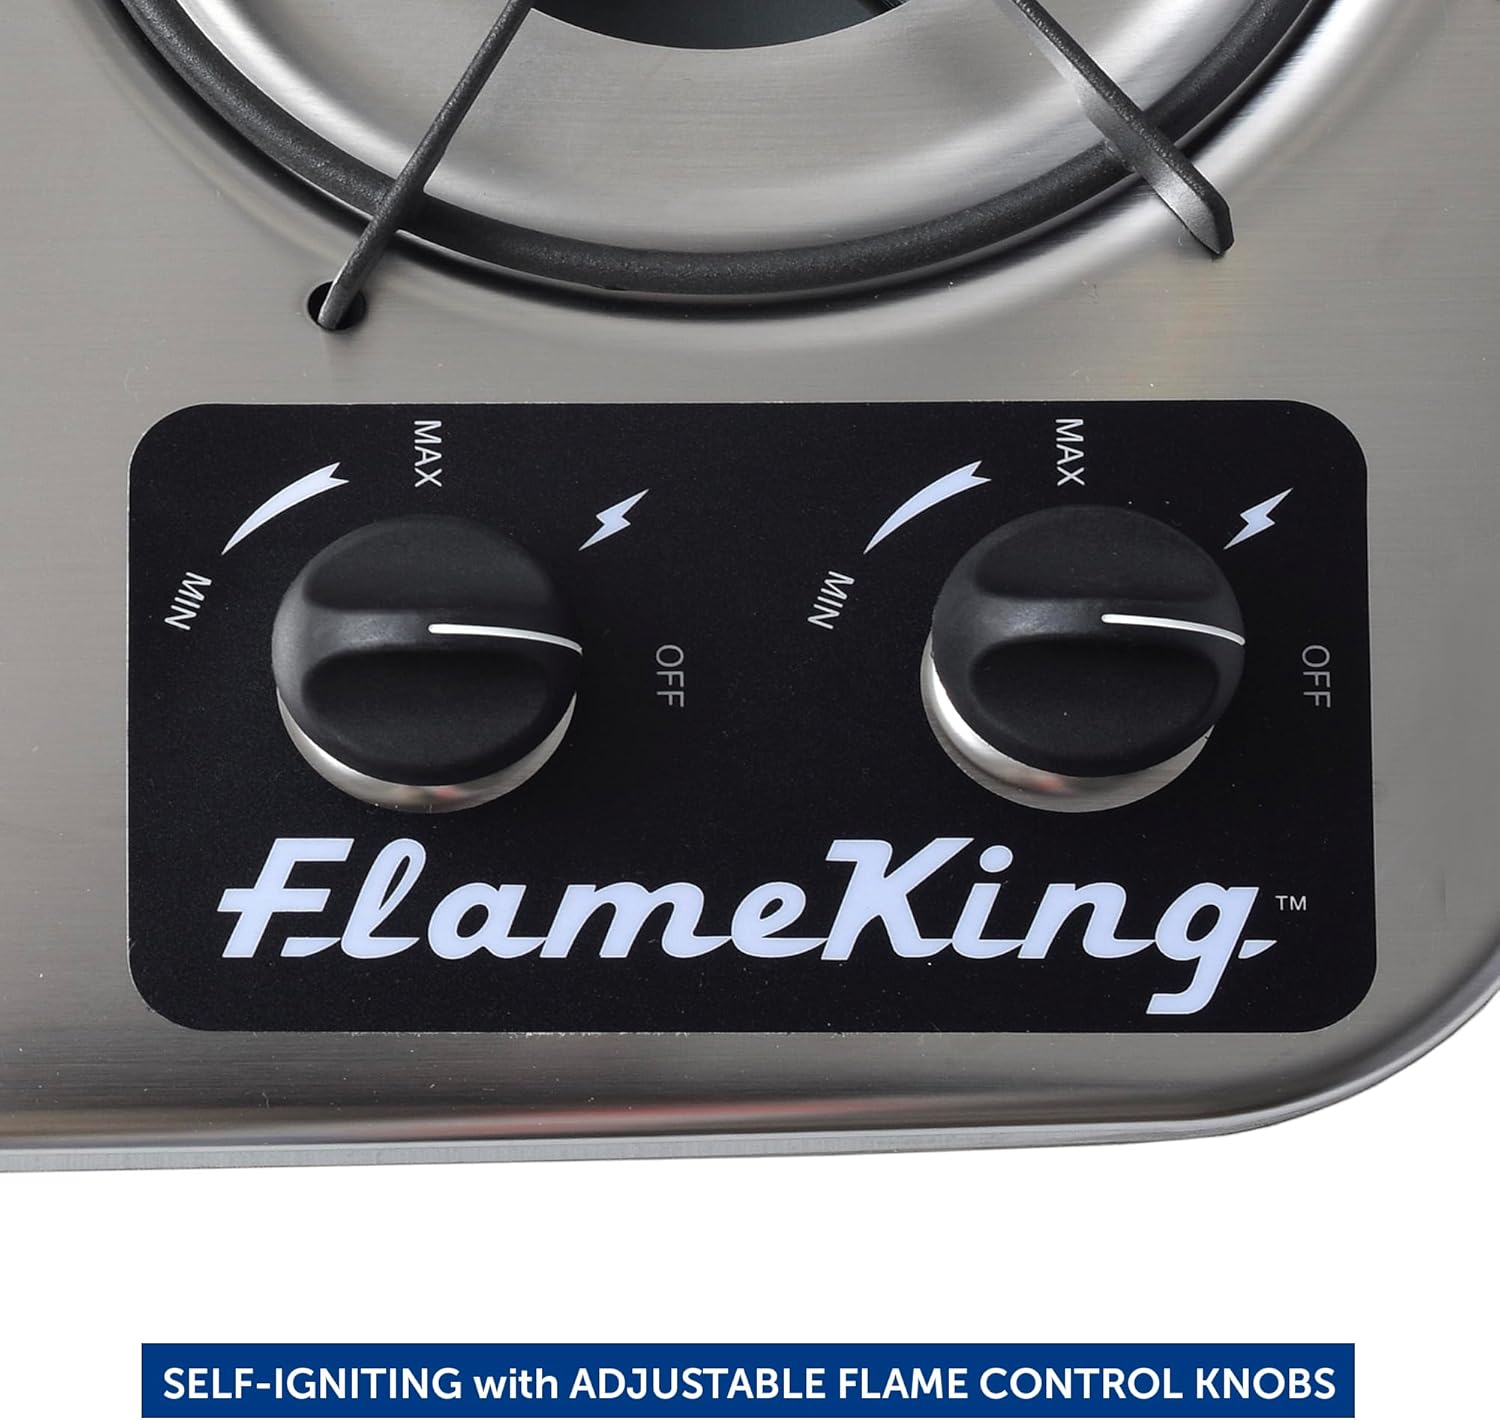
Figure 3: Close-up of the control knobs, showing 'MIN', 'MAX', and 'OFF' settings, along with the piezo ignition symbol.
4. Setup and Installation
The Flame King YSNHT600 cooktop is designed for built-in installation. Proper installation is crucial for safe and efficient operation. It is recommended that installation be performed by a qualified technician.
4.1 Dimensions and Cutout
The cooktop dimensions are approximately 18.5" (Width) x 13" (Depth) x 4.5" (Height). The required counter cutout dimensions are 16-1/8" x 11 5/16". Ensure sufficient clearance around the appliance for ventilation and safety.

Figure 4: Side view of the cooktop with overall dimensions indicated.
4.2 Gas Connection
This cooktop connects to your RV's self-contained LP gas system. Ensure all connections are secure and leak-free. Refer to the detailed installation instructions provided in the official User Manual PDF for specific plumbing and connection procedures.
For detailed installation instructions, please refer to the official User Manual (PDF).
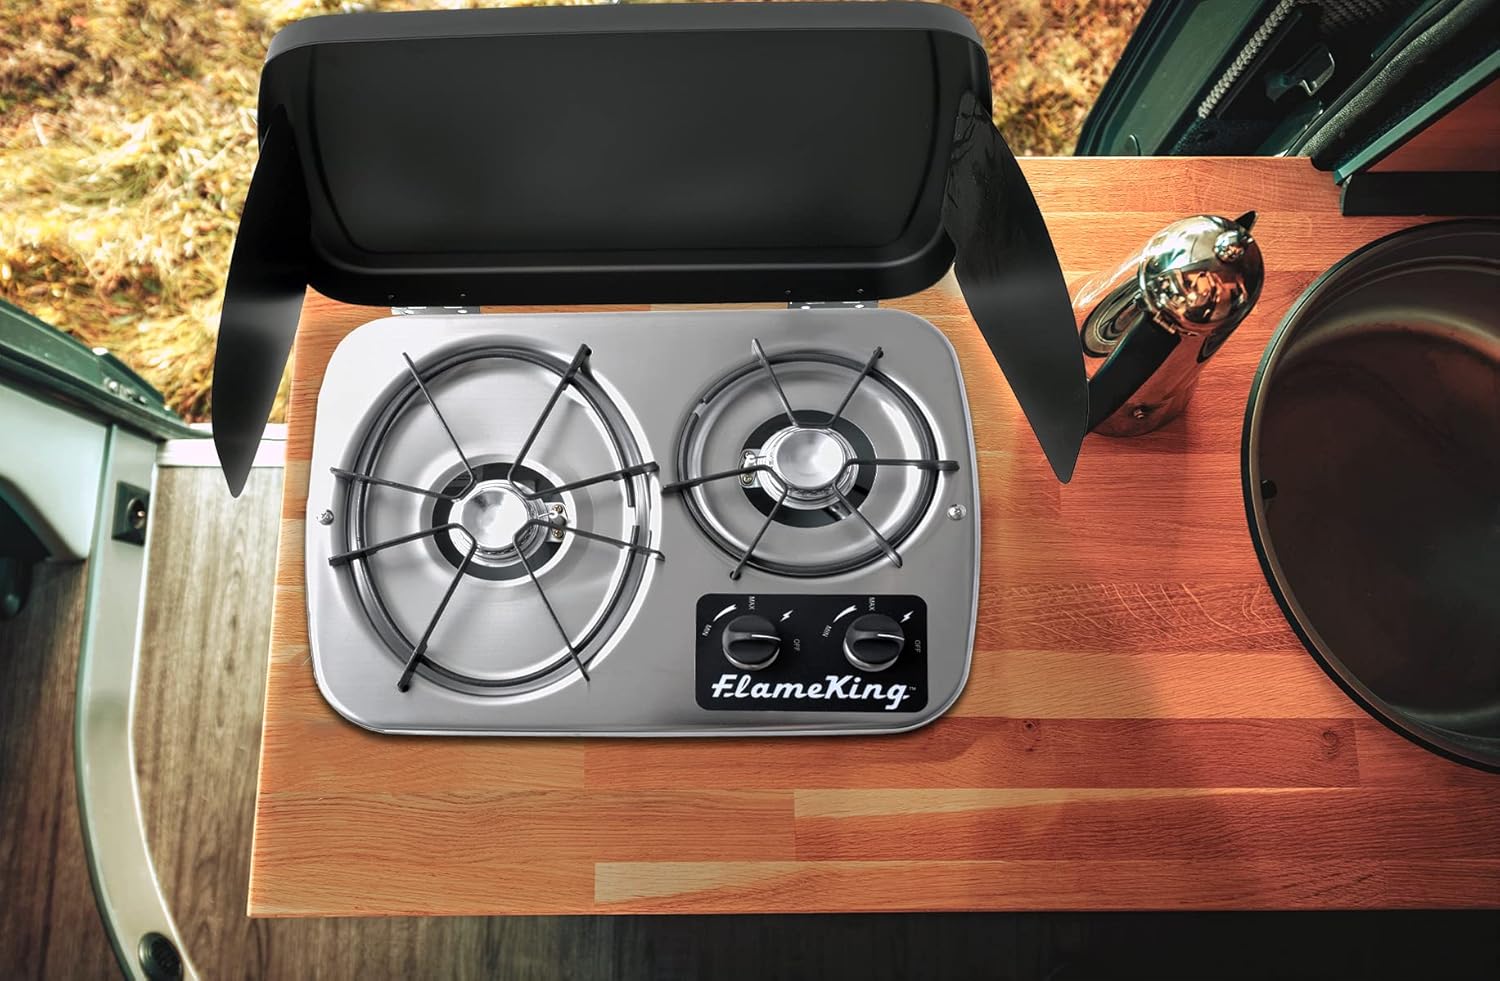
Figure 5: Example of the cooktop integrated into an RV countertop.
5. Operating Instructions
5.1 Ignition
- Ensure the gas supply to the cooktop is open.
- Push down and turn the desired burner knob counter-clockwise to the 'MAX' position.
- The integrated piezo igniter will spark, igniting the gas. Hold the knob down for a few seconds after ignition to allow the thermocouple to heat up and keep the flame lit.
- If the burner does not light within 5 seconds, turn the knob to 'OFF', wait 5 minutes for gas to dissipate, and repeat the ignition process.
5.2 Adjusting Flame
Once the burner is lit, you can adjust the flame intensity by rotating the knob between the 'MAX' and 'MIN' positions. Turn the knob clockwise to decrease the flame and counter-clockwise to increase it.
5.3 Turning Off
To turn off a burner, rotate the knob clockwise until it clicks into the 'OFF' position. Ensure all burners are turned off after use and the gas supply is closed if the RV is to be left unattended for an extended period.
5.4 Using the Cover
The cooktop comes with a hinged cover that can be closed when the cooktop is not in use. This protects the burners and provides a clean surface. Ensure the cooktop is completely cool before closing the cover. The cover also features wind guards that can be deployed during cooking to help maintain flame stability in breezy conditions.

Figure 6: The cooktop with its protective cover closed.
6. Maintenance and Cleaning
Regular cleaning and maintenance will ensure the longevity and optimal performance of your cooktop.
6.1 Cleaning the Cooktop Surface
- Allow the cooktop to cool completely before cleaning.
- Wipe the stainless steel surface with a damp cloth and mild detergent. Avoid abrasive cleaners or scouring pads that can scratch the finish.
- For stubborn stains, use a non-abrasive stainless steel cleaner according to its instructions.
- Dry the surface thoroughly to prevent water spots.
6.2 Cleaning Burner Grates and Caps
- Remove the burner grates and caps when cool.
- Wash them with warm, soapy water. For baked-on food, soak them before scrubbing.
- Rinse thoroughly and dry completely before placing them back on the cooktop.
6.3 General Maintenance
- Periodically check gas connections for tightness and signs of wear.
- Ensure burner ports are clear of debris to maintain proper flame distribution.
- Do not attempt to repair or modify the gas system yourself. Contact a qualified service technician for any repairs.
7. Troubleshooting
This section addresses common issues you might encounter with your cooktop. For problems not listed here, or if solutions do not resolve the issue, contact a qualified service technician.
| Problem | Possible Cause | Solution |
|---|---|---|
| Burner does not light | No gas supply Igniter not sparking Burner ports clogged | Check LP gas tank and supply valve Ensure knob is pushed down and turned correctly; check igniter electrode for debris Clean burner ports |
| Flame is weak or uneven | Low gas pressure Burner ports clogged Incorrect burner cap placement | Check LP gas level; ensure regulator is functioning correctly Clean burner ports Ensure burner caps are seated properly |
| Gas odor detected | Gas leak Unlit burner | Immediately turn off gas supply; ventilate area; check for leaks with soapy water; do not operate appliance Ensure all burners are off and gas supply is closed |
8. Specifications
| Feature | Specification |
|---|---|
| Brand | Flame King |
| Model | YSNHT600 |
| Product Dimensions | 18.5"D x 13"W x 4.5"H |
| Item Weight | 15 Pounds |
| Heating Elements | 2 (7200 BTU oval, 5200 BTU circular) |
| Power Source | Gas Powered (LP Gas) |
| Controls Type | Knob |
| Burner Type | Open |
| Material | Alloy Steel, Plastic |
| Color | Silver |
| Included Components | Cooktop Stove, Cover |
| Recommended Uses | Backpacking, RV, Camping |
| Country of Origin | China |
9. Warranty and Support
For detailed warranty information and customer support, please refer to the documentation included with your product or visit the official Flame King website. You can also find additional resources, including a comprehensive user guide, at the following link:
If you require technical assistance or have questions regarding your Flame King YSNHT600 cooktop, please contact Flame King customer service directly.
