
Mount-It! MI-4110
Mount-It! Full Motion TV Wall Mount Instruction Manual
Model: MI-4110
Product Overview
The Mount-It! MI-4110 Full Motion TV Wall Mount is designed to provide versatile viewing angles for your television or monitor. Its articulating arms allow for extensive movement, including tilt, swivel, and extension from the wall, ensuring optimal viewing from various positions in your room.

Figure 1: Overview of the Mount-It! MI-4110 Full Motion TV Wall Mount.
- Full Motion Capability: Articulating arms offer adjustable 20 degrees tilt (up and down) and 180 degrees swivel (left or right). The mount retracts to 3.5 inches and extends up to 15.7 inches from the wall.
- Heavy Duty Construction: Made from high-strength steel, this bracket supports flat screens up to 66 lbs (tested to 132 lbs for safety).
- Universal VESA Compatibility: Supports VESA patterns including 75x75mm, 100x100mm, 200x100mm, and 200x200mm without adapters. With included 4 extra plate adapters, it fits VESA 300x300mm, 400x300mm, and 400x400mm.
- Broad Compatibility: Compatible with various TV brands such as SAMSUNG, SONY, LG, VIZIO, TCL, ELEMENT, SCEPTRE, HISENSE, and others with screen sizes between 23 and 55 inches.
- Monitor Wall Mount: Also suitable for larger ultrawide monitors (32, 34, 35 inches) to save desktop space and for ergonomic computer screen setup. Please ensure the back of your monitor can fit an 8x8 inch mounting plate.
Setup and Installation
Proper installation is crucial for the safety and stability of your TV. Please follow these instructions carefully. It is recommended to have two people for installation, especially for larger TVs.
Installation Video Guide
Video 1: Official installation guide for the Mount-It! MI-4110 Full Motion TV Wall Mount. This video demonstrates both wood stud and concrete/brick wall installation methods, VESA pattern selection, TV attachment, and final adjustments.
Step-by-Step Installation
1. Prepare the Wall
For wood stud installation, use a stud finder to locate the center of a drywall stud. For concrete or brick walls, identify your desired mounting location.

Figure 2: Key features and installation considerations including single stud installation and VESA compatibility.
2. Mark Drill Holes
Hold the wall plate of the mount (or the included template if available) against the wall at the desired height. Use a bubble level to ensure it is straight. Mark the three lag bolt holes with a pencil.
3. Drill Pilot Holes
- For Wood Studs: Use a 3/16 inch drill bit to drill pilot holes at the marked locations.
- For Concrete/Brick Walls: Use a 3/8 inch masonry drill bit to drill holes to a depth of 2.4 inches (60mm). Clear any dust or debris from the holes and insert the three plastic anchors.
4. Install Lag Bolts (Wall Plate)
Install the top two lag bolts into the drilled holes, leaving a 3mm gap between the wall surface and the inside of the bolt head. This gap allows the mount to hang securely before final tightening.
5. Attach Mount to TV
Lay your TV face down on a soft, flat surface to prevent damage. Choose the appropriate VESA configuration for your TV. Larger TVs may require the VESA extensions (included). Assemble the VESA extensions to the mount according to your TV's VESA pattern. Select the correct size mounting bolts for your display and tighten them until secure.

Figure 3: VESA compatibility chart and how extension brackets fit larger screen sizes.
6. Mount TV to Wall
Carefully hang the TV mount (with the TV attached) onto the two pre-installed lag bolts. Slide the TV mount down until the wall plate is securely engaged with the lag bolts. Install the final lag bolt into the bottom hole and tighten it until secure. Then, fully tighten the top lag bolts until they are secure.

Figure 4: Example of the TV mounted on the wall, showcasing its extension capability.
7. Add Decorative Covers
Slide the decorative covers into place over the top and bottom lag bolts for a clean finish.
Operating Instructions
The Mount-It! MI-4110 offers flexible positioning to optimize your viewing experience.
Adjusting the TV Angle
- Extension/Retraction: Gently pull or push the TV to extend it up to 15.7 inches from the wall or retract it to a minimum of 3.5 inches.
- Swivel: The articulating arms allow for 180 degrees of swivel left or right. Adjust the rotation of each arm joint as desired.
- Tilt: To adjust the tilt, rotate the knob on the mount counter-clockwise to loosen the TV plate. Adjust to your desired tilt angle (up to 20 degrees up or down), then rotate the knob clockwise to lock the tilt position.

Figure 5: Visual representation of the mount's full motion capabilities: tilt, swivel, and extension.
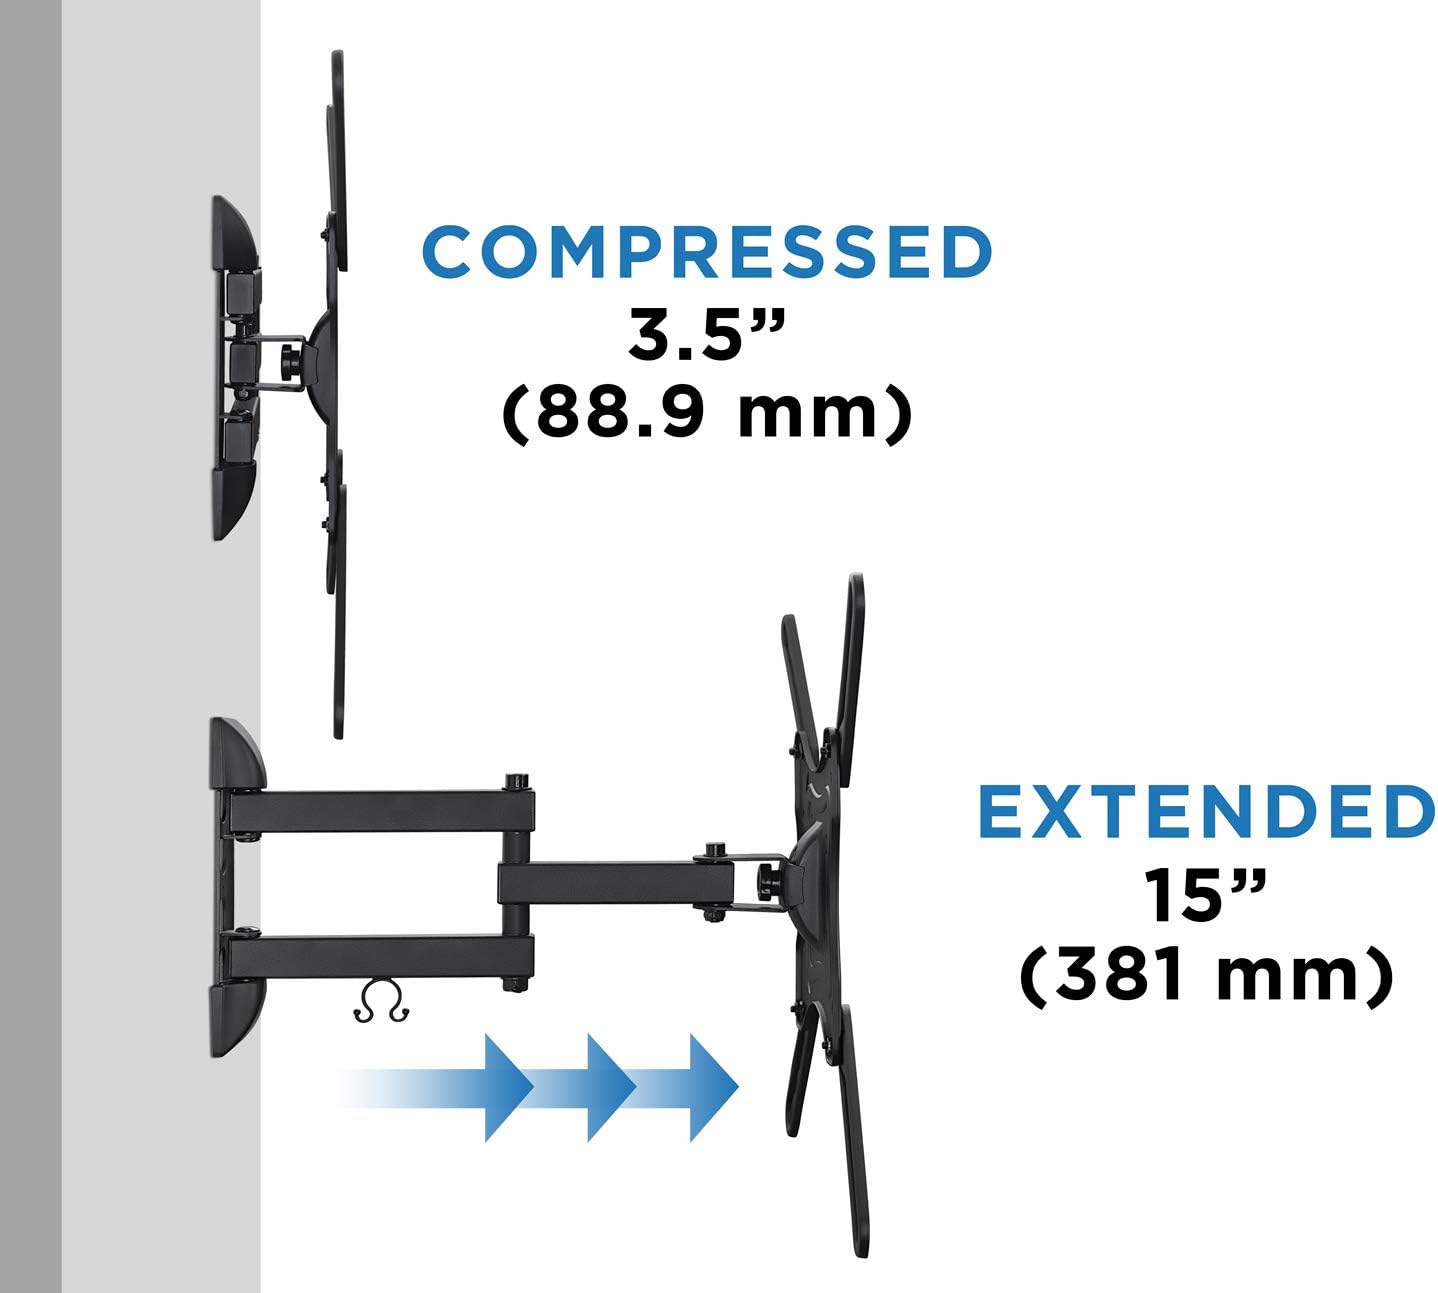
Figure 6: Comparison of the mount's compressed and extended positions.
Maintenance
To ensure the longevity and safe operation of your Mount-It! TV wall mount, periodic maintenance is recommended:
- Regular Inspection: Periodically check all screws and connections to ensure they remain tight and secure. Over time, vibrations or frequent adjustments can cause fasteners to loosen.
- Cleaning: Use a soft, dry cloth to wipe down the mount. Avoid abrasive cleaners or solvents that could damage the finish.
- Lubrication: If the articulating arms become stiff or noisy, a small amount of silicone-based lubricant can be applied to the moving joints. Do not use oil-based lubricants as they can attract dust.
Troubleshooting
If you encounter any issues with your Mount-It! TV wall mount, refer to the following common troubleshooting tips:
- Mount feels loose on the wall: Ensure all lag bolts securing the wall plate to the stud or concrete are fully tightened. Re-check the integrity of the wall structure.
- TV is not level: Check the bubble level during installation and adjust the mount's position on the wall plate if necessary. Some mounts allow for minor post-installation leveling adjustments.
- Difficulty adjusting tilt/swivel: Ensure the tilt adjustment knob is loosened before attempting to change the tilt angle. For swivel, ensure no cables are snagged or restricting movement.
- Cables are messy: Utilize the included cable management clip to route and organize your cables along the mount's arm.
If problems persist, please contact Mount-It! customer support for assistance.
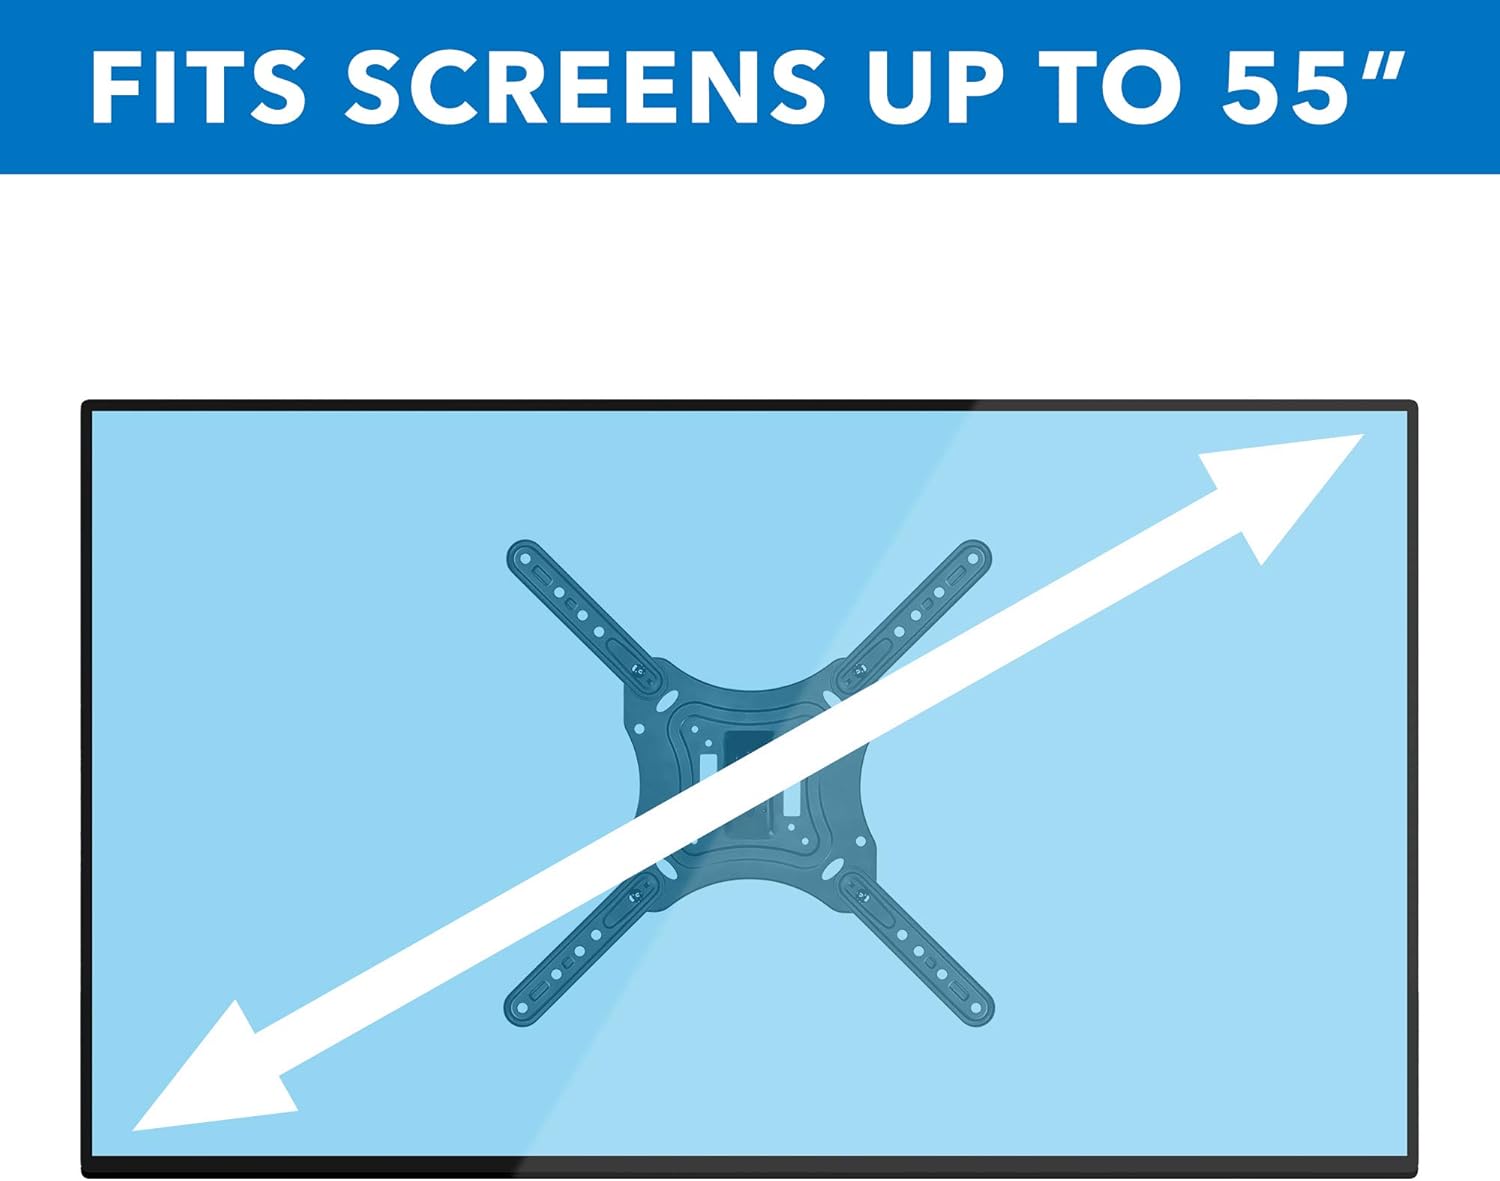
Figure 7: The mount is designed to fit screens up to 55 inches diagonally.
Specifications
| Feature | Detail |
|---|---|
| Product Dimensions | 11 x 10.3 x 3.5 inches |
| Item Weight | 2.99 pounds |
| Item Model Number | MI-4110 |
| Manufacturer | Mount-It! |
| Country of Origin | China |
| Mounting Type | Wall Mount |
| Movement Type | Tilt, Swivel, Extension |
| Material | Alloy Steel |
| Maximum Compatible Size | 55 Inches |
| Minimum Compatible Size | 23 Inches |
| Color | Black |
| Maximum Tilt Angle | 20 Degrees |
| Compatible Devices | Monitor, Television |
| VESA Compatibility | 75x75mm, 100x100mm, 200x100mm, 200x200mm, 300x300mm, 400x300mm, 400x400mm |
Warranty and Support
Mount-It! products are designed for durability and reliability. For specific warranty information, please refer to the documentation included with your purchase or visit the official Mount-It! website.
For technical support, installation questions, or any other inquiries, please contact Mount-It! customer service. Contact details can typically be found on the product packaging or on the Mount-It! official website (Visit the Mount-It! Store on Amazon).
Related documentsMI-4110


Ask a question about this manual
Ask about setup, troubleshooting, compatibility, parts, safety, or missing instructions. Manuals+ will review the question and use this page’s manual context to help answer it.