
1. Important Safety Instructions
Please read these instructions carefully before using the appliance and keep them for future reference. This appliance is intended for domestic use only. Misuse can lead to personal injury and property damage. The manufacturer accepts no liability for damage caused by non-observance of these instructions.
- Always unplug the toaster from the power outlet when not in use, before cleaning, or in case of malfunction.
- Do not immerse the appliance, cord, or plug in water or any other liquid.
- Do not operate the toaster with a damaged cord or plug, or after the appliance malfunctions or has been damaged in any manner.
- Keep children away from the toaster during operation as surfaces become hot.
- Do not place the toaster near hot gas or electric burners, or in a heated oven.
- Do not insert oversized foods, metal foil packages, or utensils into the toaster as this may create a fire or electric shock hazard.
- Never attempt to dislodge food when the toaster is plugged in.
- Ensure the crumb tray is always in place during use and emptied regularly.
- Do not cover the toaster during operation.
2. Product Overview and Components
Familiarize yourself with the various parts of your Severin AT 2589 Automatic Toaster.

Image 2.1: Front view of the Severin AT 2589 Automatic Toaster with bread slices inserted into the toasting slots.

Image 2.2: Close-up of the control panel, showing the browning level dial (1-6), defrost, reheat, and cancel buttons with indicator lights.

Image 2.3: The toaster with the integrated roll attachment raised, holding two bread rolls for warming.
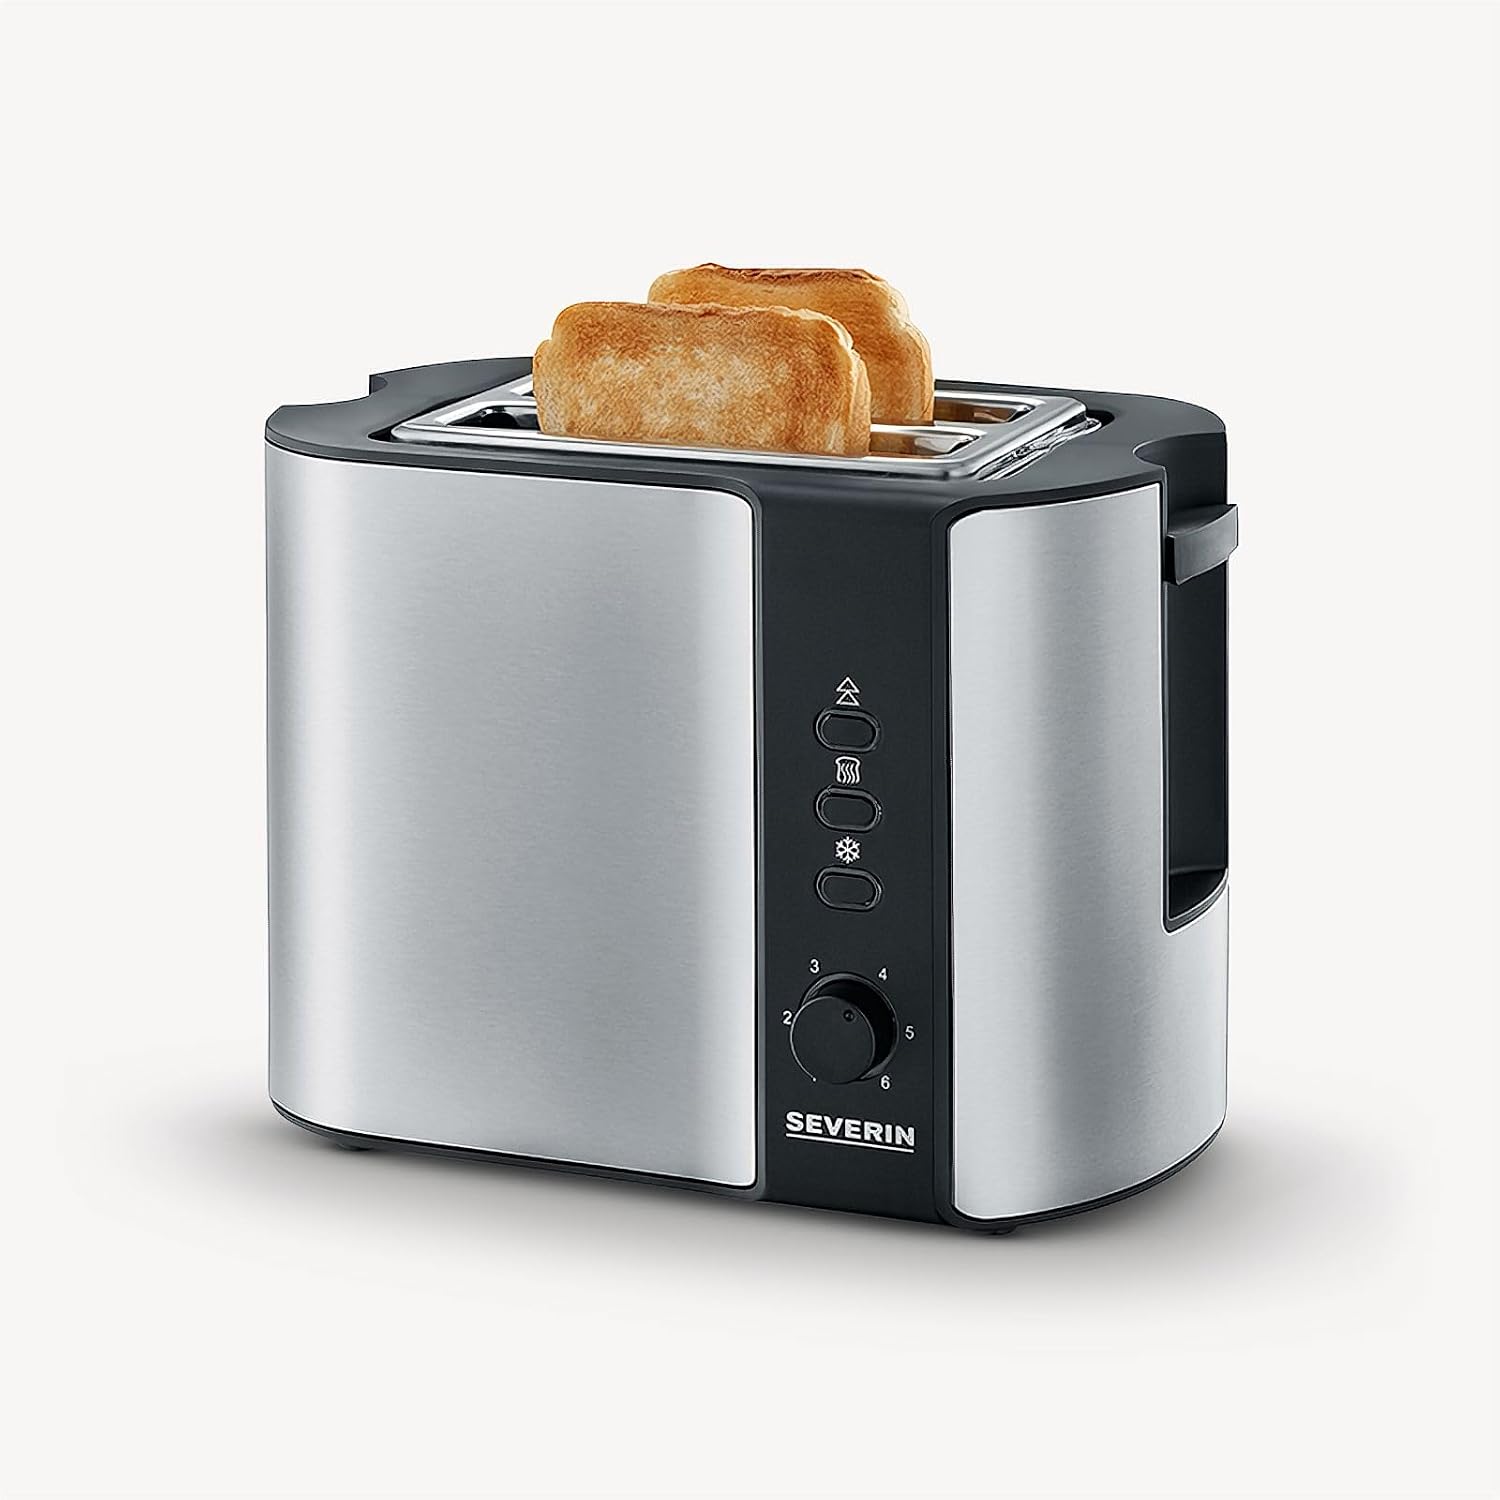
Image 2.4: The removable crumb tray of the Severin AT 2589 Toaster, shown partially pulled out, containing crumbs.
Key Components:
- Toasting Slots: Two slots for bread slices.
- Browning Level Dial: Adjustable settings from 1 (lightest) to 6 (darkest).
- Defrost Button: For toasting frozen bread, indicated by a snowflake symbol.
- Reheat Button: For warming already toasted bread without further browning, indicated by a wavy line symbol.
- Cancel Button: Stops the toasting process immediately, indicated by a double arrow symbol.
- Lever: Lowers and raises the bread carriage.
- Integrated Roll Attachment: A foldable rack for warming rolls and pastries.
- Crumb Tray: Removable tray for easy cleaning of crumbs.
- Cord Winding: Located at the base for neat storage of the power cord.
3. Setup
- Unpack: Carefully remove the toaster and all packaging materials. Retain packaging for future transport or storage if needed.
- Placement: Place the toaster on a stable, flat, heat-resistant surface, away from curtains, walls, or other flammable materials. Ensure adequate ventilation around the appliance.
- Power Connection: Unwind the power cord from the cord winding at the base and plug it into a suitable grounded wall outlet.
- First Use (Burn-off): Before toasting food for the first time, operate the toaster without bread for a few cycles at the highest browning setting (6). This will burn off any manufacturing residues and eliminate initial odors. Ensure the area is well-ventilated during this process.
4. Operating Instructions
4.1. Toasting Bread
- Ensure the toaster is plugged in.
- Place one or two slices of bread into the toasting slots. The bread centering mechanism will automatically position the bread for even browning.
- Select your desired browning level using the browning dial (1 for light, 6 for dark).
- Press the lever down until it locks into place. The toasting cycle will begin, and the cancel button's indicator light will illuminate.
- Once the selected browning level is reached, the toast will automatically pop up, and the heating elements will switch off.
- To stop the toasting cycle at any time, press the Cancel button.
4.2. Defrosting Frozen Bread
- Place frozen bread slices into the toasting slots.
- Select your desired browning level.
- Press the lever down.
- Press the Defrost button (snowflake symbol). Its indicator light will illuminate. The toaster will automatically adjust the toasting time for frozen bread.
- The toast will pop up when the cycle is complete.
4.3. Reheating Toast
- Place already toasted bread slices into the toasting slots.
- Press the lever down.
- Press the Reheat button (wavy line symbol). Its indicator light will illuminate. This function warms the bread without additional browning.
- The toast will pop up when the cycle is complete.
4.4. Using the Roll Attachment
- To raise the roll attachment, push the lever located on the side of the toaster upwards until it locks into position.
- Place rolls, croissants, or other pastries on the attachment.
- Set the browning dial to a low setting (e.g., 1 or 2).
- Press the main lever down to start the heating cycle.
- Monitor the warming process closely to prevent burning. You may need to turn the items over for even warming.
- Press the Cancel button to stop heating when desired.
- After use, allow the attachment to cool before folding it back down.
5. Maintenance and Cleaning
Regular cleaning ensures optimal performance and extends the life of your toaster.
- Always Unplug: Before cleaning, always unplug the toaster from the power outlet and allow it to cool down completely.
- Empty Crumb Tray: Pull out the crumb tray (refer to Image 2.4) from the bottom of the toaster. Dispose of crumbs and wipe the tray clean with a damp cloth. Ensure it is completely dry before reinserting.
- Clean Exterior: Wipe the exterior of the toaster with a soft, damp cloth. For stubborn stains, a mild detergent can be used, but ensure no liquid enters the toasting slots. Do not use abrasive cleaners or metal scouring pads.
- Interior Cleaning: Never insert fingers or metal objects into the toasting slots. If food is stuck, unplug the toaster, allow it to cool, and carefully invert the toaster to shake out crumbs.
- Storage: When not in use, the power cord can be wound around the cord storage facility at the base of the appliance. Store the toaster in a dry place.
6. Troubleshooting
| Problem | Possible Cause | Solution |
|---|---|---|
| Toaster does not turn on. | Not plugged in; power outlet malfunction; safety shut-off activated. | Check power plug and outlet. Ensure the lever is fully depressed. If bread is jammed, unplug and remove it carefully. |
| Bread is not toasting evenly. | Uneven bread thickness; browning level too low/high. | Ensure bread slices are of similar thickness. Adjust the browning dial. The centering mechanism should help with evenness. |
| Smoke coming from toaster. | Crumbs accumulated; food stuck; first use burn-off. | Immediately press the Cancel button and unplug. Empty the crumb tray. If food is stuck, remove it carefully after cooling. First use smoke is normal. |
| Lever does not stay down. | Toaster not plugged in; internal mechanism issue. | Ensure the toaster is plugged into a live outlet. If the problem persists, contact customer support. |
7. Specifications
- Brand: Severin
- Model Number: AT 2589
- Power: Approximately 800 Watts
- Voltage: 220V
- Material: High-quality and heat-insulating Stainless Steel housing
- Color: Brushed Stainless Steel / Black
- Product Dimensions (L x W x H): 26.5 x 18 x 19.5 cm (approx. 10.4 x 7.1 x 7.7 inches)
- Item Weight: 1.4 kg (approx. 3.1 lbs)
- Slot Count: 2
- Browning Levels: 6
- Special Features: Defrost function, Reheat function, Cancel button, Integrated roll attachment, Bread centering, Automatic shut-off, Crumb tray, Cord winding.
8. Warranty and Support
Severin products are manufactured to high-quality standards. In the unlikely event of a defect or malfunction, please refer to the following information:
- Warranty: This product typically comes with a manufacturer's warranty. Please refer to the warranty card included with your purchase or visit the official Severin website for detailed warranty terms and conditions specific to your region.
- Spare Parts: Severin ensures spare part availability for this model for at least 2 years within the EU.
- Customer Support: For technical assistance, troubleshooting beyond this manual, or warranty claims, please contact Severin customer service. Contact details can usually be found on the official Severin website (www.severin.com) or on your product packaging.
When contacting support, please have your model number (AT 2589) and proof of purchase readily available.


