1. Introduction
This manual provides essential information for the safe and efficient operation, installation, and maintenance of your Airwell HKD 012 - N11 / YKD 012 - H11 split air conditioning system. Please read this manual thoroughly before using the unit and keep it for future reference. Proper understanding of these instructions will ensure optimal performance and longevity of your air conditioner.
2. Safety Information
To prevent injury to the user or others and property damage, the following instructions must be followed. Incorrect operation due to ignoring instructions may cause harm or damage.
- Professional Installation: Installation and maintenance must be performed by qualified personnel.
- Electrical Safety: Ensure the power supply matches the unit's specifications (220-240V AC). Do not operate with wet hands or near water.
- Refrigerant: This unit uses R410A refrigerant. Only qualified technicians should handle refrigerant. The unit features a refrigerant leak alarm.
- Clearance: Maintain adequate clearance around both indoor and outdoor units for proper airflow.
- Children and Pets: Keep children and pets away from the unit during operation and maintenance.
- Cleaning: Disconnect power before cleaning. Use a soft, dry cloth. Do not use harsh chemicals.
3. Product Overview
The Airwell HKD 012 - N11 / YKD 012 - H11 is a versatile split air conditioning system designed for both cooling and heating, offering efficient climate control for rooms up to 35 square meters. It features an inverter compressor for energy efficiency and precise temperature management.
3.1. Outdoor Unit
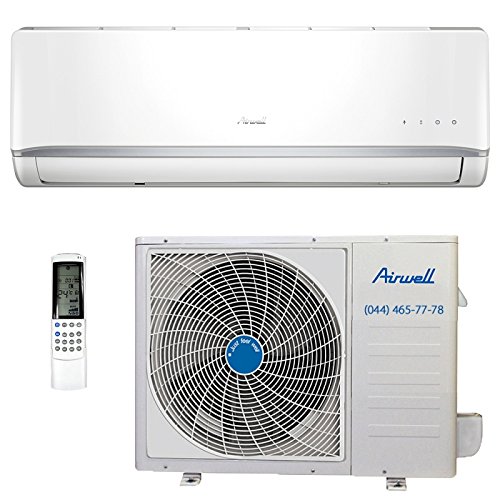
Image: Airwell HKD 012 - N11 / YKD 012 - H11 outdoor unit, showing the fan grille and 'DC INVERTER' branding. This unit is responsible for heat exchange with the outside environment.
3.2. Indoor Unit

Image: Front view of the Airwell indoor unit, a sleek white casing with the 'Airwell' logo and subtle indicator lights/buttons on the right side. This unit delivers conditioned air into the room.

Image: The indoor unit with its front panel open, revealing the air filters. These filters are crucial for maintaining air quality and unit efficiency.
3.3. Remote Control

Image: The remote control for the Airwell air conditioning system, featuring an LCD display and various buttons for mode selection, temperature adjustment, and timer settings.
3.4. Key Features
- Multi-functional: Cooling, Heating, Dehumidification, and Ventilation modes.
- Energy Efficiency: A++ / A+ cooling capacity with a SEER of 5.8, ensuring minimal energy consumption.
- Inverter Technology: Provides precise temperature control and energy savings.
- 'I Feel' Function: Allows for accurate room temperature regulation based on the remote control's sensor.
- Advanced Filtering: Features photocatalytic and antibacterial filtering for improved air quality.
- Self-Cleaning: Automatic cleaning function for the indoor unit and self-cleaning drainage.
- Refrigerant Leak Alarm: Alerts users to potential refrigerant leaks.
- Automatic Restart: Unit restarts with previous settings after a power outage.
- Timer Function: Programmable on/off timer.
4. Setup and Installation
Installation of the Airwell split air conditioning system requires specialized knowledge and tools. It is strongly recommended that installation be performed by a certified HVAC professional to ensure proper function, safety, and warranty validity.
4.1. Pre-Installation Checks
- Verify that the installation site meets the necessary structural requirements to support the weight of both units.
- Ensure adequate space for airflow around both indoor and outdoor units.
- Confirm electrical supply specifications (220-240V AC, 50Hz) are available and meet the unit's power consumption (0.97 kW).
4.2. Key Installation Parameters
- Refrigerant Type: R410A
- Gas Pipe Diameter: 3/8 inch (9.525 mm)
- Liquid Pipe Diameter: 4.1 mm (approximately 5/32 inch)
- Maximum Pipe Length: 20 meters
- Maximum Height Difference: 8 meters between indoor and outdoor units.
- Outdoor Unit Dimensions: 780 x 540 x 250 mm
- Indoor Unit Dimensions: 800 x 275 x 188 mm
5. Operating Instructions
The Airwell air conditioning system is primarily controlled via the wireless remote control. Ensure the remote control has working batteries.
5.1. Basic Operation
- Power On/Off: Press the ON/OFF button on the remote control to start or stop the unit.
- Mode Selection: Press the MODE button to cycle through available modes: Cooling (snowflake icon), Heating (sun icon), Dehumidification (drop icon), and Fan (fan icon).
- Temperature Adjustment: Use the UP/DOWN arrows to set your desired temperature. The unit operates within an outdoor temperature range of -15°C to +50°C for cooling and -15°C to +30°C for heating.
- Fan Speed: Adjust the fan speed using the dedicated fan speed button.
5.2. Advanced Functions
- 'I Feel' Function: Activate this function for precise temperature control. The remote control's built-in sensor measures the ambient temperature at its location and adjusts the unit's operation to maintain the set temperature around the remote.
- Timer Function: Use the TIMER ON/OFF buttons to program the unit to turn on or off automatically at a specified time. Refer to the remote control's specific instructions for detailed timer setup.
- Sleep Mode: (If available on remote) This mode adjusts temperature and fan speed for comfortable sleep and energy saving.
6. Maintenance
Regular maintenance ensures the efficiency and longevity of your air conditioning system. Always disconnect power to the unit before performing any maintenance.
6.1. Air Filter Cleaning
The indoor unit's air filters should be cleaned regularly, typically every two weeks, or more frequently depending on usage and air quality.
- Open the front panel of the indoor unit.
- Carefully remove the air filters.
- Clean the filters using a vacuum cleaner or wash them with lukewarm water and a mild detergent. Rinse thoroughly.
- Allow the filters to dry completely in a shaded area before reinserting them.
- Close the front panel securely.
6.2. Self-Cleaning Function
The unit features an automatic self-cleaning function for the indoor coil and self-cleaning drainage. Consult your remote control manual for instructions on how to activate this feature. This helps prevent mold and bacteria growth and maintains efficiency.
6.3. Seasonal Maintenance
- Before Summer/Winter: Have a qualified technician inspect the refrigerant levels, electrical connections, and overall system performance.
- Outdoor Unit: Keep the outdoor unit clear of debris, leaves, and snow to ensure proper airflow.
7. Troubleshooting
Before contacting service, please check the following common issues:
| Problem | Possible Cause | Solution |
|---|---|---|
| Unit does not start | No power; remote control batteries dead; timer set to OFF. | Check power supply; replace batteries; check timer settings. |
| Poor cooling/heating performance | Dirty air filters; blocked outdoor unit; room too large; windows/doors open. | Clean filters; clear obstructions; ensure proper room insulation. |
| Refrigerant Leak Alarm | System detects a refrigerant leak. | Immediately contact a qualified technician for inspection and repair. Do not operate the unit. |
| Unusual noises | Loose parts; foreign objects; compressor noise (normal). | Check for loose parts; remove foreign objects. If persistent or loud, contact service. |
If the problem persists after attempting these solutions, please contact a qualified service technician.
8. Specifications
| Feature | Specification |
|---|---|
| Model Number | HKD 012 - N11 / YKD 012 - H11 |
| Brand | Airwell |
| Form Factor | Minisplit |
| Color | White |
| Voltage | 230 Volt AC (VAC) |
| Power Source | Corded Electric |
| Max Cooling Capacity | 3.2 kW |
| Max Heating Capacity | 3.5 kW |
| Power Consumption | 0.97 kW |
| Seasonal Energy Efficiency Ratio (SEER) | 5.8 (A++) |
| Energy Efficiency in Heating (COP) | 4.6 (A+) |
| Refrigerant Type | R410A |
| Airflow (m³/h) | 630 |
| Recommended Room Size | Up to 35 m² |
| Outdoor Unit Dimensions (L x W x H) | 780 x 540 x 250 mm |
| Indoor Unit Dimensions (L x W x H) | 800 x 275 x 188 mm |
| Gas Pipe Diameter | 3/8 inch |
| Liquid Pipe Diameter | 4.1 mm |
| Max Pipe Length | 20 m |
| Max Height Difference | 8 m |
| Outdoor Temperature Range (Cooling) | -15°C to +50°C |
| Outdoor Temperature Range (Heating) | -15°C to +30°C |
| Control Method | Remote Control |
| Special Features | Dehumidifier, Inverter, Automatic Restart, Refrigerant Leak Alarm, Self-Cleaning, 'I Feel' Function, Timer |
9. Warranty and Support
The Airwell HKD 012 - N11 / YKD 012 - H11 air conditioning system comes with a 3-year limited warranty from the date of purchase. This warranty covers manufacturing defects under normal use and service.
For warranty claims, technical support, or professional service, please contact your authorized Airwell dealer or service center. Ensure you have your purchase receipt and model information available when contacting support.
Unauthorized repairs or modifications will void the warranty. Always rely on qualified technicians for any service beyond routine user maintenance.


