Product Overview
The Sargent Powerglide 351 Series Grade 1 Aluminum Door Closer with Universal Arm (Model 351 UO EN) is engineered for robust performance in commercial buildings and high-traffic areas. This door closer provides controlled closing of doors, enhancing safety and security while reducing wear and tear on door frames and hardware. It is constructed from durable aluminum and meets stringent industry specifications.
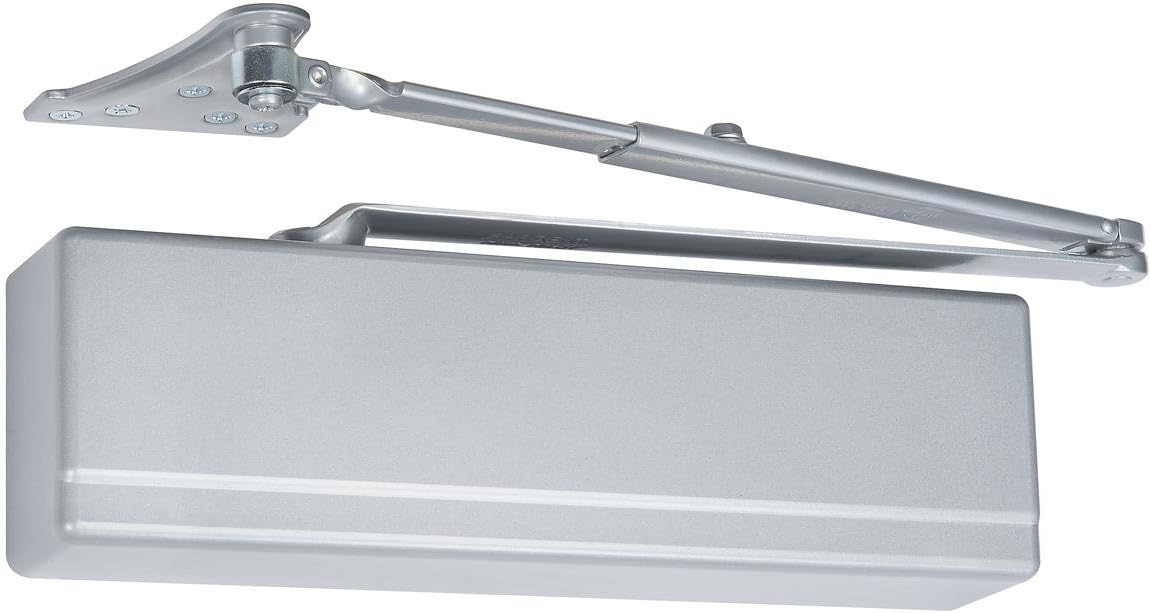
Image: Sargent Powerglide 351 Series Grade 1 Aluminum Door Closer. This image displays the main body of the door closer in a silver aluminum finish, with the universal arm extended. The arm mechanism is visible at the top, designed for versatile installation.
Setup and Installation
The Sargent Powerglide 351 Series door closer is designed for screw-in installation and is suitable for various door types in commercial environments. Proper installation is crucial for optimal performance and longevity.
Pre-Installation Checklist:
- Verify all components are present: closer body, universal arm, mounting screws, and instructions.
- Ensure the door and frame are structurally sound and capable of supporting the closer's weight (approximately 9 pounds).
- Confirm the door closer's handedness (left or right) matches the door's swing direction, or if it's truly universal.
- Gather necessary tools: drill, screwdrivers, measuring tape, level, pencil.
General Installation Steps:
- Mounting Template: Use the provided mounting template (if included) to mark the drilling locations on the door and/or frame.
- Drilling Holes: Drill pilot holes at the marked locations according to the recommended drill bit size.
- Attach Closer Body: Secure the closer body to the door or frame using the provided screws. Ensure it is level and firmly attached.
- Attach Arm Assembly: Connect the universal arm assembly to the closer body and the door frame or door, depending on the mounting configuration (e.g., parallel arm, regular arm, top jamb).
- Adjust Arm Length: Adjust the arm length to achieve the desired opening angle and closing force.
- Final Tightening: Securely tighten all screws and fasteners.
Note: Always refer to the detailed installation instructions provided with your specific unit for precise measurements and mounting configurations.
Operating Instructions
The Sargent Powerglide 351 Series door closer is designed to provide smooth and controlled door closing. Once installed, its operation is largely automatic.
Adjusting Closing Speed:
Most door closers feature adjustment valves to control the closing speed and latching speed. These valves are typically located on the side of the closer body.
- Main Closing Speed Valve: Controls the speed of the door from its fully open position until approximately 10-15 degrees from closed.
- Latching Speed Valve: Controls the speed of the door for the final 10-15 degrees of closing, ensuring the door latches securely without slamming.
To adjust, turn the appropriate valve with a screwdriver. Turning clockwise typically decreases speed (slower close), and turning counter-clockwise increases speed (faster close). Make small adjustments and test the door's operation after each adjustment.
Backcheck Function (if applicable):
Some models include a backcheck function, which provides hydraulic resistance when the door is opened past a certain point (e.g., 70 degrees). This prevents the door from being violently thrown open, protecting the door, frame, and adjacent walls. The backcheck intensity can often be adjusted via a dedicated valve.
Maintenance
Regular maintenance ensures the longevity and proper functioning of your Sargent Powerglide 351 Series door closer.
- Cleaning: Periodically wipe down the closer body and arm with a soft, damp cloth to remove dust and grime. Avoid abrasive cleaners.
- Check Fasteners: Annually inspect all mounting screws and arm fasteners to ensure they are tight. Loose fasteners can lead to improper operation or damage.
- Inspect for Leaks: Check for any signs of hydraulic fluid leaks around the closer body or adjustment valves. If a leak is detected, contact a qualified technician.
- Arm Condition: Ensure the arm assembly moves freely and is not bent or damaged.
Do not attempt to disassemble the closer body, as it contains pressurized hydraulic fluid and may void the warranty.
Troubleshooting
Here are some common issues and their potential solutions for your door closer:
| Problem | Possible Cause | Solution |
|---|---|---|
| Door slams shut. | Latching speed set too fast. | Adjust the latching speed valve (turn clockwise to slow down). |
| Door closes too slowly or doesn't close fully. | Main closing speed set too slow; insufficient spring force; air in hydraulic fluid. | Adjust the main closing speed valve (turn counter-clockwise to speed up). If issue persists, check for leaks or contact support. |
| Door does not latch. | Latching speed too slow; door/frame misalignment. | Increase latching speed. Check door alignment and hinges. |
| Oil leakage from closer body. | Damaged seals or internal components. | This indicates a serious issue. Do not attempt to repair. Contact manufacturer support or a qualified technician for replacement. |
Specifications
| Feature | Detail |
|---|---|
| Model Number | 351 UO EN |
| Manufacturer | SARGENT Manufacturing |
| Recommended Uses | Commercial buildings, high-traffic areas |
| Specification Met | ANSI, UL, cUL |
| Item Weight | 9 pounds |
| Material | Aluminum |
| Color | Silver |
| Exterior Finish | Aluminum |
| Installation Type | Screw-In |
| Batteries Required | No |
Warranty Information
Specific warranty terms for the Sargent Powerglide 351 Series door closer are provided by the manufacturer, SARGENT Manufacturing. Please refer to the documentation included with your product or visit the official SARGENT Manufacturing website for detailed warranty coverage, terms, and conditions.
Customer Support
For technical assistance, replacement parts, or further inquiries regarding your Sargent Powerglide 351 Series door closer, please contact SARGENT Manufacturing directly. Contact information can typically be found on their official website or within the product packaging.
You may also contact the seller from whom you purchased the product for initial support or guidance.


