
InFocus IN128HDX
InFocus IN128HDx 1080p DLP Professional Network Projector User Manual
Model: IN128HDX
1. Introduction
This manual provides essential instructions for the safe and efficient operation of your InFocus IN128HDx 1080p DLP Professional Network Projector. Please read this manual thoroughly before using the projector and retain it for future reference. The InFocus IN128HDx is designed to deliver high-definition content with clarity and brightness, suitable for various professional and educational environments.
2. Product Overview
2.1 Key Features
- Native 1080p resolution for high-definition content display without scaling.
- 4000 lumens brightness and 15,000:1 contrast ratio for clear, readable images in various lighting conditions.
- Integrated 10-watt speaker for audio output.
- Common throw ratio (1.3:1) for flexible installation and replacement.
- Multiple connectivity options: HDMI, VGA, composite, S-video, and LAN port for network management.
2.2 Projector Components

Figure 2.1: Front view of the InFocus IN128HDx projector. This image shows the main lens and the overall compact design of the unit.

Figure 2.2: Top view of the InFocus IN128HDx projector, highlighting the control panel with buttons for power, menu, source selection, and navigation. Also visible are the focus and zoom rings near the lens.

Figure 2.3: Side view of the InFocus IN128HDx projector, illustrating the ventilation grilles for heat dissipation and the overall profile of the device.
3. Setup
3.1 Unpacking and Placement
- Carefully remove the projector from its packaging.
- Place the projector on a stable, flat surface or mount it securely according to installation guidelines. Ensure adequate ventilation around the unit.
- Position the projector at the desired distance from the screen. Refer to the specifications for throw ratio details.
3.2 Connecting to Power
- Connect the power cord to the projector's power inlet.
- Plug the other end of the power cord into a grounded electrical outlet.
3.3 Connecting Video Sources
The IN128HDx supports multiple input sources:
- HDMI: For high-definition digital video and audio. Connect an HDMI cable from your source device to the projector's HDMI port.
- VGA: For analog video signals from computers. Connect a VGA cable from your computer to the projector's VGA port.
- Composite Video: For standard definition video. Connect a composite video cable (yellow RCA) to the corresponding port.
- S-Video: For improved standard definition video. Connect an S-Video cable to the S-Video port.
- LAN: For network control and management. Connect an Ethernet cable to the LAN port.
4. Operating Instructions
4.1 Powering On/Off
- Power On: Press the Power button on the projector's control panel or remote control. The power indicator light will illuminate.
- Power Off: Press the Power button again. A confirmation message may appear; press Power a second time to confirm shutdown. Allow the projector to cool down before unplugging.
4.2 Adjusting Focus and Zoom
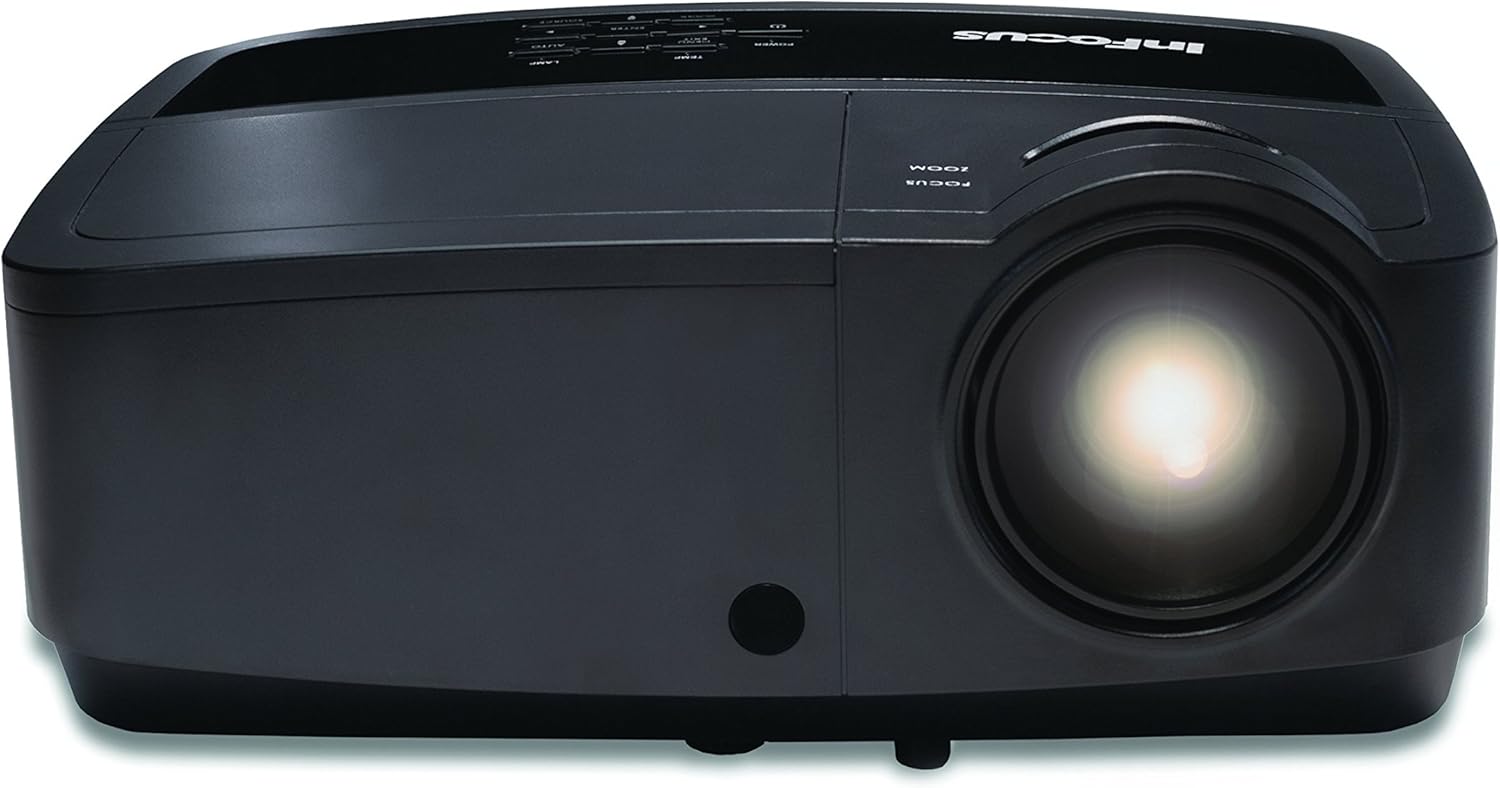
Figure 4.1: Close-up view of the projector lens, showing the manual focus and zoom adjustment rings. These rings are used to sharpen the image and adjust its size on the screen.
- Focus: Rotate the Focus ring around the lens until the image appears sharp and clear on the screen.
- Zoom: Rotate the Zoom ring to adjust the size of the projected image.
4.3 Selecting Input Source
Press the Source button on the control panel or remote control to cycle through available input sources (HDMI, VGA, Composite, S-Video). Alternatively, use the menu to select the desired source.
4.4 Menu Navigation
Press the Menu button to access the on-screen display (OSD) menu. Use the arrow buttons to navigate and the Enter button to select options. Press Menu or Exit to close the menu.
5. Maintenance
5.1 Lamp Replacement
The projector lamp has a finite lifespan. When the lamp indicator illuminates or the image brightness significantly decreases, the lamp may need replacement. Refer to the full service manual for detailed lamp replacement procedures. Always use genuine InFocus replacement lamps.
5.2 Cleaning the Projector
- Exterior: Use a soft, lint-free cloth dampened with a mild cleaning solution to wipe the exterior casing. Do not use abrasive cleaners or solvents.
- Lens: Gently clean the projector lens with a lens cleaning cloth or lens paper. Avoid touching the lens surface with your fingers.
- Air Filters: Regularly check and clean the air filters to ensure proper ventilation and prevent overheating. Refer to the full service manual for filter access and cleaning instructions.
6. Troubleshooting
| Problem | Possible Cause | Solution |
|---|---|---|
| No image displayed |
|
|
| Image is blurry |
|
|
| No audio |
|
|
For more detailed troubleshooting, please consult the comprehensive user manual available on the InFocus support website.
7. Specifications
| Feature | Detail |
|---|---|
| Model Number | IN128HDX |
| Display Type | DLP |
| Native Resolution | 1920 x 1080 (1080p) |
| Brightness | 4000 Lumens |
| Contrast Ratio | 15,000:1 |
| Connectivity | HDMI, VGA, Composite, S-Video, LAN |
| Built-in Speaker | 10-watt |
| Item Weight | 5.06 pounds (2.29 kg) |
| Product Dimensions | 8.66 x 11.5 x 3.86 inches (22 x 29.2 x 9.8 cm) |

Figure 7.1: InFocus IN128HDx projector illustrating its physical dimensions: approximately 29.2 cm (11.5 inches) in length, 22 cm (8.66 inches) in width, and 12.1 cm (4.76 inches) in height.
8. Warranty and Support
For information regarding the product warranty, please refer to the warranty card included with your projector or visit the official InFocus website. For technical support, service, or to purchase replacement parts, please contact InFocus customer service or visit their support portal online.
InFocus Official Website: www.infocus.com
Related documentsIN128HDX


Ask a question about this manual
Ask about setup, troubleshooting, compatibility, parts, safety, or missing instructions. Manuals+ will review the question and use this page’s manual context to help answer it.