Introduction
This user manual provides essential information for the proper installation, operation, and maintenance of your Thakker CT 221 Diamond Stylus. Designed as a high-quality replacement for Marantz TT 221 turntables, this stylus ensures optimal audio performance and longevity when handled correctly. Please read this manual thoroughly before use.
Product Overview
The Thakker CT 221 is a precision-engineered diamond stylus, crafted to deliver clear and accurate sound reproduction from your vinyl records. Its spherical tip design provides reliable tracking and compatibility with a wide range of record types.
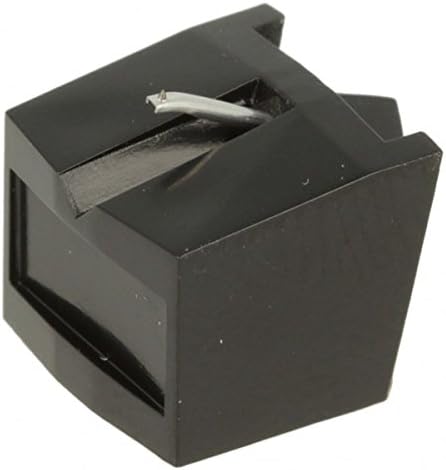
This image displays the Thakker CT 221 diamond stylus. It features a compact black housing, designed for precise fitment into compatible phono cartridges. A slender silver-colored cantilever extends from the housing, terminating in a small, visible diamond tip, which is the component responsible for tracking the record grooves. The overall design is functional and robust, ensuring accurate audio reproduction.
Key Features:
- Quality: Generic stylus, manufactured to high standards.
- Stylus Name: CT 221
- Material: Diamond, bonded for durability and precise tracking.
- Stylus Type: Spherical, offering balanced sound and reduced record wear.
- Color: Red (referring to the genuine stylus color, though the housing is black).
Setup and Installation
Proper installation is crucial for optimal performance and to prevent damage to the stylus or your records. Always handle the stylus by its plastic body, avoiding contact with the cantilever or diamond tip.
- Power Off: Ensure your turntable is powered off and unplugged from the mains electricity before beginning installation.
- Remove Old Stylus (if applicable): Gently grasp the old stylus assembly and pull it straight forward and slightly downward from the cartridge body. Do not twist or apply excessive force.
- Inspect New Stylus: Carefully examine the new Thakker CT 221 stylus for any visible damage or defects.
- Install New Stylus: Hold the new stylus by its plastic housing. Align the stylus with the cartridge body, ensuring the small notch or groove on the stylus aligns with the corresponding slot on the cartridge. Gently push the stylus straight back into the cartridge until it clicks securely into place. Do not force it.
- Verify Seating: Once installed, visually confirm that the stylus is fully seated and flush with the cartridge body. The cantilever should be straight and centered.
- Balance Tonearm: After installation, it is recommended to re-balance your turntable's tonearm and set the tracking force according to your turntable or cartridge manufacturer's specifications. This is critical for proper playback and stylus longevity.
Operating Instructions
Using your turntable with the new stylus requires careful handling to preserve both your records and the stylus itself.
- Clean Records: Always play clean records. Dust and debris can accumulate on the stylus tip, degrading sound quality and potentially damaging the stylus or record grooves.
- Lowering the Stylus: Use the tonearm lift mechanism to gently lower the stylus onto the record. Avoid dropping the tonearm manually, as this can cause impact damage to the stylus.
- Handling: Never touch the stylus tip with your fingers. Oils and dirt from your skin can contaminate the diamond.
- Storage: When not in use, ensure the stylus guard (if provided with your cartridge) is in place, or that the tonearm is secured in its rest.
Maintenance and Care
Regular maintenance will extend the life of your stylus and ensure consistent sound quality.
- Stylus Cleaning:
- Use a dedicated stylus cleaning brush (dry type) or a stylus cleaning fluid with a brush.
- Brush the stylus gently from back to front (from the cartridge body towards the tip). Never brush side-to-side or front-to-back, as this can damage the cantilever.
- Clean the stylus after every few record sides, or whenever you notice visible dust accumulation.
- Record Cleaning: Keep your records clean. A clean record surface significantly reduces the amount of debris transferred to the stylus.
- Avoid Harsh Chemicals: Do not use alcohol or other harsh solvents directly on the stylus or cartridge, as they can damage the bonding agent or plastic components.
- Replacement: A stylus has a finite lifespan. Replace your stylus after approximately 500-1000 hours of playback, or sooner if you notice a degradation in sound quality (e.g., distortion, sibilance) or visible wear on the diamond tip.
Troubleshooting
If you encounter issues with your audio playback, consider the following common problems and solutions:
| Problem | Possible Cause | Solution |
|---|---|---|
| Distorted or muffled sound | Dirty stylus, incorrect tracking force, worn stylus, damaged record. | Clean stylus. Re-adjust tracking force. Inspect stylus for wear; replace if necessary. Clean record. |
| Skipping or jumping | Incorrect tracking force, anti-skate setting, warped record, dirty stylus, damaged stylus. | Adjust tracking force and anti-skate. Ensure records are flat and clean. Clean or replace stylus. |
| No sound or very low volume | Stylus not properly seated, wiring issues, amplifier/receiver settings. | Ensure stylus is fully inserted into the cartridge. Check all audio connections. Verify amplifier input selection and volume. |
| Excessive hum or buzzing | Grounding issue, proximity to electrical interference. | Ensure turntable is properly grounded to the amplifier. Move turntable away from other electronic devices. |
Specifications
- Model Number: 7311
- ASIN: B01CB48H0C
- Stylus Type: Spherical
- Stylus Material: Bonded Diamond
- Compatibility: Marantz TT 221 (and other compatible cartridges)
- Manufacturer: Thakker Japan
Warranty and Support
For information regarding warranty coverage or technical support, please contact the manufacturer, Thakker Japan, or your authorized retailer. Keep your purchase receipt as proof of purchase.
For further assistance, you may visit the official Thakker website or contact their customer service department. Specific contact details are typically provided with your product packaging or on the manufacturer's website.