
1. Introduction
This manual provides comprehensive instructions for the safe and proper installation, operation, and maintenance of your Peerless-AV DesignerSeries Universal Ultra Slim Articulating Wall Mount, model SUA761PU. Please read all instructions carefully before beginning installation to ensure optimal performance and safety.
1.1. What's in the Box
- Universal Ultra Slim Articulating Wall Mount for 37in to 65in Ultra-Thin Displays
- Wall and Display Installation Hardware Kit
- Installation Instructions (this manual)
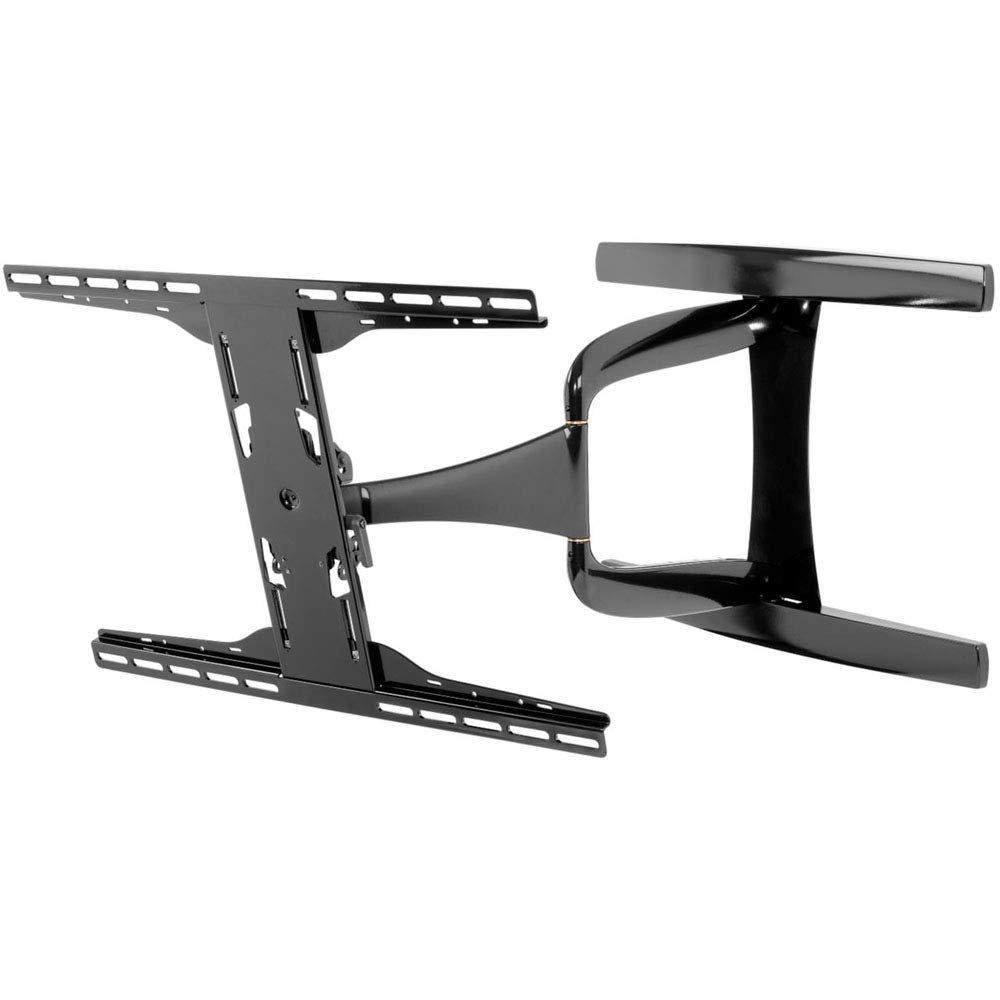
Image 1.1: Main components of the Peerless-AV SUA761PU wall mount.
2. Important Safety Information
WARNING: Failure to read, thoroughly understand, and follow all instructions can result in serious personal injury, property damage, or voiding of the factory warranty. It is the installer's responsibility to ensure all components are properly assembled and installed. If you do not understand these instructions or have doubts about the safety of the installation, contact Peerless-AV customer service or a qualified installer.
- Do not install this product on walls that are not structurally sound.
- Ensure the mounting surface can safely support the combined weight of the mount and the display.
- Always use two people for lifting and positioning the display.
- Do not overtighten screws; this may cause damage and reduce holding capacity.
- Keep children and pets away during installation.
- Check for hidden electrical wires, plumbing, or gas lines before drilling.
3. Setup and Installation
3.1. Tools Required
- Stud Finder
- Drill with appropriate drill bits (e.g., 7/32" for wood studs, 1/2" for concrete)
- Level
- Phillips Head Screwdriver
- Socket Wrench (1/2" or 13mm)
- Pencil
- Measuring Tape
3.2. Mounting Location Considerations
Select a wall location that is free from obstructions and provides adequate viewing angles. Ensure the wall structure can support the weight of your display and the mount. For wood stud installation, locate the center of the studs. For concrete or brick walls, use appropriate anchors (not always included).
3.3. Installation Steps
- Attach Display Brackets: Carefully place your display face down on a soft, clean surface. Identify the correct screws and spacers from the hardware kit that fit your display's VESA mounting holes. Attach the vertical display brackets to the back of your display using these screws and spacers. Ensure the brackets are centered and securely fastened.
- Mount Wall Plate: Position the wall plate on the desired location on the wall. Use a level to ensure it is perfectly horizontal. Mark the drilling locations through the holes on the wall plate. Drill pilot holes according to the wall type (wood stud, concrete, etc.). Secure the wall plate to the wall using the provided lag bolts and washers.
- Attach Articulating Arm: Connect the articulating arm assembly to the wall plate. Ensure all bolts are tightened securely.
- Hang Display: With assistance, carefully lift the display with the attached brackets and hook them onto the articulating arm's horizontal bars. Ensure the display is securely seated on the mount.
- Secure Display: Use the safety screws or locking mechanisms on the display brackets to prevent accidental dislodgement of the display from the mount.
- Cable Management: Route display cables through the internal cable management channels of the articulating arm for a clean and professional appearance.
Image 3.1: Example of wall plate installation.
4. Operation
4.1. Adjusting the Mount
The SUA761PU mount offers various adjustments to optimize your viewing experience:
- Extension/Retraction: Gently pull or push the display to extend or retract the arm. The arm retracts to 1.85" (47mm) and extends up to 24.85" (631mm) from the wall.
- Swivel: Rotate the display horizontally to achieve the desired viewing angle.
- Tilt: Loosen the tilt adjustment knobs (if applicable, refer to specific mount design) on the display brackets, adjust the display to the desired vertical angle, and then retighten the knobs.
- Landscape/Portrait Orientation: This mount supports both landscape and portrait mounting options. To change orientation, carefully remove the display from the mount, rotate the display brackets, and re-mount.
Image 4.1: The mount's articulating arm in an extended position.
5. Maintenance
Regular maintenance ensures the longevity and safe operation of your wall mount.
- Cleaning: Wipe the mount with a soft, dry cloth. Do not use abrasive cleaners or solvents, as they may damage the finish.
- Periodic Checks: Periodically check all screws and bolts to ensure they remain tight. Over time, vibrations or adjustments may cause fasteners to loosen. Retighten as necessary, but do not overtighten.
- Inspect for Damage: Regularly inspect the mount for any signs of wear, damage, or corrosion. If any damage is observed, discontinue use and contact customer support.
6. Troubleshooting
Refer to the table below for common issues and their solutions.
| Problem | Possible Cause | Solution |
|---|---|---|
| Display is not level. | Wall plate or display brackets are not level. | Adjust the wall plate or display brackets. Ensure the wall plate is level during installation. |
| Mount feels loose or wobbly. | Fasteners are not tight enough. | Check and retighten all wall mounting bolts and display bracket screws. Do not overtighten. |
| Difficulty moving the articulating arm. | Joints may be too tight or require lubrication. | Check for any adjustment screws on the joints that might be overtightened. If necessary, apply a small amount of silicone-based lubricant to moving parts. |
| Display not securely attached to arm. | Safety screws or locking mechanisms not engaged. | Ensure the display brackets are fully seated on the arm and all safety screws/locking mechanisms are engaged. |
7. Product Specifications
- Model Number: SUA761PU
- Brand: Peerless-AV
- Compatible Display Sizes: 37" to 65" Ultra-Thin Displays
- Mounting Pattern (VESA): 200 x 100 to 600 x 400mm
- Movement Type: Articulating
- Arm Retraction: 1.85" (47mm) from wall
- Arm Extension: Up to 24.85" (631mm) from wall
- Product Dimensions: 41 x 23.8 x 4 inches (approximate, packaging)
- Item Weight: 24.7 pounds
- Material: Alloy Steel, Aluminum
- Color: Black Glossy Finish
- UPC: 735029306399
8. Warranty Information
Peerless-AV products are designed and manufactured to the highest quality standards. For specific warranty terms and conditions applicable to your SUA761PU mount, please refer to the warranty card included with your product or visit the official Peerless-AV website. Keep your purchase receipt as proof of purchase for warranty claims.
9. Customer Support
If you have any questions, require technical assistance, or need to report a missing or damaged part, please contact Peerless-AV customer support. Contact information can typically be found on the Peerless-AV official website or on the product packaging.
Online Resources: Visit the Peerless-AV website for FAQs, product manuals, and support videos.


