1. Introduction
This instruction manual provides detailed guidance for the safe and efficient installation, operation, and maintenance of your Chamberlain T1EML-05 Basic Timer. Please read this manual thoroughly before attempting to install or use the device. Retain this manual for future reference.
The Chamberlain T1EML-05 is an embedded timer designed for various electrical applications, offering reliable time-based control for your devices.
2. Important Safety Information
WARNING: Risk of Electric Shock!
- Always disconnect power at the circuit breaker or fuse box before installing or servicing the timer.
- Installation should only be performed by a qualified electrician or competent person in accordance with all local electrical codes and regulations.
- Do not use this device with loads exceeding its specified electrical ratings.
- Do not expose the timer to water or extreme moisture.
- Ensure all wiring connections are secure and properly insulated.
3. Package Contents and Product Overview
3.1 Package Contents
- 1 x Chamberlain T1EML-05 Basic Timer
- Instruction Manual (this document)
3.2 Product Overview
The Chamberlain T1EML-05 is a compact, embedded timer designed for flush-mounting. It features a digital display and three control buttons for easy programming.

Figure 1: Front view of the Chamberlain T1EML-05 Basic Timer. This image displays the timer's white casing, a central square digital screen, and three rectangular buttons positioned horizontally below the screen. The buttons appear to have symbols for 'Up', 'Mode/Select', and 'Down'.
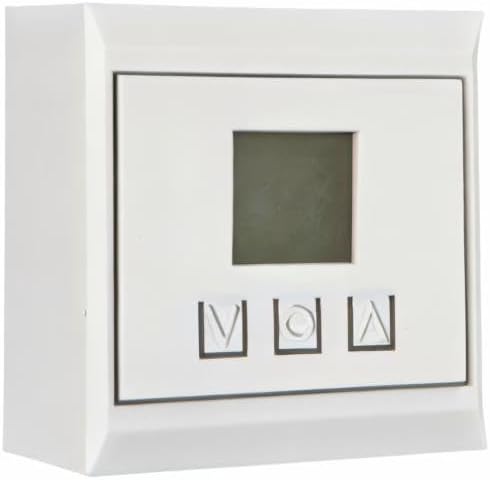
Figure 2: Side perspective view of the Chamberlain T1EML-05 Basic Timer. This image illustrates the depth of the timer unit, highlighting its design for embedded or flush installation within a wall or panel. The front face with the display and buttons is visible from an angle.
4. Installation and Setup
This timer is designed for embedded installation. Ensure you have the necessary tools and electrical knowledge before proceeding. If unsure, consult a qualified electrician.
4.1 Tools Required
- Screwdriver (appropriate type for terminal screws)
- Wire strippers
- Voltage tester
- Mounting box (if not already present)
4.2 Installation Steps
- Power Disconnection: Locate the circuit breaker or fuse controlling the power to the installation area and turn it OFF. Verify power is off using a voltage tester.
- Prepare Wiring: Carefully remove the existing switch or outlet, if applicable. Strip the ends of the electrical wires (Live, Neutral, Load) to the appropriate length as indicated by the timer's terminals.
- Connect Wires: Connect the electrical wires to the corresponding terminals on the Chamberlain T1EML-05 timer. Refer to the wiring diagram provided with the product packaging (if available) or standard electrical wiring practices. Typically:
- Live (L) to Live input
- Neutral (N) to Neutral input
- Load (OUT) to the device being controlled
- Mount the Timer: Gently push the wired timer into the wall mounting box. Secure it with screws provided (if applicable) or by tightening the mounting clamps.
- Install Faceplate: Attach the decorative faceplate (if separate) to the timer.
- Restore Power: Turn the power back ON at the circuit breaker or fuse box.
- Initial Test: The timer display should illuminate. Proceed to the operating instructions.
5. Operating Instructions
The Chamberlain T1EML-05 timer features a digital display and three control buttons: Up (▲), Mode/Set (M), and Down (▼).
5.1 Setting the Current Time
- Press and hold the Mode/Set (M) button for approximately 3 seconds until the time display starts flashing.
- Use the Up (▲) or Down (▼) buttons to adjust the hour.
- Press the Mode/Set (M) button again to move to the minutes setting. Use Up (▲) or Down (▼) to adjust the minutes.
- Press Mode/Set (M) once more to confirm and exit the time setting mode.
5.2 Programming On/Off Cycles
The timer allows you to set multiple ON/OFF programs. The exact number of programs may vary, but the general procedure is as follows:
- Press the Mode/Set (M) button briefly to cycle through program settings (e.g., P1 ON, P1 OFF, P2 ON, P2 OFF, etc.).
- When you reach the desired program (e.g., "P1 ON"), the time will flash. Use the Up (▲) or Down (▼) buttons to set the desired ON time (hour and then minutes).
- Press Mode/Set (M) to confirm the ON time and move to the OFF time for that program (e.g., "P1 OFF").
- Use the Up (▲) or Down (▼) buttons to set the desired OFF time.
- Repeat for additional programs as needed.
- After setting all programs, press the Mode/Set (M) button until the display returns to the current time.
5.3 Manual Override
To manually switch the connected device ON or OFF outside of the programmed schedule, briefly press the Up (▲) or Down (▼) button while the timer is displaying the current time. This will typically cycle through ON, OFF, and AUTO modes. Select AUTO for programmed operation.
6. Maintenance
The Chamberlain T1EML-05 Basic Timer requires minimal maintenance.
- Cleaning: Wipe the surface of the timer with a soft, dry cloth. Do not use abrasive cleaners, solvents, or excessive moisture, as these can damage the unit.
- Inspection: Periodically check the timer for any visible damage or loose connections. If any issues are found, disconnect power and consult a qualified electrician.
7. Troubleshooting
If you encounter issues with your Chamberlain T1EML-05 timer, refer to the following common problems and solutions:
| Problem | Possible Cause | Solution |
|---|---|---|
| Timer display is blank. | No power supply. | Check circuit breaker/fuse. Ensure wiring connections are secure. |
| Connected device does not turn ON/OFF as programmed. | Incorrect program settings; Timer in manual mode; Wiring issue. | Verify program times. Ensure timer is in AUTO mode. Check load wiring. |
| Buttons are unresponsive. | Temporary software glitch; Physical damage. | Try cycling power to the timer (turn off/on at breaker). If issue persists, contact support. |
| Time is inaccurate. | Initial time not set correctly. | Re-set the current time as per Section 5.1. |
If the problem persists after attempting these solutions, please contact Chamberlain customer support.
8. Technical Specifications
| Feature | Detail |
|---|---|
| Brand | Chamberlain |
| Model Number | T1EML-05 |
| Color | White |
| Material | Plastic |
| Product Dimensions (L x W x H) | 19.5 x 8.5 x 8 cm |
| Item Weight | 12 g |
| Number of Settings | 14 (as per product specifications, likely referring to program slots) |
| International Article Number (EAN/UPC) | 04014243213833 |
| Country of Origin | Germany |
9. Warranty Information
Chamberlain products are manufactured to high-quality standards. This product is covered by a limited warranty against defects in materials and workmanship. The specific terms and duration of your warranty may vary by region and purchase date. Please retain your proof of purchase for warranty claims. For detailed warranty information, refer to the documentation included with your product or visit the official Chamberlain website.
10. Customer Support
If you have any questions, require technical assistance, or need to report a problem with your Chamberlain T1EML-05 Basic Timer, please contact Chamberlain customer support.
- Online Support: Visit the official Chamberlain website for FAQs, support resources, and contact forms.
- Telephone Support: Refer to your product packaging or the Chamberlain website for regional contact numbers.
When contacting support, please have your product model number (T1EML-05) and proof of purchase readily available.


