
Introduction
Thank you for choosing the HHIP 4400-1500 Electronic Indicator. This precision measuring instrument is designed for accurate dimensional measurements in various industrial and scientific applications. It features a high-resolution digital display, true inch/millimeter conversion, and a user-friendly interface. Please read this manual thoroughly before operating the device to ensure proper use and to maximize its lifespan.
Product Overview
The HHIP 4400-1500 Electronic Indicator is a versatile tool for precise measurements. Its robust design and clear digital display make it ideal for demanding environments.
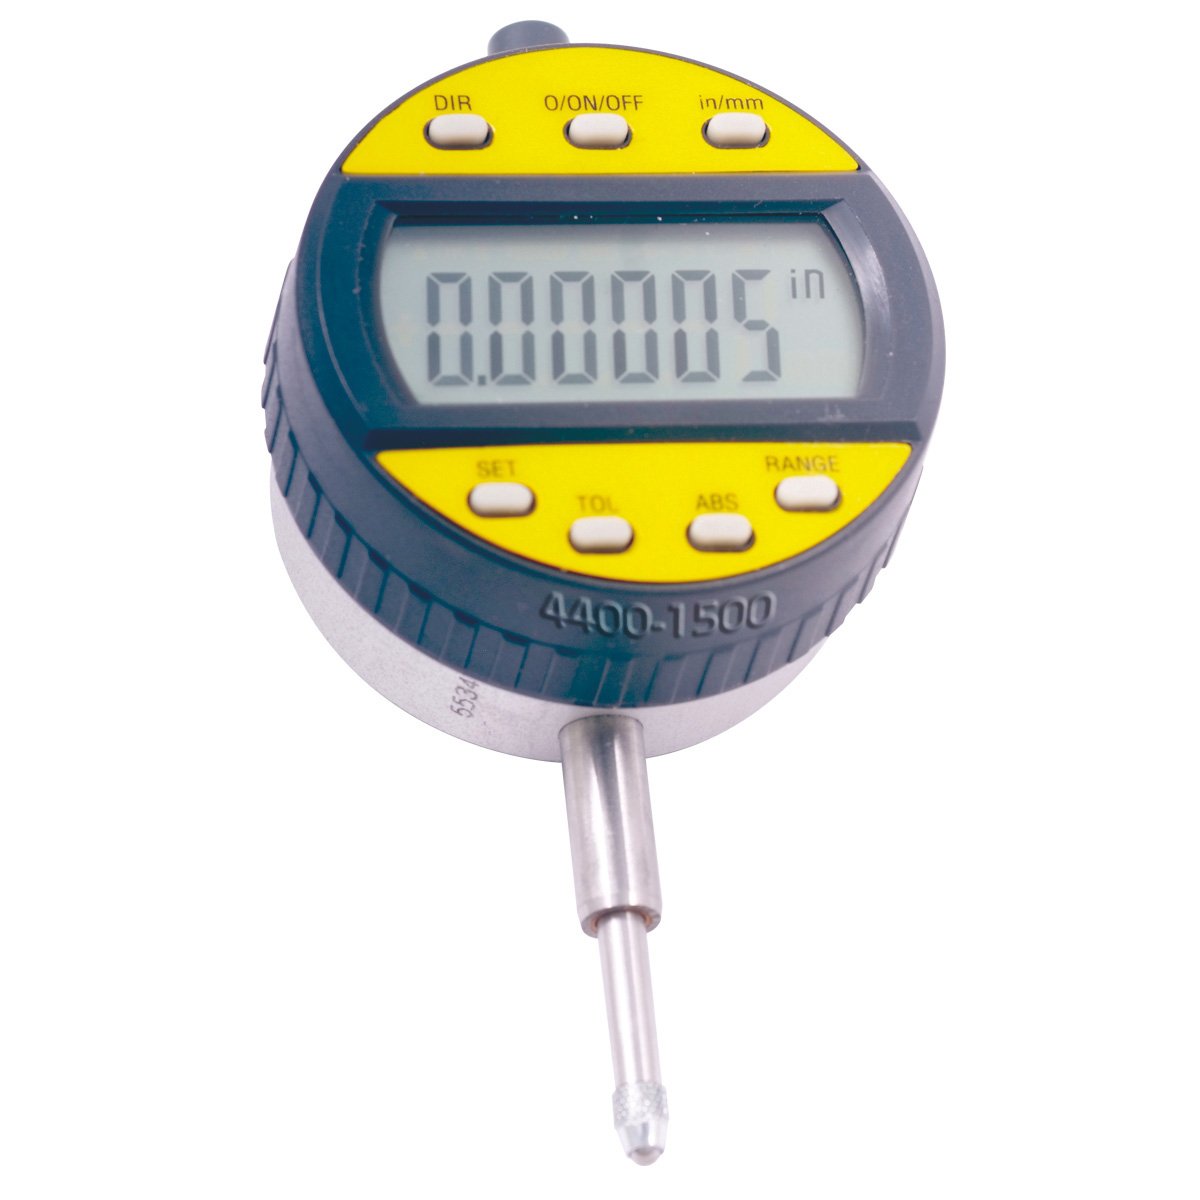
Figure 1: HHIP 4400-1500 Electronic Indicator. This image shows the front view of the electronic indicator, highlighting its large digital display, the yellow control panel with various buttons (DIR, O/ON/OFF, in/mm, SET, TOL, ABS, RANGE), and the measuring spindle extending from the bottom. The model number "4400-1500" is visible below the buttons.
Key Features:
- High Resolution: 0.00005 inch / 0.001 mm for precise readings.
- Measurement Range: 0-0.5 inch / 0-12.7 mm.
- True Inch/Millimeter Conversion: Seamless switching between imperial and metric units.
- High Accuracy: 0.0002 inch / 0.005 mm.
- 7 Control Keys: On/Off, Direction (Dir), Inch/mm, Tolerance (Tol), Set, Absolute (ABS), and Range.
- Easy Reading Adjustment: Standard or reverse reading options.
- Flat Back Design: For stable mounting.
- Standard Stem Diameter: 8 mm.
- Battery Operated: Uses one SR44/1.5V button battery.
Setup
- Unpacking: Carefully remove the electronic indicator from its fitted case. Inspect the device for any signs of damage during transit.
- Battery Installation:
- Locate the battery compartment cover, typically on the back or side of the unit.
- Open the cover and insert one SR44/1.5V button battery, ensuring correct polarity (+/-).
- Close the battery compartment cover securely.
- Mounting: The indicator features an 8 mm stem. Mount the indicator securely into a suitable stand or fixture using the stem. Ensure the mounting is rigid to prevent measurement errors.
- Initial Power On: Press the O/ON/OFF button to turn on the device. The display should illuminate and show a reading.
Operating Instructions
Button Functions:
- O/ON/OFF: Powers the unit on or off.
- DIR (Direction): Changes the measurement direction (e.g., positive or negative reading for increasing/decreasing values).
- in/mm: Toggles between inch and millimeter measurement units.
- TOL (Tolerance): Used for setting tolerance limits for Go/No-Go gauging. Refer to advanced operation for detailed setup.
- SET: Sets the current position to zero or a specific reference value.
- ABS (Absolute): Switches between absolute and incremental measurement modes. In absolute mode, measurements are relative to a fixed zero point. In incremental mode, measurements are relative to the last set zero point.
- RANGE: May be used to select different measurement ranges or resolutions if applicable (check specific model features).
Basic Measurement Steps:
- Power On: Press the O/ON/OFF button.
- Select Units: Press the in/mm button to choose your desired unit (inches or millimeters).
- Zero Setting:
- Position the measuring probe against your reference surface or workpiece.
- Press the SET button to zero the display at this position.
- Take Measurement: Move the probe to the point you wish to measure. The display will show the deviation from your set zero point.
- Change Direction (Optional): If the reading direction is not as desired, press the DIR button to reverse it.
- Absolute/Incremental Mode (Optional): Use the ABS button to switch between absolute and incremental measurements as needed for your application.
Maintenance
- Cleaning: Wipe the indicator body and probe with a soft, dry, lint-free cloth after each use. For stubborn dirt, a cloth lightly dampened with isopropyl alcohol can be used, but avoid excessive moisture.
- Storage: Store the indicator in its original fitted case when not in use to protect it from dust, moisture, and physical damage. Store in a dry environment at room temperature.
- Battery Replacement: When the display becomes dim or erratic, replace the SR44/1.5V button battery. Ensure the device is off before replacing the battery.
- Calibration: For critical applications, periodic calibration by a qualified technician is recommended to maintain accuracy.
- Avoid Impact: Do not drop or subject the indicator to strong impacts, as this can damage the precision internal components.
Troubleshooting
| Problem | Possible Cause | Solution |
|---|---|---|
| Display is blank or dim. | Battery is dead or low. Incorrect battery polarity. | Replace the SR44/1.5V battery. Ensure battery is inserted with correct polarity. |
| Inaccurate readings. | Probe or spindle is dirty. Indicator not properly zeroed. Loose mounting. Environmental factors (temperature fluctuations). | Clean the probe and spindle. Re-zero the indicator. Ensure the indicator is securely mounted. Allow the indicator to acclimate to the measurement environment. |
| Buttons are unresponsive. | Low battery. Internal electronic issue. | Replace the battery. If the issue persists, contact customer support. |
| Display shows "Error" or erratic numbers. | Electronic interference. Internal malfunction. | Move away from strong electromagnetic fields. Try turning the unit off and on again. If the problem continues, contact customer support. |
Specifications
| Model Number | 4400-1500 |
| Measurement Range | 0-0.5 inch / 0-12.7 mm |
| Resolution | 0.00005 inch / 0.001 mm |
| Accuracy | 0.0002 inch / 0.005 mm |
| Stem Diameter | 8 mm |
| Battery Type | SR44 / 1.5V Button Cell |
| Product Dimensions | 15.24 x 10.16 x 7.62 cm (6 x 4 x 3 inches) |
| Product Weight | 1 kg (2.2 lbs) |
Warranty and Support
HHIP products are manufactured to high quality standards. For information regarding warranty coverage, please refer to the warranty card included with your product or visit the official HHIP website. For technical support, troubleshooting assistance beyond this manual, or spare parts, please contact HHIP customer service through their official channels.
Website: www.hhip.com