1. Important Safety Instructions
Please read and understand all instructions before using this appliance. Keep this manual for future reference.
- Do not operate the toaster without the crumb tray in place.
- Do not insert oversized foods, metal foil packages, or utensils into the toaster slots.
- Unplug the toaster from the outlet when not in use and before cleaning.
- Do not immerse the toaster, cord, or plug in water or other liquids.
- Ensure the appliance is placed on a stable, heat-resistant surface.
- Do not operate if the cord or plug is damaged.
- Bread may burn, therefore toasters must not be used near or below curtains and other combustible materials. They must be watched.
2. Product Overview
The Dualit Classic 2 Slice NewGen Toaster is designed for durability and precise toasting. It features ProHeat elements, a mechanical timer, and a manual ejector lever.

Figure 1: Key components of the Dualit Classic 2 Slice Toaster, including ProHeat Elements, Selector Switch, Mechanical Timer, Defrost Function, Manual Ejector, and Removable Crumb Tray.
- ProHeat Elements: Designed for efficiency and longevity, providing even heat distribution.
- Slot Selector: Allows activation of one or both slots for energy efficiency.
- Mechanical Timer: Provides precise control over browning levels.
- Manual Ejector Lever: Enables checking toast progress without interrupting the cycle and keeps toast warm until ready.
- Removable Crumb Tray: For easy cleaning and maintenance.
3. Setup
- Unpack: Carefully remove the toaster and all packaging materials.
- Placement: Place the toaster on a flat, stable, heat-resistant surface, away from curtains or other flammable materials. Ensure adequate ventilation around the appliance.
- Power Connection: Plug the toaster into a grounded electrical outlet.
- First Use (Seasoning): Operate the toaster empty for a few minutes on a medium setting to burn off any manufacturing residues. A slight odor or smoke is normal during this initial use. Ensure the area is well-ventilated.
4. Operating Instructions
4.1 Basic Toasting
- Insert Bread: Place slices of bread into the toaster slots. The wide 28mm slots accommodate various bread types, including bagels.
- Select Slots: Use the slot selector dial to activate the desired number of slots (e.g., one for a single slice, two for two slices).
- Set Browning: Turn the mechanical timer dial to your preferred browning level. Settings typically range from light to dark.
- Lower Bread: Push down the manual ejector lever to lower the bread into the toasting chamber. The toasting cycle will begin.
- Monitor Toast: You can lift the manual ejector lever at any time to check the toast progress without stopping the timer. Lower it back down to continue toasting.
- Retrieve Toast: Once the timer completes, the toast will remain warm in the slots. Push the manual ejector lever up to retrieve the toast.
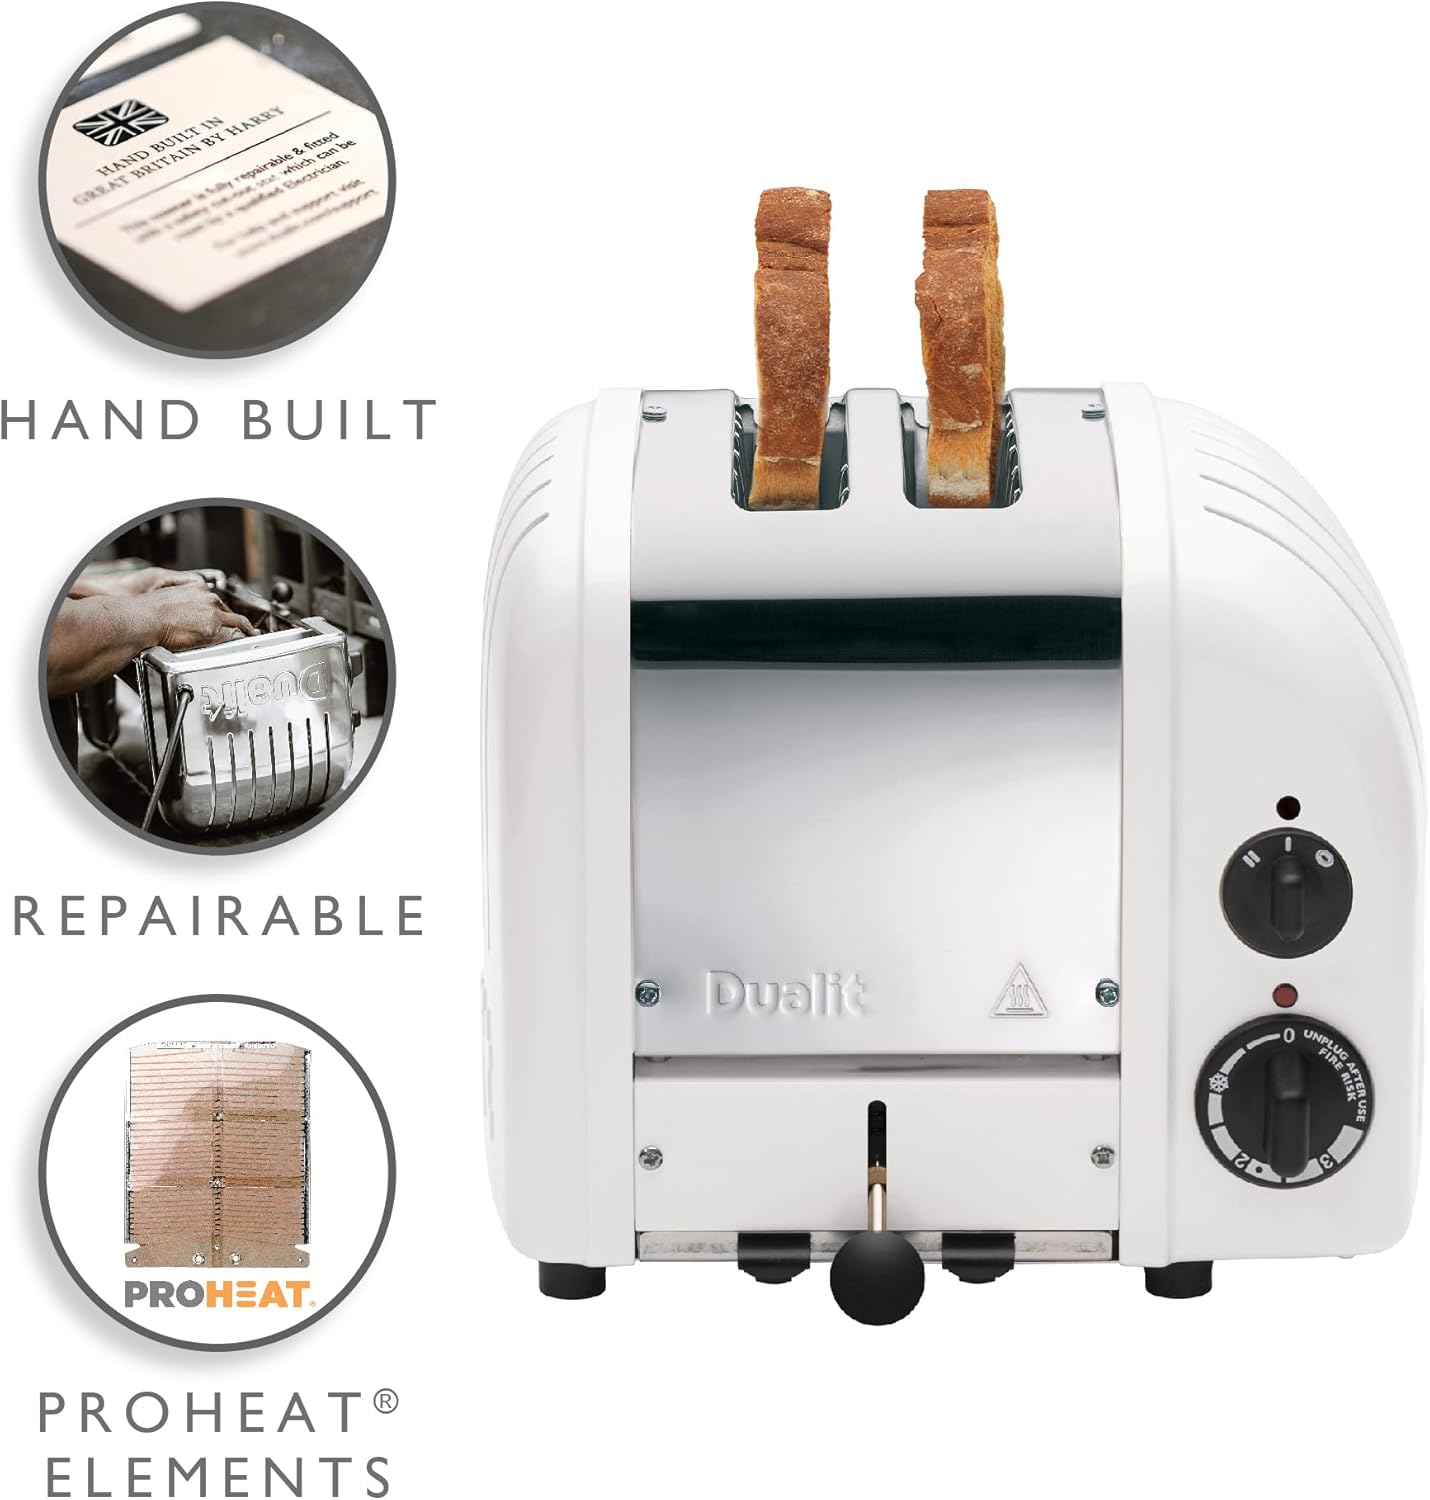
Figure 2: The Dualit Classic 2 Slice Toaster in operation, showing two slices of bread being toasted.
4.2 Defrost Function
To toast frozen bread, select the defrost setting on the mechanical timer dial (often indicated by a snowflake symbol). This setting adds extra time to thaw the bread before toasting to your selected browning level.
4.3 Bagel Function
The toaster features a bagel function that toasts the cut side of bagels while gently warming the other side. Ensure the cut side of the bagel faces inwards towards the active heating elements.
4.4 Manual Ejector Lever
The manual ejector lever allows you to check the browning progress at any point during the cycle. Simply lift the lever to raise the toast, inspect it, and then lower it back down to continue toasting. This feature also keeps the toast warm in the slots until you are ready to remove it.
5. Maintenance and Cleaning
Regular cleaning ensures optimal performance and longevity of your Dualit toaster.
5.1 Crumb Tray
- Unplug: Always unplug the toaster and allow it to cool completely before cleaning.
- Remove Tray: Pull out the removable crumb tray located at the bottom front of the toaster.
- Empty: Discard accumulated crumbs.
- Clean: Wipe the tray with a damp cloth. Do not use abrasive cleaners.
- Replace: Ensure the crumb tray is dry before reinserting it into the toaster.

Figure 3: The removable crumb tray is easily accessible for cleaning.
5.2 Exterior Cleaning
Wipe the exterior of the toaster with a soft, damp cloth. For stainless steel surfaces, use a non-abrasive stainless steel cleaner. Avoid using harsh chemicals or abrasive pads that could scratch the finish.
5.3 ProHeat Elements
The Dualit ProHeat elements are designed to be durable and long-lasting. In the event of an element failure, they are replaceable. Refer to the Dualit website or authorized service centers for replacement elements and instructions.

Figure 4: Dualit ProHeat elements feature a protective covering for enhanced durability and even toasting.
6. Troubleshooting
- Uneven Toasting: Ensure the bread slices are of uniform thickness and fit properly in the slots. For single slices, ensure the slot selector is set correctly.
- Toaster Not Heating: Check if the toaster is properly plugged into a working outlet. Ensure the timer dial is set and the ejector lever is fully depressed.
- Smoke/Burning Smell: Unplug immediately. Check the crumb tray for excessive crumbs and clean if necessary. Ensure no food items are stuck in the slots.
- Toast Stuck: Unplug the toaster and carefully remove the toast using non-metallic tongs. Never use metal utensils.
7. Specifications
| Feature | Detail |
|---|---|
| Brand | Dualit |
| Model Number | 27153 |
| Color | White (NewGen) |
| Material | Stainless Steel |
| Product Dimensions | 10"D x 8"W x 9"H |
| Wattage | 1800 Watts |
| Number of Slices | 2 |
| Voltage | 120 Volts |
| Item Weight | 7.7 Pounds |

Figure 5: Product dimensions for the Dualit Classic 2 Slice Toaster.
8. Warranty and Support
The Dualit Classic Toaster is hand-built in the UK and designed for longevity with repairable and replaceable parts. For warranty information, spare parts, or technical support, please visit the official Dualit website or contact their customer service.
This toaster is fully repairable and fitted with a safety cut-out switch which can be reset by a qualified Electrician. For help and support, visit www.dualit.com/support.
9. Official Product Videos
Explore the craftsmanship and features of your Dualit Classic Toaster through these official videos:
How the Classic Toaster is Made
Video 1: A look into the manufacturing process of the Dualit Classic Toaster, highlighting its hand-built quality and attention to detail.
Dualit Classic NewGen Toaster Overview
Video 2: An overview of the Dualit Classic NewGen Toaster, showcasing its features and design.


