Introduction
Welcome to your new Sunbeam Turbo Steam Iron! This manual provides essential information for the safe and efficient operation, maintenance, and troubleshooting of your appliance. Please read it thoroughly before first use and keep it for future reference.
Important Safety Instructions
When using electrical appliances, basic safety precautions should always be followed, including the following:
- Read all instructions before using the iron.
- Use iron only for its intended use.
- To protect against a risk of electric shock, do not immerse the iron in water or other liquids.
- Always turn the iron OFF before plugging or unplugging from the electrical outlet. Never yank cord to disconnect from outlet; instead, grasp plug and pull to disconnect.
- Do not allow cord to touch hot surfaces. Let iron cool completely before putting away. Loop cord loosely around iron when storing.
- Always disconnect iron from electrical outlet when filling with water or emptying, and when not in use.
- Do not operate iron with a damaged cord or if the iron has been dropped or damaged. To avoid the risk of electric shock, do not disassemble the iron; take it to a qualified serviceman for examination and repair. Incorrect reassembly can cause a risk of electric shock when the iron is used.
- Close supervision is necessary for any appliance being used by or near children. Do not leave iron unattended while connected or on an ironing board.
- Burns can occur from touching hot metal parts, hot water, or steam. Use caution when you turn a steam iron upside down – there may be hot water in the reservoir.
- This appliance is for household use only.
Product Overview
Familiarize yourself with the components and key features of your Sunbeam Turbo Steam Iron.
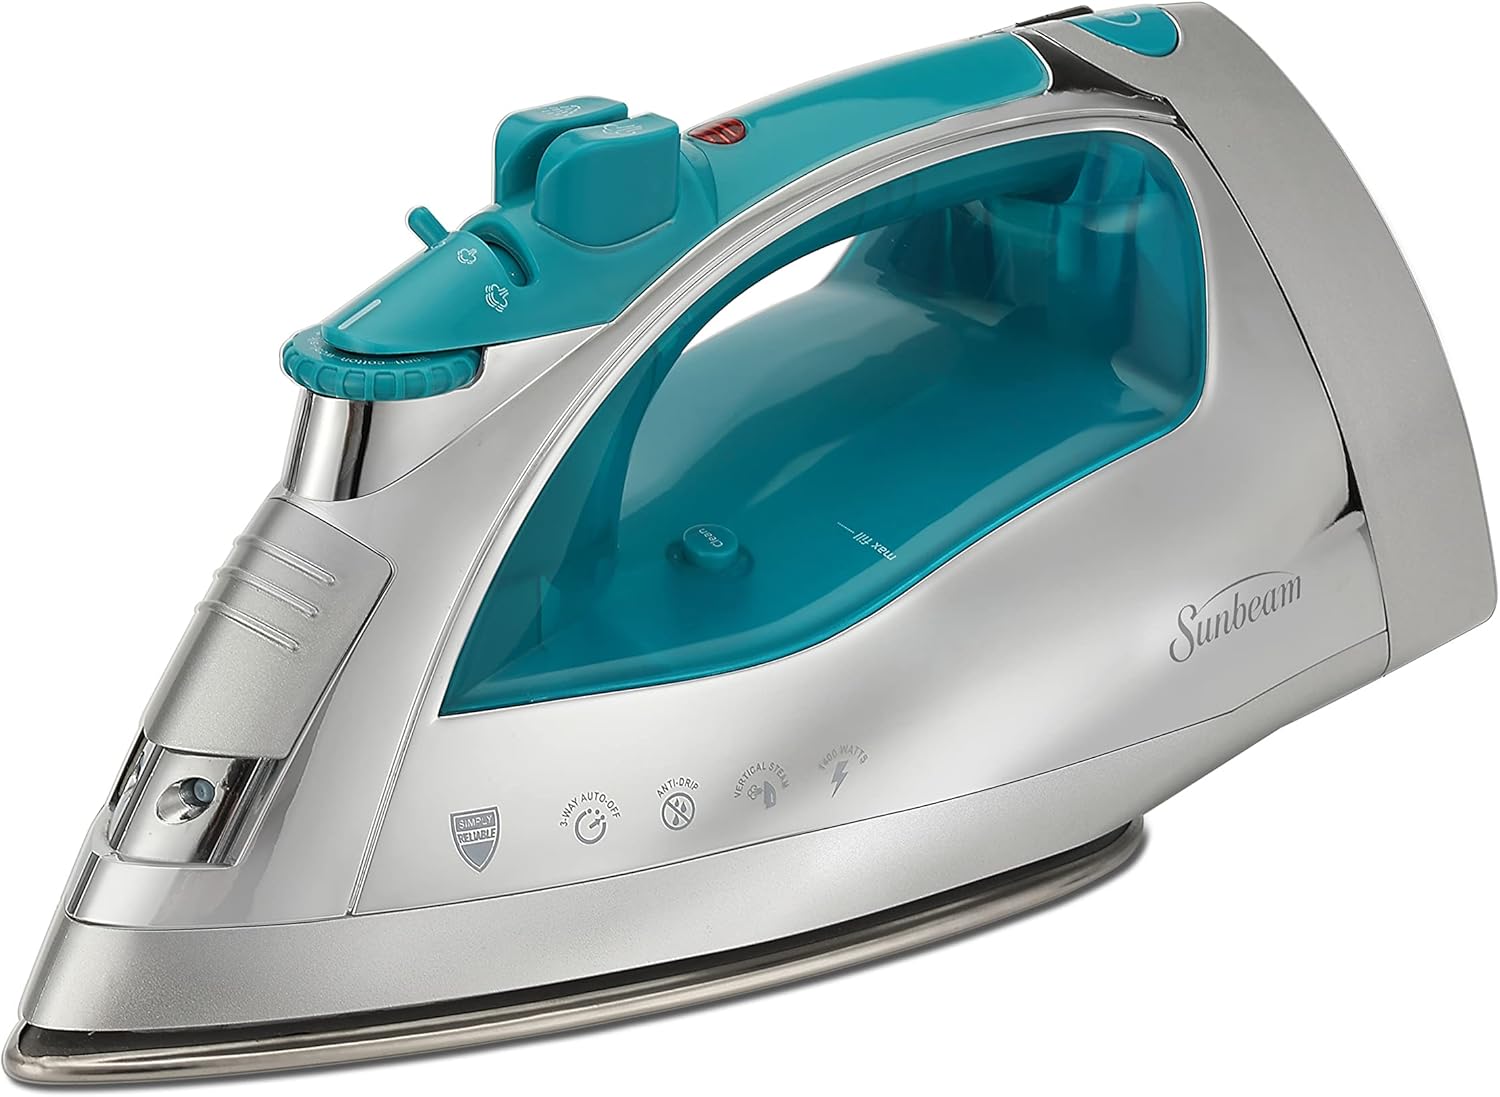
Figure 1: Front view of the Sunbeam Turbo Steam Iron in Chrome/Teal color. It features a sleek design with a nonstick ceramic soleplate and a comfortable handle.

Figure 2: A user demonstrating the powerful Shot of Steam feature while ironing clothes on an ironing board. This feature helps to smooth out stubborn wrinkles.

Figure 3: The iron being used for vertical steaming on a hanging garment, showcasing its versatility for different fabric types and situations.

Figure 4: A detailed view of the large stainless steel non-stick soleplate, designed for smooth gliding over various fabrics.

Figure 5: A close-up showing the dual spray mist feature in action, which helps to dampen fabrics for easier wrinkle removal.

Figure 6: Hands demonstrating the retractable 8-foot power cord, which allows for convenient storage and prevents tangling.

Figure 7: The iron highlighting its 3-way timed auto-off safety feature, which automatically shuts off the iron if left unattended.

Figure 8: An overhead view of the iron with its dimensions, showing a length of 12.1 inches and a width of 4.9 inches.
Setup
Before First Use
- Remove any labels, protective film, or stickers from the iron's soleplate and body.
- Unwind the power cord completely.
- It is recommended to test the iron on an old piece of fabric to ensure no residue is left on the soleplate from manufacturing.
Filling the Water Tank
- Ensure the iron is unplugged from the electrical outlet.
- Set the steam control to the "Dry Iron" position (no steam).
- Open the water fill cover located on the top of the iron.
- Using a clean measuring cup, carefully pour tap water into the water tank up to the "MAX" fill line. Do not overfill.
- Close the water fill cover securely.
Note: For optimal performance and to prevent mineral buildup, distilled or demineralized water is recommended, especially in areas with hard water.
Operating Instructions
Powering On and Temperature Setting
- Plug the iron into a standard electrical outlet. The indicator light will illuminate.
- Turn the temperature control dial to the desired fabric setting (e.g., Linen, Cotton, Wool, Silk, Synthetic). Refer to the fabric care label on your garment.
- Allow the iron to heat up. The indicator light will turn off when the selected temperature is reached.
Steam Ironing
- Ensure the water tank is filled (refer to "Filling the Water Tank").
- Set the temperature control dial to a steam-compatible setting (usually Cotton, Linen, or Wool). Steam will not be generated at lower temperatures.
- Once the iron reaches the set temperature, adjust the steam control to the desired steam level.
- Begin ironing, moving the iron smoothly over the fabric.
Shot of Steam / Vertical Steam
The Shot of Steam feature provides an extra burst of steam for stubborn wrinkles or for vertical steaming of hanging garments.
- Ensure the iron is at a high temperature setting (e.g., Cotton or Linen).
- Press the "Shot of Steam" button (often located on the handle) to release a powerful burst of steam.
- For vertical steaming, hold the iron upright, close to the hanging garment, and press the "Shot of Steam" button repeatedly as needed.
Spray Mist
- Press the "Spray Mist" button (often located near the handle) to release a fine mist of water onto the fabric.
3-Way Auto-Off Safety Feature
For safety, the iron is equipped with a 3-way auto-off system:
- If left motionless on its soleplate, it will shut off after approximately 30 seconds.
- If left motionless on its side, it will shut off after approximately 30 seconds.
- If left motionless on its heel rest, it will shut off after approximately 15 minutes.
Warning: The auto-off feature is a safety measure and not a substitute for unplugging the iron when not in use.
Video Demonstration: Retractable Cord
Video 1: This video demonstrates the convenient retractable cord feature of the Sunbeam Turbo Steam Iron. The user shows how to extend and retract the cord by pressing a button, highlighting its ease of use for storage.
Maintenance
Cleaning the Soleplate
- Allow the iron to cool completely before cleaning.
- Wipe the soleplate with a damp cloth and a non-abrasive cleaner if necessary.
- Do not use metallic scouring pads or abrasive cleaners, as these will scratch the soleplate.
Self-Clean Function
The self-clean function helps to remove mineral deposits from the steam vents.
- Fill the water tank to the "MAX" line.
- Plug in the iron and set the temperature to "Linen" or "Max".
- Once the iron reaches temperature, unplug it.
- Hold the iron horizontally over a sink.
- Press and hold the "Self-Clean" button (if available) or the "Shot of Steam" button repeatedly until all water has emptied from the tank and steam/hot water stops coming out.
- Plug the iron back in and allow it to heat up again to dry out any remaining water.
- Unplug and store the iron once cool.
Storage
- Always ensure the iron is completely cool and empty of water before storing.
- Retract the power cord for neat storage.
- Store the iron upright on its heel rest to prevent soleplate damage.
Troubleshooting
| Problem | Possible Cause | Solution |
|---|---|---|
| Iron does not heat up. | Not plugged in; power outlet not working; auto-off activated. | Check power connection; test outlet with another appliance; move iron to reactivate. |
| No steam or insufficient steam. | Water tank empty; temperature too low for steam; steam control set to "Dry Iron"; mineral buildup. | Fill water tank; set temperature to steam-compatible setting; adjust steam control; perform self-clean. |
| Water leaks from soleplate. | Temperature too low for steam; overfilled water tank; iron not hot enough for Shot of Steam. | Allow iron to heat fully; do not overfill; wait for iron to reach full temperature before using Shot of Steam. |
| Soleplate is sticking or dirty. | Residue from fabrics or starch buildup. | Clean soleplate with a damp cloth and non-abrasive cleaner. |
| Retractable cord not retracting. | Cord mechanism jammed. | Gently pull the cord out slightly and then press the retract button again. Ensure there are no kinks. |
Specifications
- Model: 32610014
- Brand: Sunbeam
- Power: 1400 Watts
- Soleplate Material: Nonstick Ceramic (Stainless Steel base)
- Features: Shot of Steam, Vertical Steam, Spray Mist, 3-Way Auto-Off, Self-Clean, Retractable Cord
- Water Tank Capacity: 240ml (approx.)
- Cord Length: 8 feet (retractable)
- Dimensions: 13.85"L x 6.49"W (Product Dimensions)
- Item Weight: 2.95 pounds


