1. Introduction
The LUMIX DMC-TZ85 is a compact digital camera equipped with 4K video recording and a 30x optical zoom. This model features 4K 30p video recording, enhanced "4K PHOTO" functionality for continuous shooting at 30 frames per second, and a new "Focus Select" feature that allows you to choose your preferred focus point after shooting. This design aims to reduce missed focus errors during photography and enables more personalized photo creation. It is equipped with a LEICA DC lens offering 30x optical zoom from a wide-angle 24mm and a new Venus Engine, achieving both high magnification and high image quality.
Key Features:
- Easily capture the best shots with "4K Photo (High-Speed Burst)" and the new "Focus Select" function.
- Achieves high image quality with a wide-angle 24mm / 30x optical LEICA DC lens and new Venus Engine.
- High-definition video recording is also possible, supporting 4K30p and AVCHD 60p shooting.
- Language display options: Japanese, English, Simplified Chinese, Traditional Chinese, Korean.
- Minimum shooting distance: 50cm.
- Effective pixels: 18.1 million pixels.
- Weight: 282g (including battery and memory card).
- Face recognition available.
2. Setup
2.1 Unpacking and Checking Contents
Before using your camera, ensure all accessories are present:
- Panasonic LUMIX DMC-TZ85-W Camera Body
- Battery Pack
- AC Adapter
- USB Connection Cable
- Hand Strap
- Instruction Manual (this document)
2.2 Charging the Battery
- Insert the battery pack into the camera.
- Connect the camera to the AC adapter using the USB connection cable.
- Plug the AC adapter into a power outlet. The charging indicator will illuminate.
- Charging is complete when the indicator turns off.
2.3 Inserting a Memory Card
Open the battery/card compartment cover on the bottom of the camera. Insert a compatible SD memory card (sold separately) into the slot until it clicks into place. Ensure the card is inserted in the correct orientation.
2.4 Attaching the Hand Strap
Thread the hand strap through the strap eyelet on the camera body and secure it firmly to prevent accidental drops.
2.5 Initial Settings
Upon first power-on, the camera will prompt you to set the date, time, and language. Follow the on-screen instructions to configure these basic settings.
3. Operating the Camera
3.1 Power On/Off
Press the ON/OFF button located on the top of the camera to power it on or off.
3.2 Basic Photography
- Turn the mode dial to select your desired shooting mode (e.g., Intelligent Auto, Program AE).
- Frame your shot using the LCD monitor or the electronic viewfinder.
- Press the shutter button halfway down to focus.
- Press the shutter button fully to take the picture.
3.3 Optical Zoom Function
The camera features a 30x optical zoom. Use the zoom lever around the shutter button to zoom in (T) or out (W).

Image: Comparison of 1x, 10x, and 30x optical zoom. The 1x image shows a wide view of a building, the 10x image shows a closer view of a section of the building, and the 30x image shows a highly magnified detail of the building's architecture.
3.4 Using the Viewfinder
The electronic viewfinder (EVF) provides a clear view for framing, especially in bright conditions. The camera automatically switches between the LCD and EVF when you bring your eye to the viewfinder.
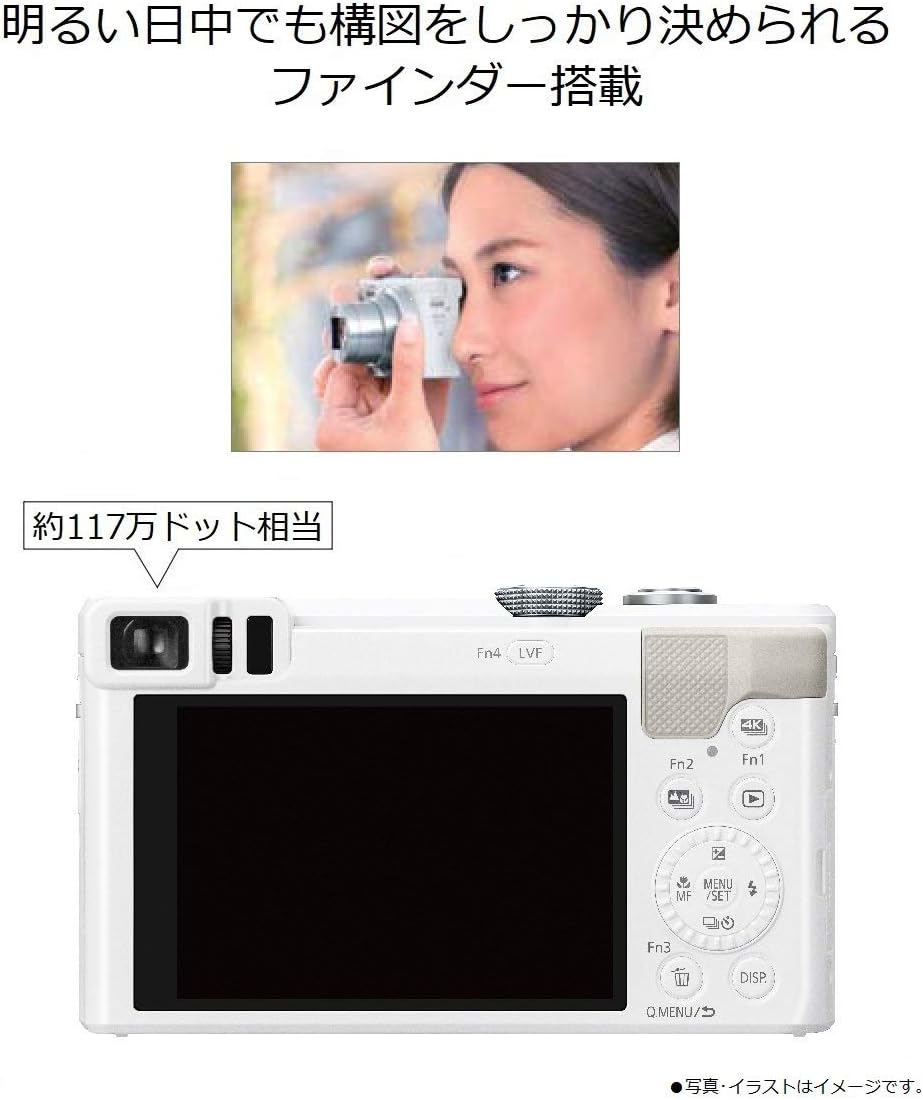
Image: Top image shows a woman looking through the camera's electronic viewfinder. The bottom image displays the rear of the camera, highlighting the viewfinder and the surrounding control buttons, indicating approximately 1.17 million dots resolution.
3.5 4K PHOTO Mode
In 4K PHOTO mode, the camera records a short 4K video sequence at 30 frames per second. You can then select and save individual frames as 8-megapixel still images.

Image: This illustration demonstrates the "4K PHOTO" feature. It shows a sequence of four frames captured in one second at 30 frames per second, featuring a cat licking its nose. Below, one frame is highlighted as the 'favorite photo', showcasing the ability to select the best moment from a burst.
3.6 Focus Select Function
The Focus Select function allows you to change the focus point of an image after it has been taken. This is particularly useful for ensuring critical focus on your desired subject.

Image: This image illustrates the "Focus Select" feature. The top photo shows an old camera in the foreground with the focus on it, while the background is blurred. The bottom photo shows the same scene but with the focus shifted to the background light fixtures, demonstrating the ability to choose the focus point after shooting.
3.7 Video Recording
To record video, turn the mode dial to the video recording mode. Press the dedicated video record button to start and stop recording. The camera supports 4K30p and AVCHD 60p video formats.
4. Maintenance
4.1 Cleaning the Camera
- Use a soft, dry cloth to clean the camera body.
- For the lens, use a lens brush or a blower to remove dust, then gently wipe with a lens cleaning cloth.
- Avoid using strong chemical cleaners or solvents.
4.2 Storage
When not in use for extended periods, remove the battery and store the camera in a cool, dry place away from direct sunlight and extreme temperatures. Use a desiccant if storing in a humid environment.
5. Troubleshooting
5.1 Camera Does Not Power On
- Ensure the battery is fully charged.
- Check that the battery is inserted correctly.
- If using an AC adapter, ensure it is properly connected to a power source.
5.2 Images Are Blurry
- Check if the lens is clean.
- Ensure the camera is properly focused on the subject.
- Use a higher shutter speed or image stabilization in low light conditions.
5.3 Memory Card Error
- Ensure the memory card is inserted correctly.
- Try formatting the memory card (note: this will erase all data).
- Test with a different, compatible memory card.
6. Specifications
| Feature | Detail |
|---|---|
| Brand | Panasonic |
| Product Model Number | DMC-TZ85-W |
| Year Model | 2016 |
| Effective Pixels | 18.1 million pixels |
| Image Sensor | 1/2.3 type CMOS |
| Screen Size | 3 inches |
| Articulating LCD | No |
| Continuous Shooting Speed | 40 frames/sec (electronic shutter) |
| Optical Zoom | 30x |
| Focal Length (Wide-angle) | 24 mm |
| Focal Length (Telephoto) | 720 mm |
| F-number (Wide-angle) | f/3.3 |
| F-number (Telephoto) | f/6.4 |
| Shutter Speed | 1/16000 sec |
| Minimum / Maximum ISO | ISO 80~6400 |
| Viewfinder Included | Yes |
| Viewfinder Type | Electronic |
| Lens Type | Zoom Lens |
| Lens Construction | 9 groups, 12 elements |
| Wi-Fi | Yes |
| Image Stabilization | +5-axis correction |
| Included Features | Face recognition, Touch panel |
| Shooting Functions | Movie |
| Video Compression Format | AVCHD/MP4 |
| Color | White |
| Battery Type | Lithium Ion |
| Batteries Included | No (one battery pack is included as an accessory) |
| Product Dimensions | 3.8 x 11.2 x 6.4 cm; 282 g |
| Release Date | February 10, 2016 |
7. Warranty and Support
7.1 Warranty Information
This product comes with a manufacturer's warranty of 1 year. Please refer to the included warranty card for detailed terms and conditions.
7.2 Customer Support
For inquiries regarding Panasonic product repairs or technical assistance, please contact the Panasonic Repair Consultation Desk:
- TEL: 0120-878-554
- Reception Hours: 9:00 - 19:00 (Sundays, holidays, and year-end/New Year holidays: 9:00 - 17:30)
- You can also search for "Panasonic Repair" online for more information.