
Introduction
The Klipsch R-15PM powered monitors are designed to deliver room-filling sound while maintaining a compact footprint. These highly efficient speakers provide a powerful yet minimalist audio solution for enjoying movies and music. Each monitor features a 1-inch aluminum diaphragm compression driver paired with a 90° x 90° square Tractrix Horn and a 5.25-inch copper spun magnetically shielded IMG woofer.
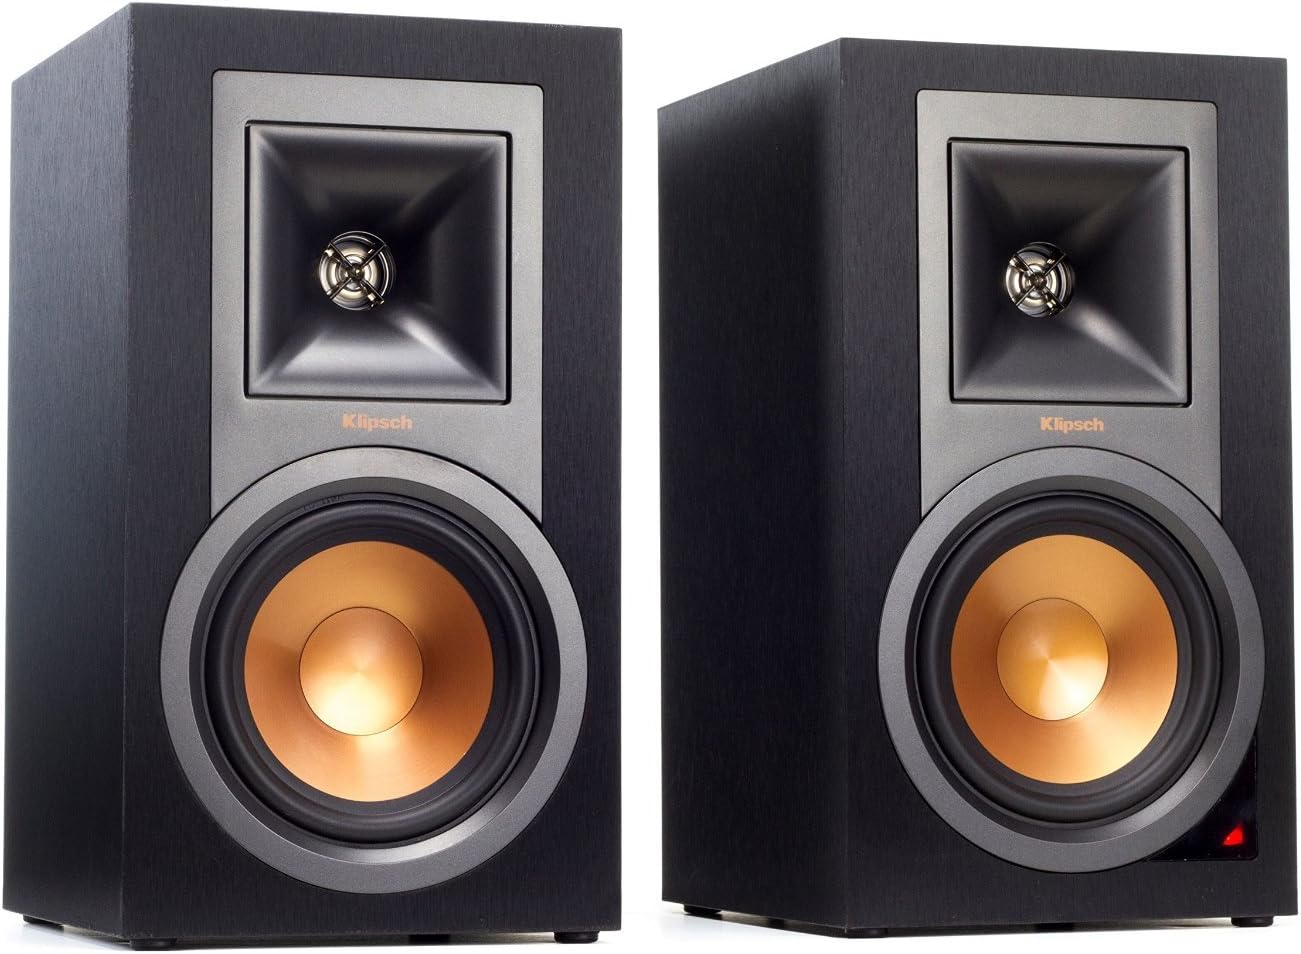
Image: Klipsch R-15PM Powered Monitors (Pair)
What's in the Box
- Klipsch R-15PM Powered Monitors (Pair)
- Power Cord
- Remote Control
- Speaker Cable (for connecting left and right speakers)
- USB Cable
- Optical Cable
- RCA Cable
Key Features
- Integrated Phono Pre-amp: Includes a pair of RCA phono level inputs with a switch for Phono/Line input versatility, complete with a ground screw terminal for turntable connection.
- Versatile Digital Audio Inputs: Features a USB digital audio input for connection to a PC or Mac, and a Digital Optical input.
- Analog Connectivity: Equipped with a 3.5mm mini jack line level input for various audio sources.
- Subwoofer Output: A single RCA line level output is provided for easy connection to an external subwoofer.
- Wireless Technology: Integrated Bluetooth wireless technology allows for seamless streaming from compatible devices.
- Full-Featured IR Remote: Control all functions conveniently with the included infrared remote.
- High-Performance Drivers: Utilizes a 1-inch aluminum diaphragm compression driver with a Tractrix Horn and a 5.25-inch copper spun magnetically shielded IMG woofer for clear and dynamic sound.
Setup Guide
Speaker Placement
For optimal sound performance, place the Klipsch R-15PM speakers on a stable, flat surface such as a bookshelf or speaker stands. Ensure there is adequate space around the speakers for proper ventilation and sound dispersion. Position the speakers equidistant from your primary listening position and angle them slightly inward towards the listener (toe-in) for a focused soundstage.
Connecting Your Speakers
The R-15PM system consists of one powered (active) speaker and one passive speaker. Connect the active speaker to the passive speaker using the supplied speaker cable. Ensure the positive (+) terminal on one speaker connects to the positive (+) terminal on the other, and similarly for the negative (-) terminals.
Power Connection
Connect the supplied power cord to the active speaker's power input and then to a wall outlet.
Audio Connections
The R-15PM offers multiple input options:
- RCA (Phono/Line): For turntables, use the PHONO input and ensure the PHONO/LINE switch is set to PHONO. For other analog devices (CD players, etc.), set the switch to LINE. Connect the ground wire from your turntable to the ground screw terminal if applicable.
- USB Audio: Connect a USB cable from your computer (PC or Mac) to the USB AUDIO input on the active speaker.
- Optical: Use an optical cable to connect to digital audio sources like TVs or game consoles.
- AUX (3.5mm Mini Jack): Connect portable devices using a 3.5mm audio cable.
- Bluetooth: For wireless connection, see the "Bluetooth Pairing" section under Operating.

Image: Klipsch R-15PM speaker with a turntable, demonstrating phono input capability.
Subwoofer Connection
To enhance bass performance, connect an external powered subwoofer to the SUB OUT RCA port on the active speaker. Use a single RCA cable for this connection.
Video: Klipsch R-15PM + Pro-Ject Primary Turntable Bundle. This video demonstrates the setup and connectivity of the R-15PM speakers, including turntable integration.
Operating Instructions
Power On/Off
Press the POWER button on the remote control or turn the VOLUME/SOURCE knob on the active speaker to power the unit on or off. The LED indicator on the active speaker will illuminate when powered on.
Source Selection
Use the dedicated source buttons (PHONO, AUX, OPT, USB, BLUETOOTH) on the remote control to switch between different audio inputs. Alternatively, press the VOLUME/SOURCE knob on the active speaker to cycle through inputs.
Volume Control
Adjust the main volume using the VOLUME UP and VOLUME DOWN buttons on the remote, or by rotating the VOLUME/SOURCE knob on the active speaker.
Bluetooth Pairing
- Select the BLUETOOTH source using the remote or by cycling through inputs on the speaker. The LED indicator will flash blue, indicating pairing mode.
- On your device (smartphone, tablet, computer), enable Bluetooth and search for available devices.
- Select "Klipsch R-15PM" from the list of devices.
- Once connected, the LED indicator on the speaker will turn solid blue.
Subwoofer Level Adjustment
If an external subwoofer is connected, use the SUB+ and SUB- buttons on the remote control to adjust the subwoofer output level. The RESET button will return the subwoofer level to its default setting.
Maintenance
To ensure the longevity and optimal performance of your Klipsch R-15PM speakers, follow these maintenance guidelines:
- Cleaning: Use a soft, dry cloth to wipe down the speaker cabinets. Avoid using abrasive cleaners, solvents, or strong detergents, as they may damage the finish.
- Dusting: Regularly dust the speaker grilles and drivers with a soft brush or a vacuum cleaner with a brush attachment on a low setting.
- Ventilation: Ensure that the rear panel of the active speaker has adequate airflow to prevent overheating. Do not block the vents.
- Cable Management: Periodically check all cable connections to ensure they are secure and free from damage.
- Storage: If storing the speakers for an extended period, keep them in a cool, dry place, away from direct sunlight and extreme temperatures.
Troubleshooting
| Problem | Possible Cause | Solution |
|---|---|---|
| No power / No LED indicator | Power cord not connected; Power outlet not active. | Ensure power cord is securely connected to the speaker and a working wall outlet. Try a different outlet. |
| No sound from speakers | Incorrect input selected; Volume too low; Cables not connected properly; Device volume too low. | Select the correct input source. Increase speaker volume. Check all audio cable connections. Increase volume on your source device. |
| Bluetooth not connecting | Speaker not in pairing mode; Device Bluetooth off; Out of range. | Ensure speaker is in Bluetooth pairing mode (flashing blue LED). Turn Bluetooth on your device. Move device closer to speakers (within 10 meters). |
| Humming or buzzing noise | Ground loop issue (especially with turntables); Loose cable connections. | Ensure turntable ground wire is connected to the speaker's ground terminal. Check all cable connections for tightness. Try plugging components into the same power strip. |
Technical Specifications
| Feature | Detail |
|---|---|
| Model Name | R-15PM |
| Speaker Type | Powered Monitor (Bookshelf) |
| Connectivity Technology | RCA, Bluetooth, USB, Optical |
| Audio Output Mode | Stereo (2.0 Channel) |
| Speaker Maximum Output Power | 100 Watts |
| Woofer Diameter | 5.25 Inches |
| Tweeter Diameter | 1 Inch |
| Impedance | 8 Ohm |
| Bluetooth Range | Up to 10 Meters (33 feet) |
| Product Dimensions (each speaker) | 7"D x 8.2"W x 12.5"H |
| Item Weight (each speaker) | 10.3 Pounds |
| Power Source | Corded Electric |
| Control Method | Remote |
Warranty and Support
The Klipsch R-15PM Powered Monitors come with a Limited Warranty. Please refer to the official Klipsch website or the full user manual for detailed warranty terms and conditions.
For technical support, troubleshooting assistance, or service inquiries, please visit the official Klipsch support page or contact their customer service department. You can also find the complete User Manual in PDF format here.


