
1. Introduction
This manual provides detailed instructions for the Peakeep Digital Alarm Clock, Model MHP3112. This battery-operated digital alarm clock features a clear display, dual alarm settings with weekday mode options, an indoor temperature display, and a smart sensor night light for enhanced visibility in low-light conditions. Its compact and durable design makes it suitable for various indoor environments.

Figure 1: Front view of the Peakeep Digital Alarm Clock MHP3112, displaying current time, date, day of the week, indoor temperature, and active alarm settings.
2. Setup
2.1 Battery Installation
The Peakeep Digital Alarm Clock requires 3 AAA batteries for operation. Batteries are not included and must be purchased separately.
- Locate the battery compartment cover on the back of the clock.
- Slide the cover downwards to open.
- Insert 3 AAA batteries, ensuring correct polarity (+ and -).
- Replace the battery compartment cover by sliding it upwards until it clicks into place.
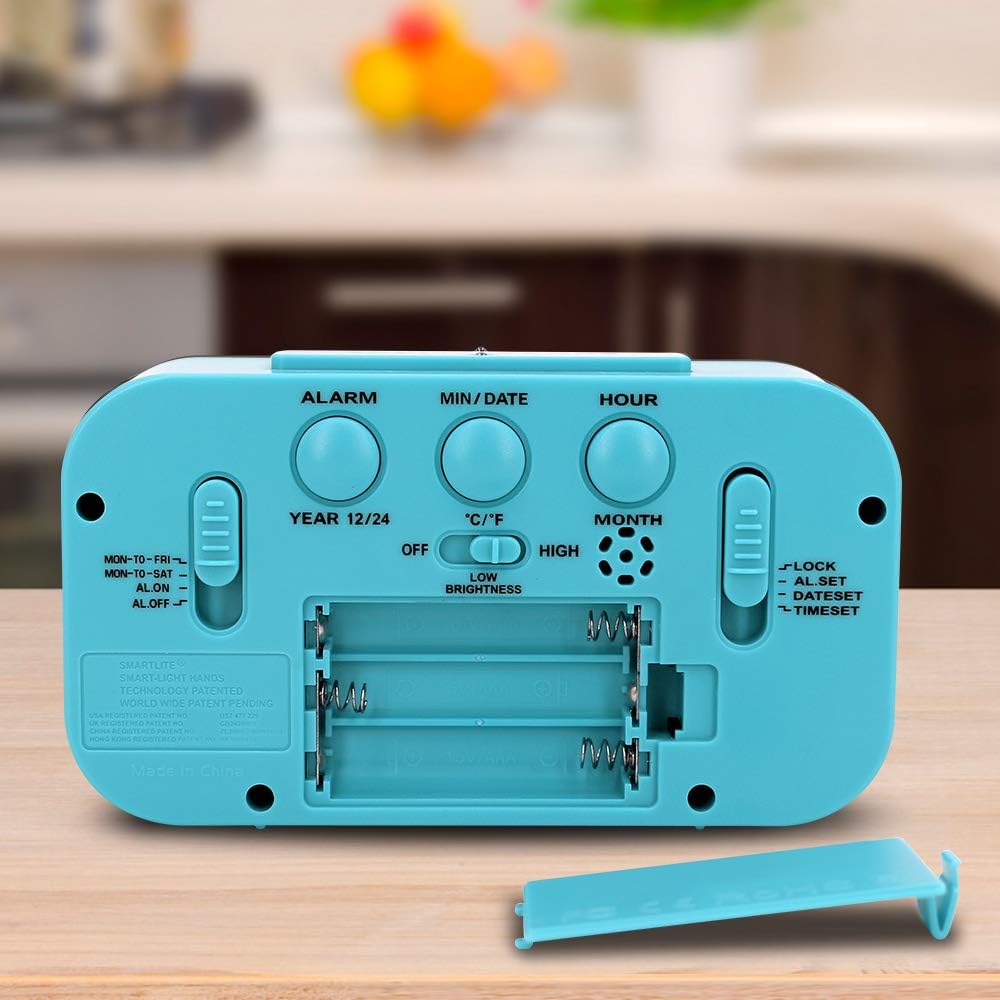
Figure 2: Rear panel of the alarm clock, highlighting the battery compartment and various setting buttons and switches.
2.2 Initial Time and Date Setting
After installing batteries, the clock will power on. Follow these steps to set the current time and date:
- Locate the TIME SET slider on the right side of the back panel. Slide it to the 'TIME SET' position.
- Use the HOUR button to adjust the hour. Press repeatedly or hold to advance quickly. Observe the AM/PM indicator.
- Use the MIN/DATE button to adjust the minute. Press repeatedly or hold to advance quickly.
- To set the date, press the MIN/DATE button while in 'TIME SET' mode. The year will flash. Use the HOUR button to adjust the year.
- Press MIN/DATE again to set the month. Use the HOUR button to adjust the month.
- Press MIN/DATE again to set the day. Use the HOUR button to adjust the day.
- Once all settings are correct, slide the TIME SET slider back to the 'LOCK' position to save.
Video 1: This video demonstrates the process of setting the time, date, and alarm on a similar digital clock. It shows how to navigate through the settings using the buttons on the back panel.
2.3 Temperature Unit and Time Format
To switch between Celsius (°C) and Fahrenheit (°F) for temperature display, or between 12-hour and 24-hour time format:
- Press the MIN/DATE button to toggle between °C and °F.
- Press the 12/24HR button to switch between 12-hour and 24-hour time formats.

Figure 3: The clock display showing the indoor temperature reading.

Figure 4: The clock display showing the month, date, and day of the week.
3. Operating Instructions
3.1 Setting Alarms (Alarm 1 & Alarm 2)
The clock supports two independent alarms. To set an alarm:
- Locate the ALARM SET slider on the right side of the back panel. Slide it to the 'ALARM SET' position.
- Use the HOUR button to adjust the alarm hour. Press repeatedly or hold to advance quickly.
- Use the MIN/DATE button to adjust the alarm minute. Press repeatedly or hold to advance quickly.
- To set the second alarm, press the ALARM button on the back panel. The alarm icon (1 or 2) will change. Repeat steps 2 and 3.
- Once the alarm time(s) are set, slide the ALARM SET slider back to the 'LOCK' position.

Figure 5: The clock display indicating two alarm settings and the active weekday mode (MON-TO-FRI).
3.2 Activating/Deactivating Alarms and Weekday Mode
Use the ALARM ON/OFF slider on the left side of the back panel to control alarm activation and mode:
- ON: Activates the alarm(s) for all 7 days.
- MON-TO-FRI: Activates the alarm(s) only on weekdays (Monday to Friday).
- MON-TO-SAT: Activates the alarm(s) from Monday to Saturday.
- OFF: Deactivates all alarms.
3.3 Snooze Function
When an alarm sounds, press the large SNOOZE/LIGHT button on the top of the clock to activate the snooze function. The alarm will temporarily stop and sound again after approximately 9 minutes.
3.4 Smart Sensor Night Light
The clock features a smart sensor night light that automatically illuminates the display in low-light conditions. You can adjust its behavior:
- Use the NIGHT LIGHT switch on the back panel to select between 'OFF', 'LOW', or 'HIGH' brightness for the automatic night light.
- Pressing the SNOOZE/LIGHT button on top will temporarily illuminate the display for 5 seconds at full brightness, regardless of the night light switch setting.
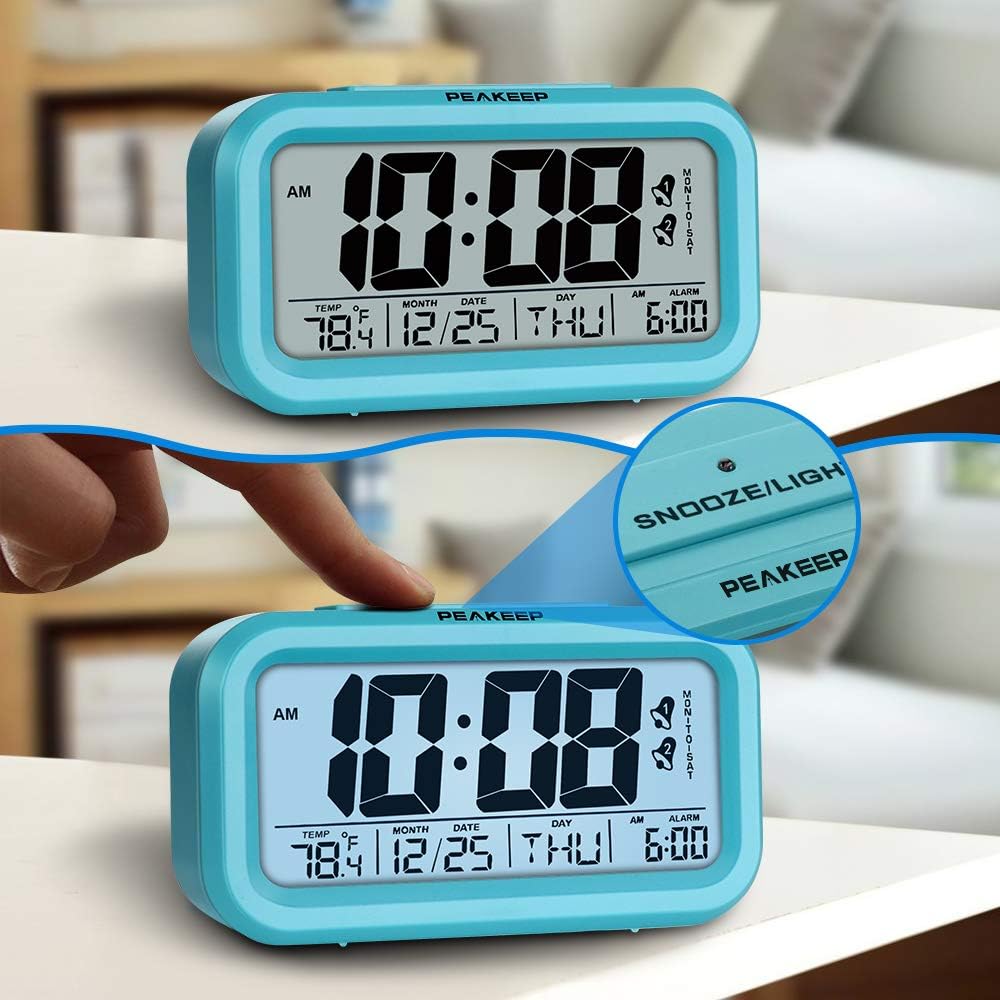
Figure 6: The top snooze/light button and the illuminated display.
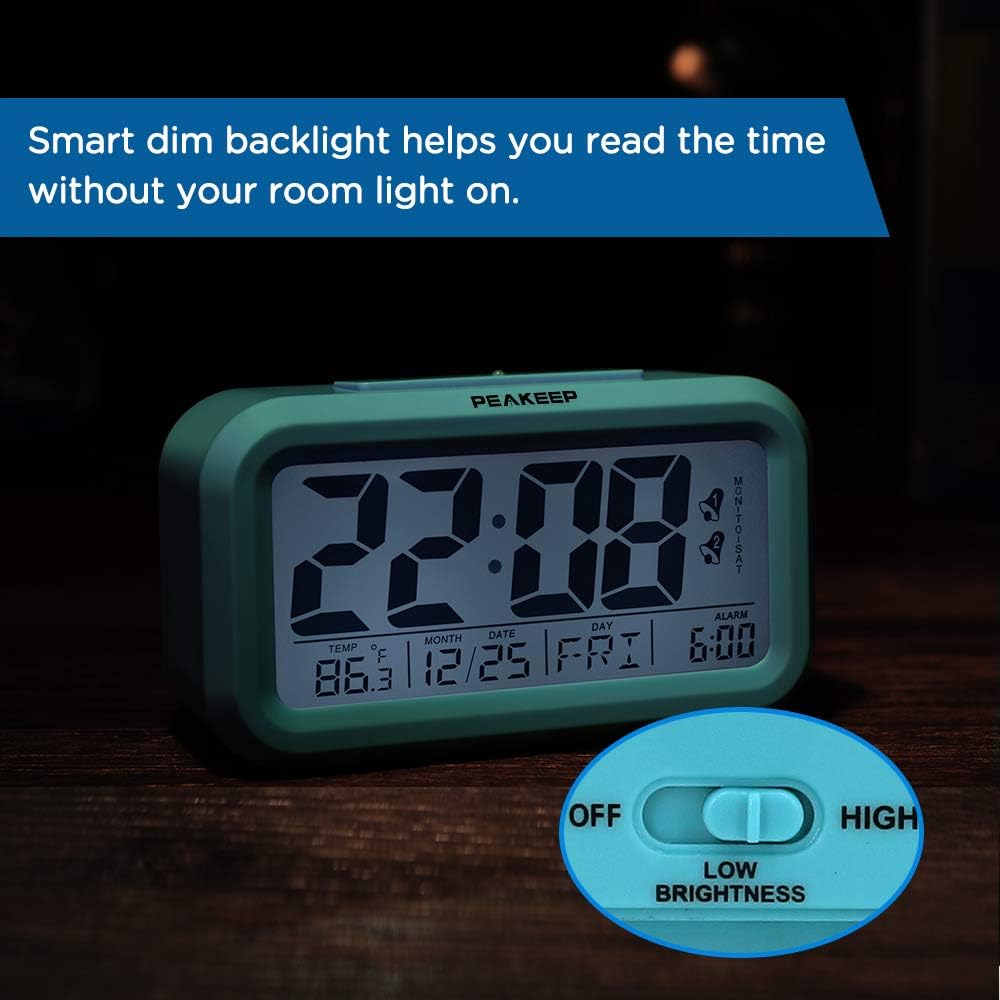
Figure 7: The clock's smart dim backlight feature in action, with the low brightness setting indicated.
Video 2: This video provides a detailed overview of the Peakeep Digital Alarm Clock, demonstrating its various features including the night light, temperature display, and the ease of setting time and alarms using the back panel controls.
4. Maintenance
4.1 Battery Replacement
When the display dims or the clock functions become erratic, it is time to replace the batteries. Follow the battery installation steps in Section 2.1.
4.2 Cleaning
To clean the clock, use a soft, dry cloth. Do not use abrasive cleaners or solvents, as these may damage the display or casing.
5. Troubleshooting
- No Display/Dim Display: Check battery installation and replace with fresh AAA batteries. Ensure the night light switch is not set to 'OFF' if expecting continuous illumination.
- Alarm Not Sounding: Verify the ALARM ON/OFF slider is set to 'ON', 'MON-TO-FRI', or 'MON-TO-SAT' as desired. Ensure the alarm time is correctly set.
- Incorrect Time/Date: Re-enter time and date settings as described in Section 2.2. Ensure the TIME SET slider is returned to 'LOCK' after adjustments.
6. Specifications
| Feature | Detail |
|---|---|
| Brand | Peakeep |
| Model Number | MHP3112 |
| Dimensions | 5.2 x 1.8 x 3 inches |
| Item Weight | 5.6 ounces |
| Power Source | 3 AAA batteries (not included) |
| Display Type | Digital |
| Special Features | 2 Alarms, Weekday Mode, Indoor Temperature Display, Smart Sensor Night Light |
| Frame Material | Plastic |

Figure 8: Dimensions of the Peakeep Digital Alarm Clock.
7. Warranty and Support
For warranty inquiries or product support, please contact Peakeep customer service at: sales@us-myhome.com.


