
Introduction
Thank you for purchasing the Rockville RXM8BTB 8-Channel Bluetooth Car Stereo Amplifier. This amplifier is designed to provide high-quality audio performance and versatile connectivity for your vehicle's sound system. Please read this manual thoroughly to ensure proper installation and operation of your new amplifier. Keep this manual for future reference.
Safety Instructions
- Always consult a professional car audio installer if you are unsure about any installation procedures.
- Disconnect the vehicle's battery negative terminal before starting any wiring to prevent electrical shorts.
- Ensure all wiring is properly routed and secured to prevent damage from moving parts or sharp edges.
- Use appropriate gauge wiring for power and ground connections as specified in the installation section.
- Install the amplifier in a location that allows for adequate ventilation to prevent overheating.
- Avoid exposing the amplifier to moisture or extreme temperatures.
- Do not operate the amplifier if it is damaged or malfunctioning. Refer to the troubleshooting section or contact support.
Product Overview
The Rockville RXM8BTB is a compact 8-channel amplifier featuring Bluetooth connectivity, designed for marine and automotive applications. It offers flexible configuration options and robust protection circuitry.

This image displays the Rockville RXM8BTB amplifier from a top-down perspective, alongside a ruler to illustrate its compact dimensions. The amplifier features a black finish with the Rockville logo prominently displayed.
Control Panel Features
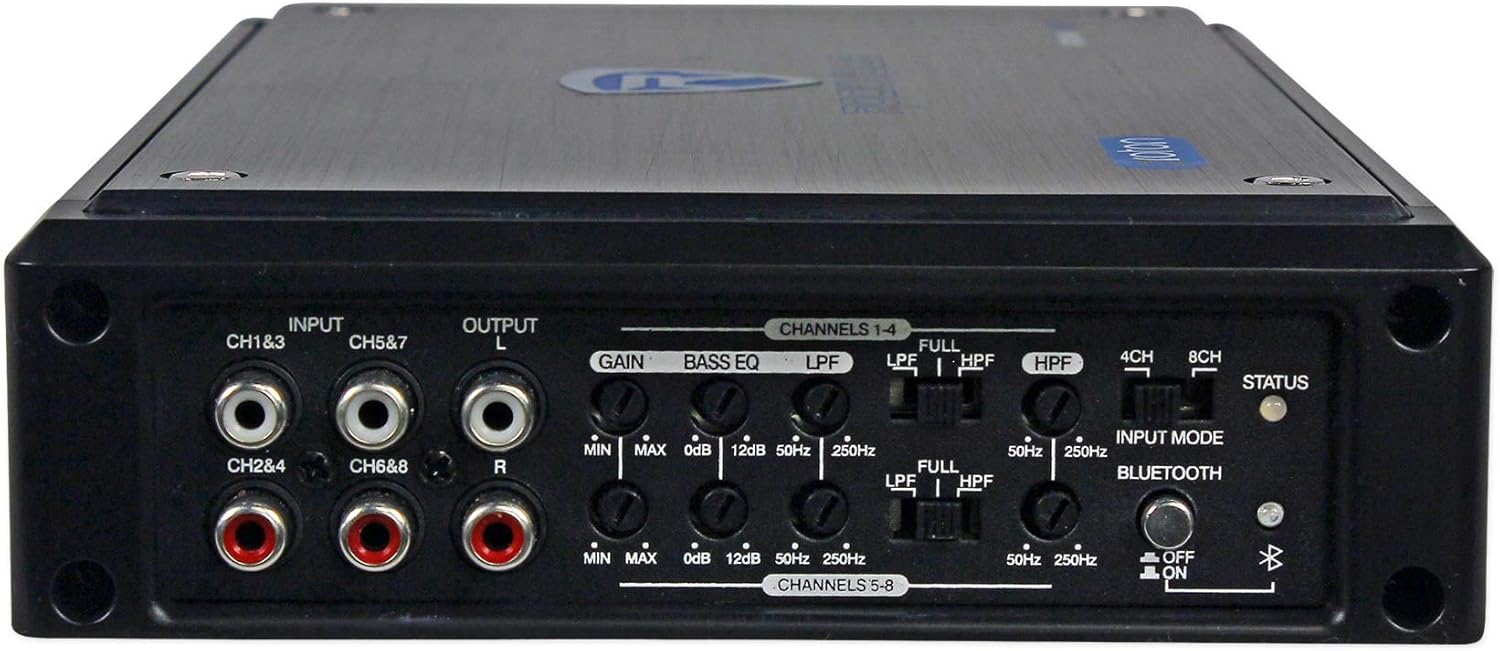
The rear panel of the RXM8BTB amplifier is shown, detailing the RCA input and output connections, gain controls for channels 1-4 and 5-8, bass equalization, and variable high-pass and low-pass filter adjustments. The Bluetooth ON/OFF switch and input mode selector are also visible.
- Input (CH1&3, CH2&4, CH5&7, CH6&8): RCA inputs for connecting to your head unit.
- Output (L, R): RCA line outputs for connecting to another amplifier.
- Gain (MIN/MAX): Adjusts the input sensitivity to match the output of your head unit.
- Bass EQ (0dB/12dB): Provides bass boost at 45Hz.
- LPF (Low Pass Filter): Adjusts the low-pass crossover frequency (50Hz - 250Hz).
- HPF (High Pass Filter): Adjusts the high-pass crossover frequency (50Hz - 250Hz).
- Full Range / Low Pass / High Pass Selector: Configures the crossover mode for each channel group.
- 4CH / 8CH Input Mode Selector: Selects between 4-channel or 8-channel input operation.
- Bluetooth ON/OFF: Activates or deactivates the Bluetooth module.
- Status Indicator: LED to show power and protection status.
Power and Speaker Terminal Panel
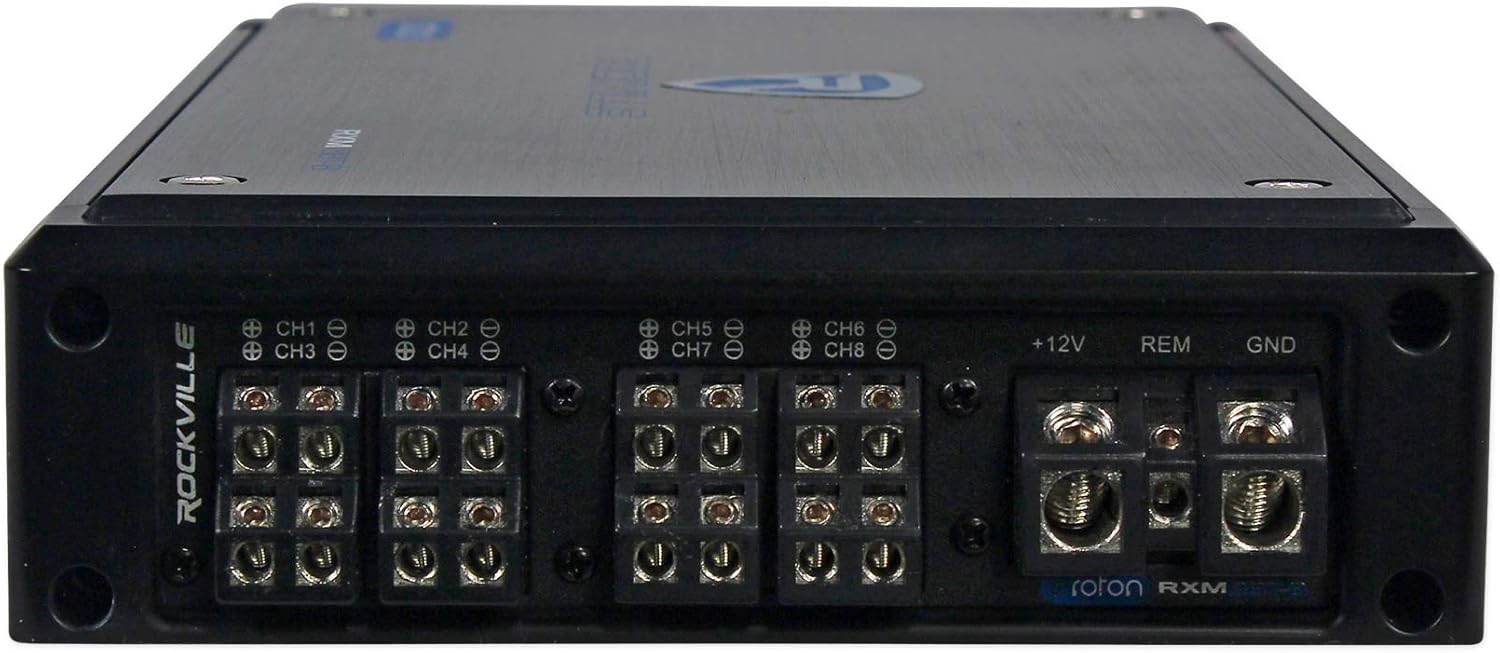
This view of the amplifier's rear panel highlights the power input (+12V), remote turn-on (REM), and ground (GND) terminals. Additionally, the speaker output terminals for all eight channels (CH1-CH8) are clearly visible, designed for secure wire connections.
- +12V: Main power input from the vehicle's battery.
- REM (Remote): Connects to the remote turn-on lead from your head unit.
- GND (Ground): Connects to a solid chassis ground point in the vehicle.
- Speaker Outputs (CH1-CH8): Connections for your speakers.
Setup and Installation
Proper installation is crucial for optimal performance and safety. If you are not confident in your ability to install this amplifier, please seek professional assistance.
What's Included
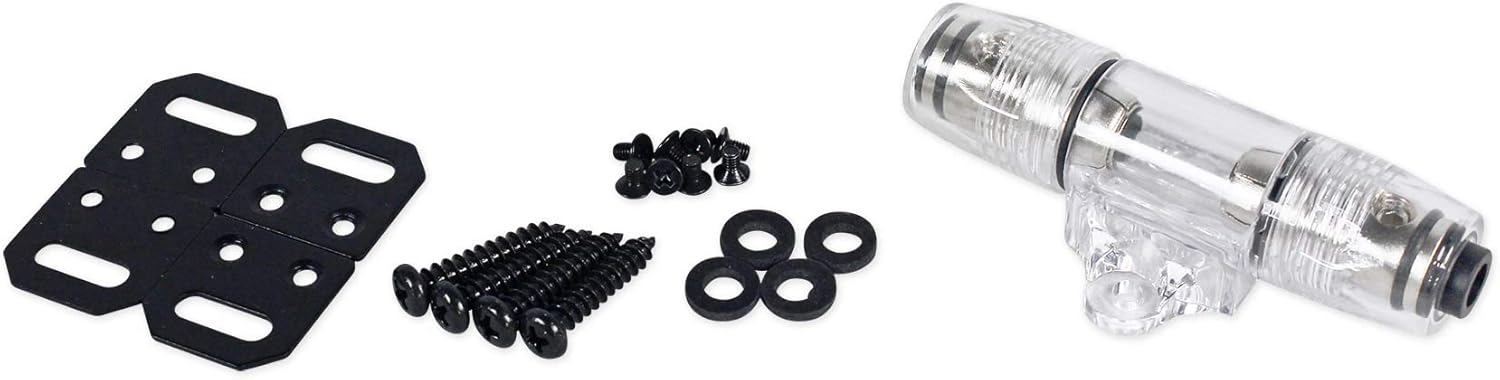
This image displays the accessories provided with the RXM8BTB amplifier, which include mounting brackets for secure installation, various screws for attachment, and a clear inline fuse holder to protect the power circuit.
- Rockville RXM8BTB Amplifier
- Mounting Brackets
- Mounting Screws
- Inline Fuse Holder
- User Manual (this document)
Mounting the Amplifier
- Choose a mounting location that is dry, well-ventilated, and protected from direct sunlight or excessive heat. Common locations include under a seat, in the trunk, or behind a panel.
- Ensure there is sufficient space around the amplifier for air circulation.
- Use the provided mounting brackets and screws to securely fasten the amplifier to a solid surface. Mark the mounting holes, drill pilot holes if necessary, and attach the amplifier.
Wiring Connections
Before making any connections, disconnect the negative terminal of your vehicle's battery.
Power, Ground, and Remote Wiring
- Power (+12V): Run an 8-gauge (or heavier) power wire directly from the positive terminal of the vehicle's battery to the amplifier's +12V terminal. Install the included inline fuse holder within 18 inches of the battery.
- Ground (GND): Run an 8-gauge (or heavier) ground wire from the amplifier's GND terminal to a clean, unpainted metal surface on the vehicle's chassis. Ensure a good electrical connection by scraping away any paint or rust. The ground wire should be as short as possible, ideally less than 3 feet.
- Remote (REM): Run a 18-gauge remote turn-on wire from your head unit's remote output to the amplifier's REM terminal. This wire turns the amplifier on and off with your head unit.
RCA Input Connections
- Connect RCA cables from your head unit's pre-amp outputs to the amplifier's RCA input jacks (CH1&3, CH2&4, CH5&7, CH6&8).
- If using a 4-channel head unit, set the amplifier's Input Mode Selector to 4CH. If using an 8-channel head unit or a processor, set it to 8CH.
Speaker Connections
- Connect your speakers to the amplifier's speaker output terminals (CH1-CH8). Ensure correct polarity (+ to + and - to -).
- The amplifier supports 2-ohm stereo operation per channel or 4-ohm bridged operation. Refer to the specifications for power ratings.
- For bridged operation, connect the positive lead of the speaker to the positive terminal of one channel and the negative lead of the speaker to the negative terminal of the adjacent channel (e.g., CH1+ and CH2- for one bridged channel).
Operating the Amplifier
Initial Power-Up
- After all connections are made, reconnect the vehicle's battery negative terminal.
- Turn on your head unit. The amplifier's power indicator LED should illuminate. If the protect LED illuminates, refer to the troubleshooting section.
Adjusting Controls
- Gain: Start with the gain control set to minimum. Play a familiar piece of music at a moderate volume on your head unit. Slowly increase the amplifier's gain until you hear distortion, then back it off slightly.
- Crossover (LPF/HPF): Adjust the LPF for subwoofers (typically 80Hz-120Hz) and HPF for full-range speakers (typically 80Hz or higher) to prevent distortion and optimize sound quality. Use the Full Range / Low Pass / High Pass selector to choose the desired filter type for each channel group.
- Bass EQ: Use the Bass EQ control to add a bass boost if desired. Start at 0dB and increase gradually. Excessive bass boost can lead to distortion.
Bluetooth Operation
- Ensure the Bluetooth ON/OFF switch on the amplifier is set to ON.
- On your mobile device, search for Bluetooth devices and select "RXM8BTB" to pair.
- Once paired, audio from your device will stream wirelessly to the amplifier.
Maintenance
- Cleaning: Periodically wipe the amplifier's exterior with a soft, dry cloth. Do not use harsh chemicals or abrasive cleaners.
- Ventilation: Ensure that the amplifier's cooling fins are free from dust and debris to maintain proper heat dissipation.
- Connections: Occasionally check all wiring connections to ensure they are secure and free from corrosion.
Troubleshooting
| Problem | Possible Cause | Solution |
|---|---|---|
| No Power / Power LED Off | Blown fuse; Poor power/ground connection; No remote turn-on signal. | Check the inline fuse and replace if necessary. Verify all power, ground, and remote wire connections are secure and have proper voltage. |
| Protect LED On | Speaker short circuit; Overheating; Low voltage. | Check speaker wiring for shorts. Ensure adequate ventilation. Verify vehicle's battery voltage. Allow amplifier to cool down. |
| No Sound Output | No input signal; Incorrect gain setting; Speaker wires disconnected. | Verify RCA input connections from head unit. Adjust gain. Check all speaker wire connections. Ensure head unit is on and playing audio. |
| Distorted Sound | Gain set too high; Incorrect crossover settings; Poor ground connection. | Reduce gain. Adjust LPF/HPF settings. Verify ground connection. |
| Bluetooth Not Connecting | Bluetooth switch off; Device too far; Interference. | Ensure Bluetooth switch is ON. Bring device closer to amplifier. Turn off other Bluetooth devices. |
Specifications
- System Power: 1500 Watts Peak
- RMS Power Output at 4 Ohms: 65 Watts x 8 Channels
- RMS Power Output at 2 Ohms: 95 Watts x 8 Channels
- RMS Bridged Power Output at 4 Ohms: 190 Watts x 4 Channels
- Configurable Channels: 8-6-4 channels or 4.2 System
- Bluetooth: Wireless with Auto Pairing
- Construction: UV and Salt Water Resistant Paint, Silk Screen and Heat Sink Enclosure, Marine-Grade Conformal Coated Boards, Non-Corrosive High Gloss White Aluminum Casing, Non-Corrosive Brushed Aluminum Casing
- Audio Topology: TI Digital Class D
- Power Supply: High Speed MosFET
- Transistors: Studio Grade Bipolar Output Stage
- Circuitry: Micro Size Architecture with SMD Components
- Bass Equalization: Fully Adjustable 0 - 12dB at 45Hz
- Protection Circuitry: 4-Way System (DC, Short, Thermal, Overload)
- Heat-sink: Heavy-Duty Aluminum Alloy
- Inputs: Stainless Steel RCA Level
- Terminals: Stainless Steel Bolt Down Molded
- Input Selector: 4CH / 8CH Mode
- Crossover Controls: Independent between CH1-4 and CH5-8
- Variable High-Pass Filter: 50Hz - 250Hz at 12dB/per Octave
- Variable Low-Pass Filter: 50Hz - 250Hz at 12dB/per Octave
- Frequency Response: 10Hz - 40KHz
- S/N Ratio: >100dB
- Minimum THD: <0.05%
- Damping Factor: >200 at 100Hz
- Input Voltage: 150mV - 6V
- RCA Line Output: Yes
- Fuse Rating: 80A
- Channel Separation: >60dB
- Input Impedance: 22K
- Dimensions: 6.7" W x 2" H x 11.5" L
- Standards Compliance: Conforms to American Boat and Yacht Council (ABYC) Marine Electronic Standards
Warranty and Support
The Rockville RXM8BTB amplifier comes with a 1-Year Manufacturer's Warranty from the date of purchase. This warranty covers defects in materials and workmanship under normal use.
For technical support, warranty claims, or service inquiries, please contact Rockville customer service. Have your product model number and proof of purchase readily available when contacting support.
Please visit the official Rockville website or refer to your purchase documentation for the most current contact information.