
Product Overview
This iJDMTOY H11/H8 Relay Harness Wire Kit is designed to provide a reliable and efficient electrical connection for automotive driving lights, fog lights, off-road lighting, and other heavy-duty electronic devices. It ensures proper power management by drawing power directly from the battery, preventing excessive load on your vehicle's existing wiring system.
Key Features:
- One relay wiring harness set includes a 4-pin SPST relay module box, in-line safety fuse box, pushbutton switch, input +/- terminals, and dual H11/H8/H9 outputs for reliable and efficient electrical connections.
- The pre-wired SPST 4-pin electrical relay unit, complete with socket and rated at 12V DC with a maximum of 30-40AMP, is ideal for most heavy duty electronic devices, light applications between 9-16V DC, with a wattage not exceeding 160W.
- Universal fit teardrop shape push button toggle switch with double sided tape on the back, featuring a green/red LED on/off indicator light, easy to install anywhere you need to.
- Perfect for power management, this relay harness is ideal for applications like front fog/driving lights and off-road lightbars, pod lamps drawing power directly from the battery to prevent excessive load on the vehicle's existing wiring system and ensuring safe, easy on/off operation.
Package Contents
The iJDMTOY H11/H8 Relay Harness Wire Kit includes the following components:
- 1x 4-pin SPST Relay Module Box
- 1x In-line Safety Fuse Box (with 30A fuse)
- 1x Pushbutton ON/OFF Switch with LED Indicator
- Input +/- Terminals (Red/Black O-ring/C-ring connectors)
- Dual H11/H8/H9 Output Connectors
- Associated Wiring

Image: The complete iJDMTOY H11/H8 Relay Harness Wire Kit, showing all components coiled together.
Setup & Installation
Follow these steps for proper installation of your iJDMTOY H11/H8 Relay Harness Wire Kit. Professional installation is recommended if you are unfamiliar with automotive electrical systems.
1. Wiring Diagram Overview

Image: Detailed wiring diagram illustrating connections for the power switch, relay, fuse, battery terminals, and fog lamps.
The diagram above shows the layout of the harness. The power switch connects to a positive trigger and ground. The 40A relay and 30A fuse are integrated. Battery connections are made via red (+) and black (-) terminals. Dual H11/H8/H9 outputs connect to your fog lamps.
2. Connecting to Fog Lamps
Connect the dual H11/H8/H9 output contacts from the harness to your light applications/devices. Ensure a secure connection for both the short and long side outputs, routing the long side to the furthest light.

Image: Close-up of the H11/H8 connectors, which are designed to plug directly into compatible fog light housings.
3. Power and Ground Connections
Attach the red O-ring/C-ring connector to the positive (+) terminal of your vehicle's battery or an accessory 12V+ source. Attach the black O-ring/C-ring connector to the negative (-) terminal of the battery or a suitable ground point on the vehicle chassis.
Video: A short demonstration showing the connection of the red and black wires to the car battery terminals. This video highlights the process of securing the power and ground connections for the relay harness.

Image: The in-line fuse holder, which contains a 30A fuse for circuit protection. Ensure the fuse is properly seated.
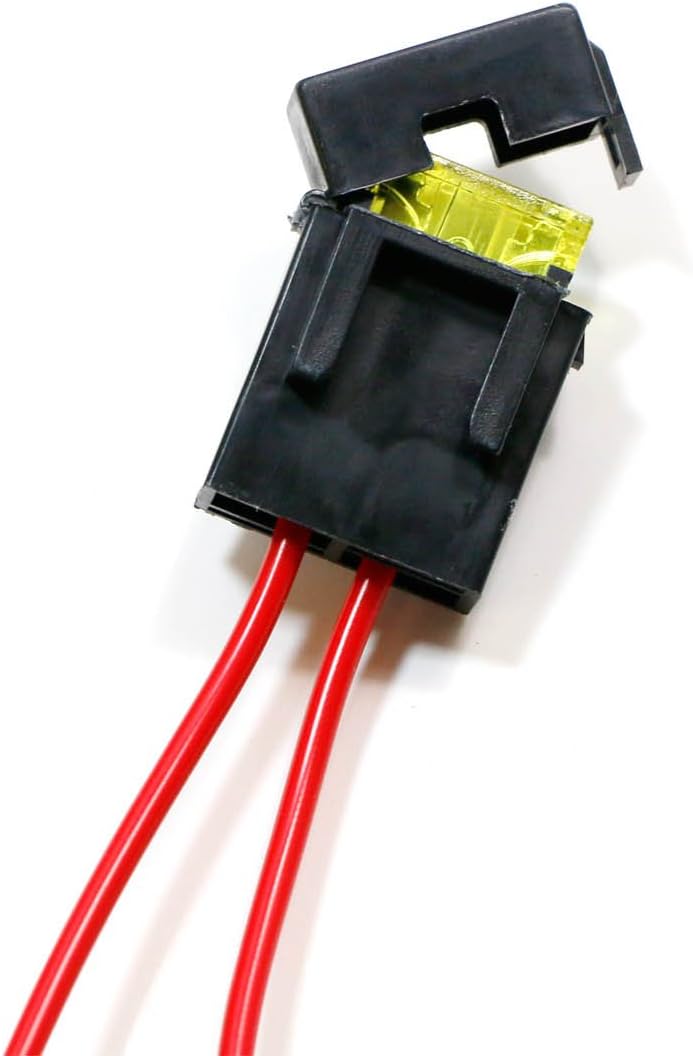
Image: The 4-pin SPST relay, which manages power flow to the lights. This component should be mounted in a secure, dry location.
4. Installing the Pushbutton Switch
Route the signal triggering wires into the car interior near the dashboard. The universal fit teardrop shape push button toggle switch features double-sided tape for easy installation. Connect the switch to the designated wires from the harness.

Image: Close-up of the pushbutton ON/OFF switch, showing its green/red LED indicator. This switch allows for convenient control of your auxiliary lights.

Image: An example of the pushbutton switch installed in a car's interior, demonstrating its compact size and discreet placement.
Video: A detailed installation guide for the iJDMTOY H11/H8 Relay Harness Wire Kit, demonstrating the process of connecting the harness to the fog lights, battery, and routing the switch wires into the cabin. This video provides a comprehensive visual walkthrough of the entire setup.
Operating Instructions
Once the iJDMTOY H11/H8 Relay Harness Wire Kit is correctly installed, operating your auxiliary lights is straightforward:
- Ensure your vehicle's ignition is in the "ON" or "ACC" position.
- Locate the installed pushbutton ON/OFF switch in your vehicle's interior.
- Press the button once to turn the connected lights ON. The LED indicator on the switch will illuminate (typically green) to confirm the lights are active.
- Press the button again to turn the connected lights OFF. The LED indicator will change color (typically red) or turn off.

Image: A vehicle demonstrating the iJDMTOY fog lights in operation, showcasing the illumination provided by the installed kit.
Maintenance
The iJDMTOY H11/H8 Relay Harness Wire Kit is designed for durability and minimal maintenance. To ensure optimal performance and longevity:
- Regular Inspection: Periodically check all wiring connections for tightness and signs of wear or corrosion.
- Fuse Check: If your lights stop working, first check the in-line 30A fuse. Replace it with a fuse of the same rating if it is blown.
- Cleanliness: Keep the relay module and fuse box free from excessive dirt and moisture.
- Cable Management: Ensure all cables are securely routed and tied away from moving parts or hot engine components to prevent damage.
Troubleshooting
If you encounter issues with your iJDMTOY H11/H8 Relay Harness Wire Kit, consider the following troubleshooting steps:
| Problem | Possible Cause | Solution |
|---|---|---|
| Lights do not turn on. | Blown fuse, loose connections, faulty switch, incorrect wiring. | Check the 30A in-line fuse and replace if necessary. Verify all connections (battery, lights, switch, relay) are secure. Test the switch functionality. Review wiring diagram for correct installation. |
| Lights flicker or are dim. | Poor ground connection, insufficient power, loose wiring. | Ensure the ground connection is clean and secure. Check battery voltage. Tighten all wiring connections. |
| Switch LED does not illuminate. | Faulty switch, no power to switch, incorrect wiring. | Test the switch with a multimeter. Verify power supply to the switch. Check switch wiring connections. |
Specifications
| Feature | Detail |
|---|---|
| Brand | iJDMTOY |
| Model Number | AA1109 |
| Material | Nylon Plastic and Copper Wires |
| Connector Type | H11/H8 Connectors |
| Relay Type | 4-pin SPST (Single Pole Single Throw) |
| Relay Rating | 12V DC, 30-40AMP Max |
| Fuse Rating | 30A In-line Safety Fuse |
| Operating Voltage | 9-16V DC |
| Max Wattage | 160W |
| Switch Type | Pushbutton with Green/Red LED Indicator |
Warranty & Support
For warranty information or technical support regarding your iJDMTOY H11/H8 Relay Harness Wire Kit, please refer to the official iJDMTOY website or contact their customer service directly. Keep your purchase receipt as proof of purchase for any warranty claims.
iJDMTOY Customer Service: Please visit iJDMTOY Store on Amazon for contact details and further product information.