
groov e GVPS210SR
Groov-e GVPS210SR Personal MP3 & Radio CD Player User Manual
Model: GVPS210SR | Brand: groov e
Introduction
The Groov-e GVPS210SR is a lightweight and compact personal CD player designed for both portable and home use. It supports CD and MP3 playback, offering a programmable memory for up to 20 CD tracks and 99 MP3 tracks. Additionally, it features an integrated FM radio tuner with 40 preset channels, an LCD display, a low battery indicator, and anti-skip protection for uninterrupted listening. This manual provides detailed instructions for setup, operation, and maintenance of your device.
Package Contents
Please check that all items listed below are included in your package:
- Groov-e GVPS210SR Personal CD Player
- Headphones
- Micro USB Cable (for power, not charging)
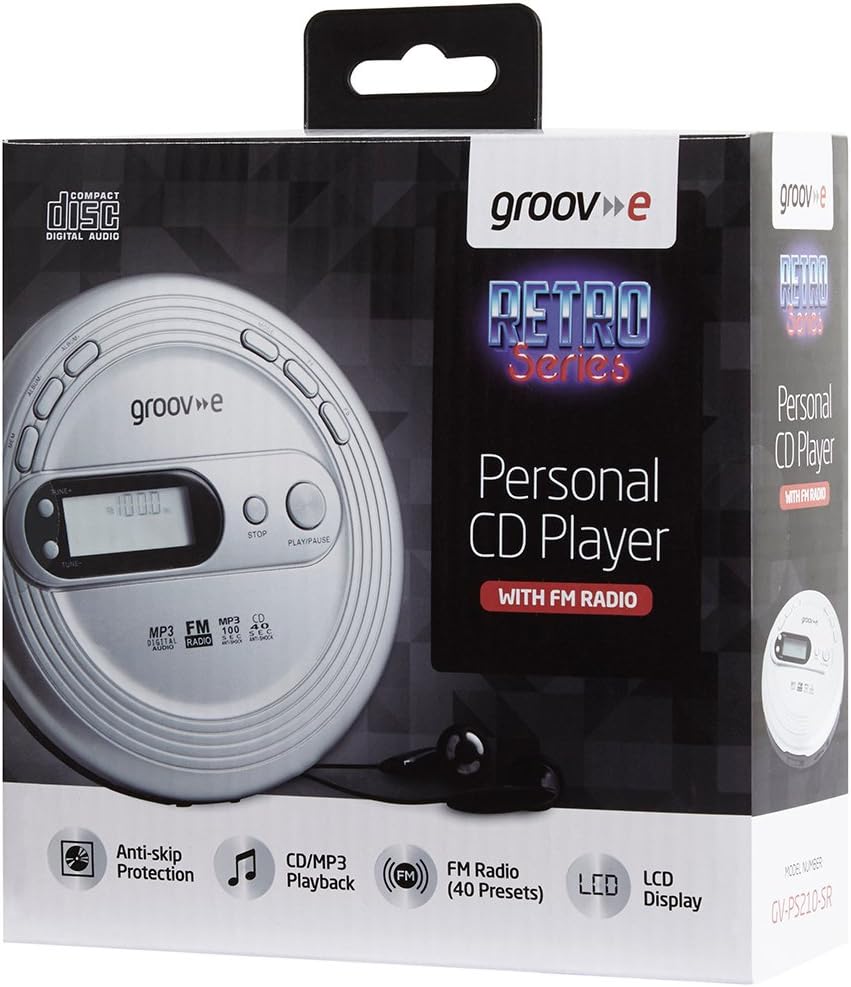
Product Overview
Familiarize yourself with the various parts and controls of your GVPS210SR CD player.

Controls and Functions:
- LCD Display: Shows track number, time, FM frequency, and other status indicators.
- TUNE+ / TUNE-: Adjusts FM radio frequency.
- STOP: Stops playback.
- PLAY/PAUSE: Starts or pauses playback.
- MEM (Memory): Used for programming tracks or saving FM radio presets.
- ALBUM: Navigates between albums/folders on MP3 discs.
- MODE: Cycles through playback modes (e.g., Repeat One, Repeat All, Intro, Random).
- FF (Fast Forward): Skips to the next track or fast forwards within a track.
- FB (Fast Backward): Skips to the previous track or fast backwards within a track.
- DC IN 4.5V Jack: For connecting an optional external power adapter.
- Headphone Jack: 3.5mm stereo output for connecting headphones.
- Battery Compartment: Located on the bottom, for AA batteries.
Setup
1. Powering On Your Device
Your GVPS210SR can be powered by AA batteries or an optional external DC 4.5V power adapter.
- Using Batteries: Open the battery compartment cover on the bottom of the unit. Insert 2 x AA batteries (not included), ensuring correct polarity (+/-). Close the cover securely.
- Using an AC Adapter (Optional): Connect a compatible DC 4.5V power adapter (not included) to the DC IN 4.5V jack on the side of the unit. Plug the adapter into a standard wall outlet.
2. Inserting a CD or MP3 Disc
- Gently press the OPEN button or slide the latch to open the CD compartment lid.
- Place the CD or MP3 disc onto the center spindle with the label side facing up.
- Press down gently on the center of the disc until it clicks into place.
- Close the CD compartment lid firmly until it latches.
3. Connecting Headphones
Connect the included headphones or any standard 3.5mm stereo headphones into the headphone jack on the side of the unit.

Operating Instructions
CD/MP3 Playback
- Ensure a disc is inserted and headphones are connected.
- Press the PLAY/PAUSE button to start playback. The LCD display will show the track number and elapsed time.
- Press PLAY/PAUSE again to pause playback. Press it once more to resume.
- Press the STOP button to stop playback.
- To skip to the next track, press the FF button.
- To go back to the beginning of the current track or to the previous track, press the FB button.
- To fast forward within a track, press and hold the FF button. Release to resume normal playback.
- To fast backward within a track, press and hold the FB button. Release to resume normal playback.
- For MP3 discs with multiple folders, use the ALBUM button to navigate between folders.
Programmable Memory
You can program up to 20 tracks for CD playback and 99 tracks for MP3 playback to play in a specific order.
- While the player is in STOP mode, press the MEM button. The display will show "P01" (Program 01).
- Use the FF or FB buttons to select the desired track number for the first program slot.
- Press MEM again to confirm the selection and move to the next program slot ("P02").
- Repeat steps 2 and 3 until all desired tracks are programmed.
- Press PLAY/PAUSE to start playing the programmed tracks.
FM Radio Operation
The GVPS210SR features an FM radio tuner with 40 preset channels.
- With the unit powered on, press the MODE button repeatedly until "FM" appears on the LCD display.
- To manually tune, press TUNE+ or TUNE- to adjust the frequency in small increments.
- To auto-scan for the next available station, press and hold TUNE+ or TUNE-. The player will stop on the next strong signal.
- To save a preset: Once you are on a desired station, press the MEM button. The preset number will flash. Use FF or FB to select the desired preset number (P01-P40), then press MEM again to confirm.
- To recall a preset: In FM mode, press the ALBUM button to cycle through saved presets.
Special Functions
- Anti-Skip Protection: This feature helps prevent audio skipping during movement. It buffers audio data to ensure smooth playback.
- Bass Boost: Press the MODE button repeatedly until "BASS" appears on the display to enhance bass frequencies. Press MODE again to turn it off.
- Repeat Playback: While playing a CD/MP3, press the MODE button to cycle through repeat options: Repeat One (repeats current track), Repeat All (repeats all tracks on disc), Random (plays tracks in random order).
- Intro Playback: Plays the first few seconds of each track. Press MODE until "INTRO" appears.

Maintenance
Cleaning the Unit
- Wipe the exterior of the unit with a soft, slightly damp cloth. Do not use abrasive cleaners or solvents.
- To clean the laser lens (inside the CD compartment), use a specialized CD lens cleaner disc. Do not touch the lens directly.
Battery Care
- Remove batteries if the unit will not be used for an extended period to prevent leakage.
- Replace all batteries at the same time with new ones of the same type.
- Dispose of used batteries responsibly according to local regulations.
Troubleshooting
| Problem | Possible Cause | Solution |
|---|---|---|
| No power | Batteries are dead or inserted incorrectly; AC adapter not connected properly. | Replace batteries or check polarity; ensure AC adapter is securely plugged in. |
| Disc not playing / "NO DISC" error | Disc is dirty, scratched, or inserted incorrectly; lid not closed. | Clean the disc; re-insert disc correctly; ensure lid is fully closed. |
| Audio skipping | Disc is dirty or scratched; excessive vibration; anti-skip protection off. | Clean the disc; avoid strong vibrations; ensure anti-skip is active. |
| No FM radio reception | Weak signal; location interference. | Adjust position of the unit; try a different location; extend headphone cable (acts as antenna). |
| Poor sound quality | Headphones not fully plugged in; dirty headphone jack; low battery. | Ensure headphones are fully inserted; clean headphone jack; replace batteries. |
Specifications
- Model: GVPS210SR
- Dimensions: 40 x 20 x 20 cm (approx. 15.7 x 7.9 x 7.9 inches)
- Weight: 300 g (approx. 0.66 lbs)
- Power Source: 2 x AA Batteries (not included) or DC 4.5V external power adapter (not included)
- Supported Audio Formats: CD, MP3-CD
- Radio Tuner: FM (40 presets)
- Programmable Tracks: 20 (CD), 99 (MP3)
- Connectivity: 3.5mm Headphone Jack
- Special Features: Anti-Skip Protection, Bass Boost, LCD Display, Low Battery Indicator
Warranty and Support
For warranty information or technical support, please refer to the warranty card included with your product or visit the official Groov-e website. Keep your purchase receipt as proof of purchase.
For further assistance, you may contact Groov-e customer service through their official channels.
Ask a question about this manual
Ask about setup, troubleshooting, compatibility, parts, safety, or missing instructions. Manuals+ will review the question and use this page’s manual context to help answer it.