Introduction
Thank you for choosing the iTek HD DVR Dashboard Dash Cam. This device is designed to record video and audio while driving, providing a reliable record of your journeys. Please read this manual thoroughly before operating the device to ensure proper use and to maximize its performance and longevity.
Safety Information
- Do not operate the device while driving. Adjust settings only when the vehicle is safely parked.
- Ensure the dash cam is securely mounted and does not obstruct your view of the road.
- Use only the provided power cable and accessories to prevent damage or malfunction.
- Avoid exposing the device to extreme temperatures, direct sunlight for prolonged periods, or moisture.
- Keep the device away from strong magnetic fields.
- Do not attempt to disassemble or repair the device yourself. Contact customer support for assistance.
Product Overview
Familiarize yourself with the components and controls of your iTek Dash Cam.

Image: Front view of the iTek HD DVR Dashboard Dash Cam, showing the camera lens, LED lights, and the attached suction cup mount.
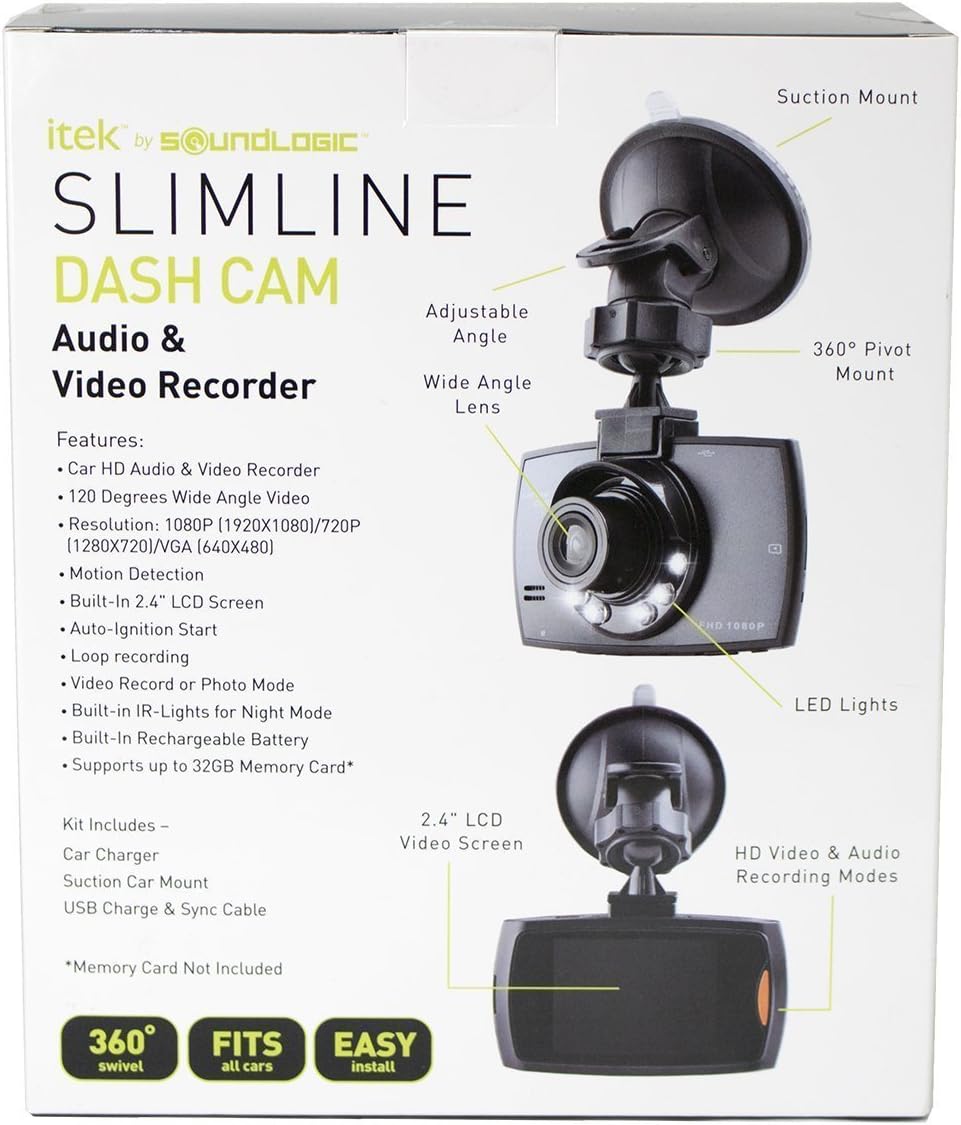
Image: Labeled diagram of the iTek Dash Cam, highlighting features such as the 2.4-inch LCD screen, wide-angle lens, LED lights, 360-degree pivot mount, and suction mount.
Key Components:
- Camera Lens: Records video footage.
- LED Lights: Assist in low-light conditions.
- 2.4-inch LCD Screen: Displays live view, recorded footage, and menu options.
- Control Buttons: (MODE, UP, OK, DOWN, MENU) for navigation and function selection.
- Microphone: Records audio.
- Speaker: For audio playback.
- SD Card Slot: For memory card insertion (supports up to 32GB, not included).
- USB Port: For power and data transfer.
- Suction Mount: For attaching the dash cam to the windshield.
Setup
1. Install the Suction Mount
- Clean the desired area on your windshield thoroughly.
- Attach the suction cup mount to the dash cam.
- Press the suction cup firmly against the windshield and flip the lever to secure it.
- Adjust the angle of the dash cam for an optimal view of the road.
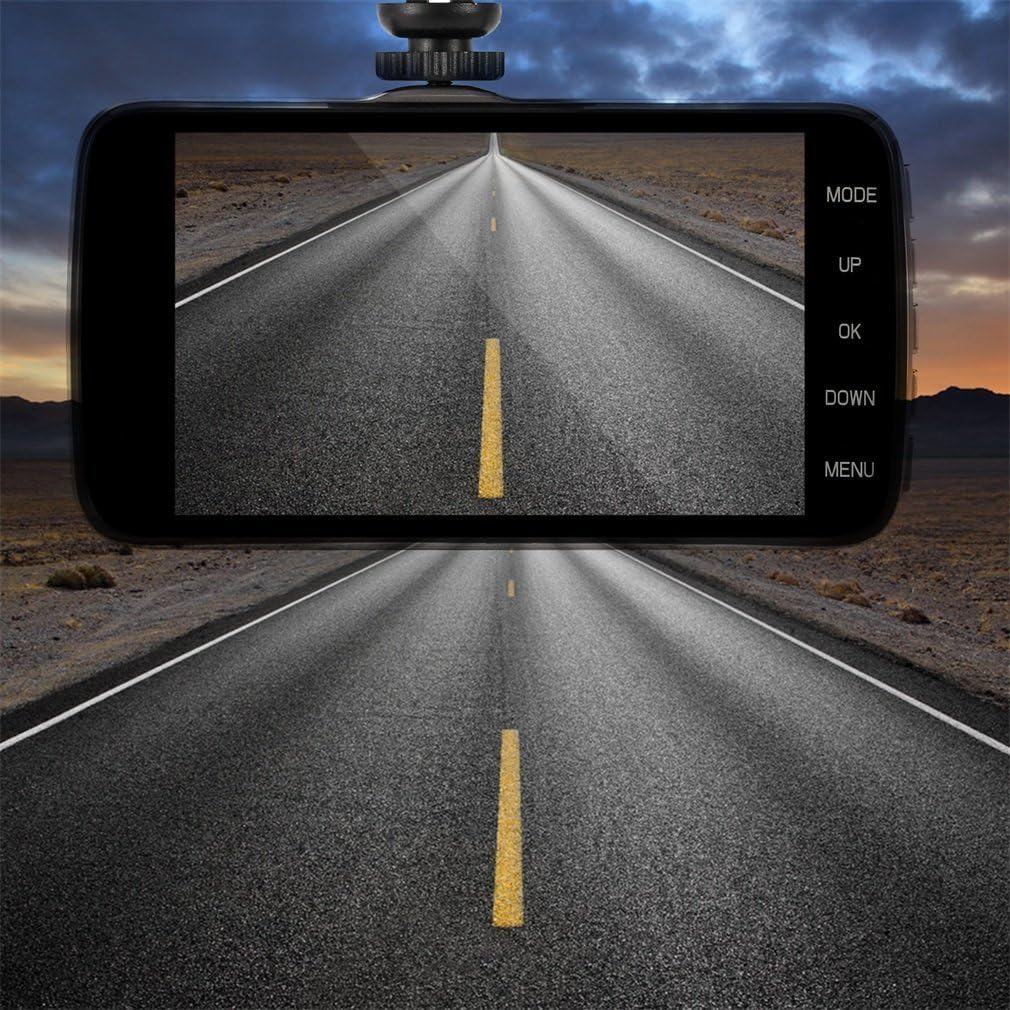
Image: The iTek Dash Cam securely mounted on a car windshield, showing the live video feed of the road on its display screen.
2. Insert SD Card
- Ensure the dash cam is powered off.
- Locate the SD card slot on the side of the device.
- Insert a Class 10 or higher Micro SD card (up to 32GB) into the slot until it clicks into place.
- To remove, gently push the card in until it springs out.
3. Power Connection
- Connect the included DC 5V car charger to the dash cam's USB port.
- Plug the other end of the charger into your vehicle's cigarette lighter socket.
- The dash cam is designed for auto ignition start, meaning it will power on and begin recording automatically when your vehicle starts.
Operating Instructions
Turning On/Off
- Automatic: The device powers on and starts recording automatically when connected to power and the vehicle ignition is on. It powers off when the ignition is turned off.
- Manual: Press and hold the Power button (if available) to manually turn the device on or off.
Recording Modes
Press the MODE button to switch between Video Recording, Photo Mode, and Playback Mode.
- Video Recording Mode: The default mode. The camera will automatically start recording when powered on. A red dot icon usually indicates recording is active. Press OK to manually start/stop recording.
- Photo Mode: In this mode, press OK to take a still photograph.
- Playback Mode: Use the UP and DOWN buttons to navigate through recorded videos or photos. Press OK to play a selected file.
Menu Settings
Press the MENU button to access the settings menu. Use UP and DOWN to navigate, and OK to select an option. Press MENU again to exit.
- Video Resolution: Select recording quality (e.g., 1080x720p).
- Loop Recording: Set video segment length (e.g., 1, 3, 5, or 10 minutes). When the SD card is full, the oldest files will be overwritten.
- Motion Detection: Enable or disable. When enabled, the camera will start recording if motion is detected in its field of view while parked.
- Audio Recording: Toggle microphone on/off.
- Date/Time Stamp: Enable or disable the display of date and time on recorded footage.
- Language: Select your preferred language (English, Chinese, Japanese, French, German, etc.).
- Format: Format the SD card (this will erase all data).
Maintenance
- Cleaning: Use a soft, dry cloth to clean the camera lens and screen. Do not use abrasive cleaners or solvents.
- SD Card Management: Regularly format your SD card (at least once a month) to ensure optimal performance and prevent data corruption. Back up important files before formatting. Replace the SD card if you notice frequent errors or recording issues.
- Firmware Updates: Check the manufacturer's website periodically for any available firmware updates.
Troubleshooting
| Problem | Solution |
|---|---|
| Device does not power on. |
|
| Recording stops unexpectedly. |
|
| Video quality is poor or grainy. |
|
| SD card is difficult to remove. |
|
Specifications
- Model Name: CCV-12/6587
- Video Capture Resolution: 720p (1280x720), 1080p (1920x1080) interpolated
- Screen Size: 2.4 Inches LCD
- Lens Angle: 100-120 Degrees Wide Angle
- Storage: Supports Micro SD Card up to 32GB (Class 10 recommended, not included)
- Connectivity: USB
- Power Input: DC 5V (via car charger)
- Features: Loop Recording, Motion Detection, Audio Recording, Date/Time Stamp, LED Lights
- Dimensions: Approximately 9.7 x 7.9 x 4.6 inches
- Weight: Approximately 11.2 ounces
What's in the Box
- iTek HD DVR Dashboard Dash Cam
- Suction Cup Mount
- DC 5V Car Charger Cable
- USB Data Cable
Warranty and Support
For warranty information and technical support, please refer to the documentation provided at the time of purchase or contact the manufacturer directly. Keep your purchase receipt as proof of purchase.
Manufacturer: iTek


