1. Introduction
This manual provides comprehensive instructions for the safe and effective installation, operation, and maintenance of your CURT 11604 Class 1 Trailer Hitch. Please read this manual thoroughly before installation and use to ensure proper function and safety.
The CURT 11604 is a custom-fit Class 1 trailer hitch designed for select Honda Civic models. It features a 1-1/4-inch receiver tube opening, suitable for light-duty towing applications and hitch-mounted accessories.

Image 1.1: The CURT 11604 Class 1 Trailer Hitch, a durable steel component designed for vehicle-specific fitment.
2. Safety Information
WARNING:
- Always ensure the gross trailer weight (GTW) and tongue weight (TW) do not exceed the lowest-rated component in your towing system (vehicle, hitch, or other towing accessories).
- This hitch is rated for 2,000 lbs. GTW and 200 lbs. TW.
- Do not use this hitch with vertical hanging bike racks that require bikes to be mounted vertically.
- CALIFORNIA WARNING: Cancer and Reproductive Harm - www.P65Warnings.ca.gov
- Professional installation is recommended if you are not familiar with vehicle modifications or specialized tools.
3. Package Contents
Verify that all components are present before beginning installation:
- CURT 11604 Class 1 Trailer Hitch
- Hitch Pin and Clip
- All necessary installation hardware
4. Specifications
| Feature | Detail |
|---|---|
| Model Number | 11604 |
| Receiver Size | 1-1/4 inch x 1-1/4 inch |
| Gross Trailer Weight (GTW) | 2,000 lbs. |
| Tongue Weight (TW) | 200 lbs. |
| Material | Carbon Steel |
| Finish | Gloss Black Powder Coat (Dual-Coat) |
| Product Dimensions | 44 x 15 x 8 inches |
| Item Weight | 24.4 pounds |
| Vehicle Service Type | Car (Select Honda Civic models) |

Image 4.1: The 1-1/4 inch receiver tube opening, indicating compatibility with Class 1 towing accessories.
5. Setup: Installation Instructions
Installation of the CURT 11604 trailer hitch requires specific tools and attention to detail. It is designed for a custom fit on select Honda Civic models. Refer to the official CURT application guide for vehicle compatibility.
- Preparation: Park the vehicle on a level surface and engage the parking brake. If necessary, raise the vehicle using a lift or jack stands for adequate working space.
- Locate Mounting Points: Identify the designated mounting points on your vehicle's frame. These are typically pre-drilled holes or areas requiring modification.
- Frame Modification (if required): Some installations may require enlarging existing holes or creating "keyhole" or T-shaped cutouts in the vehicle frame to allow for the insertion of hardware. This often requires specialized tools like a die grinder. Exercise extreme caution and consult a professional if unsure.
- Insert Hardware: Use the provided fish wires to guide the carriage bolts and spacer blocks into the vehicle frame and out through the mounting holes.
- Position Hitch: Carefully lift the trailer hitch into position, aligning the mounting holes on the hitch with the bolts protruding from the vehicle frame. It may be helpful to have an assistant for this step.
- Secure Hitch: Attach the conical tooth washers and nuts to the bolts. Hand-tighten all hardware.
- Final Tightening: Refer to the specific torque specifications provided in the detailed CURT installation sheet (usually included with the product or available on the CURT website) for your vehicle model. Use a torque wrench to tighten all fasteners to the specified values.
- Inspect: After tightening, visually inspect all connections to ensure the hitch is securely mounted and there is no interference with other vehicle components.
Note: The installation process can be challenging and may require specialized tools. If you are uncomfortable performing these steps, professional installation is recommended.
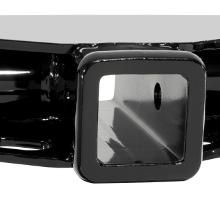
Image 5.1: A technician performing installation work under a vehicle, demonstrating the process of mounting the hitch.
6. Operating Your Trailer Hitch
Once installed, your CURT 11604 Class 1 Trailer Hitch allows for the attachment of various towing accessories. Always ensure proper connection and adherence to weight limits.
Connecting a Trailer:
- Insert Ball Mount: Slide your 1-1/4 inch ball mount (sold separately) into the receiver tube opening.
- Secure with Pin: Align the hole in the ball mount with the hole in the receiver and insert the provided hitch pin. Secure the pin with the clip.
- Attach Trailer: Lower the trailer coupler onto the hitch ball. Ensure the coupler is fully seated and latched.
- Connect Safety Chains: Cross the trailer's safety chains beneath the coupler and attach them to the designated chain loops on the hitch. Ensure there is enough slack for turns but not so much that they drag.
- Connect Wiring: If towing a trailer with lights, connect the trailer's wiring harness to your vehicle's towing electrical connector (sold separately).
- Final Check: Verify all connections are secure, lights are functioning, and the trailer brake system (if applicable) is operational before driving.
Using Hitch-Mounted Accessories:
For bike racks or cargo carriers, follow the manufacturer's instructions for the accessory. Ensure the accessory is compatible with a 1-1/4 inch receiver and does not exceed the hitch's tongue weight capacity.

Image 6.1: A close-up view of the hitch receiver with a ball mount and safety chains properly connected, ready for towing.

Image 6.2: A vehicle equipped with a CURT hitch and a cargo carrier, demonstrating its utility for transporting gear.

Image 6.3: A vehicle utilizing a CURT hitch to carry a bike rack, illustrating its use for recreational transport.
7. Maintenance
Regular maintenance ensures the longevity and safe operation of your CURT trailer hitch.
- Regular Inspection: Periodically inspect the hitch for any signs of rust, damage, or loose fasteners. Pay close attention to the receiver tube, safety chain loops, and mounting points.
- Cleanliness: Keep the receiver tube free of dirt, debris, and moisture. This prevents corrosion and ensures easy insertion of accessories.
- Lubrication: Apply a light coat of grease to the hitch ball (if used) and inside the receiver tube to prevent rust and facilitate connection.
- Fastener Torque: Re-check the torque on all mounting fasteners periodically, especially after the first few uses and after driving on rough terrain. Refer to the original installation instructions for specific torque values.
- Finish Protection: The dual-coat finish provides excellent protection against rust. If the finish is chipped or scratched, touch it up with a rust-inhibiting paint to prevent corrosion.
8. Troubleshooting
This section addresses common issues you might encounter with your trailer hitch.
| Problem | Possible Cause | Solution |
|---|---|---|
| Difficulty inserting ball mount/accessory | Rust or debris in receiver tube; bent receiver tube. | Clean receiver tube thoroughly. Apply lubricant. If bent, inspect for damage and consider replacement. |
| Hitch appears loose after installation | Mounting bolts not torqued correctly; bolts have loosened over time. | Re-torque all mounting bolts to specifications. If bolts continue to loosen, consult a professional. |
| Excessive sway or movement with attached accessory (e.g., bike rack) | Accessory not properly secured; accessory not designed for 1-1/4 inch receiver; worn components. | Ensure accessory is fully inserted and secured with its anti-rattle mechanism (if applicable). Verify accessory compatibility. Inspect hitch and accessory for wear. |
9. Warranty and Support
The CURT 11604 Class 1 Trailer Hitch is backed by a:
- Limited Lifetime Warranty: Covers defects in materials and workmanship.
- One-Year Finish Warranty: Covers the gloss black powder coat finish.
For warranty claims, technical assistance, or to locate additional resources, please visit the official CURT website or contact CURT customer support directly. Keep your purchase receipt as proof of purchase.
Manufacturer: CURT
Website: www.curtmfg.com


