1. Introduction
Thank you for choosing the KOSO XR-SRN Universal Gauge BB017B60. This high-quality instrument is designed to provide essential vehicle information for various motorcycle applications. It features a clear display for speed, RPM, odometer, trip meter, and other vital functions. This manual provides detailed instructions for proper installation, operation, and maintenance to ensure optimal performance and longevity of your gauge.
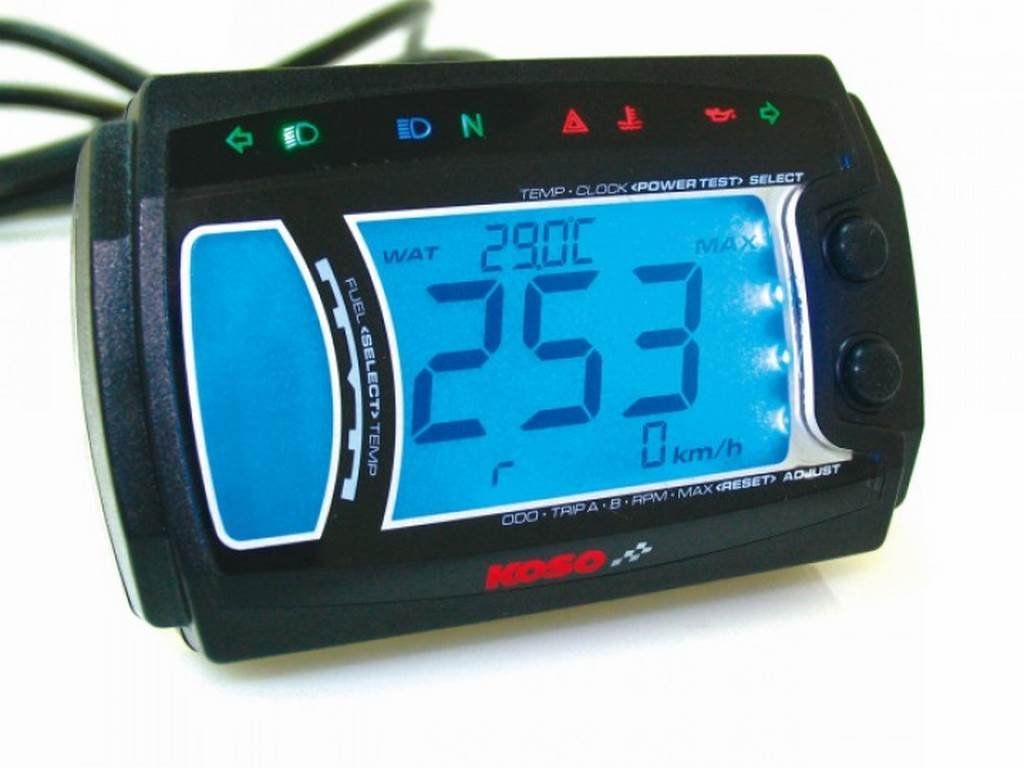
Figure 1: KOSO XR-SRN Universal Gauge BB017B60. This image displays the front view of the KOSO XR-SRN Universal Gauge, highlighting its digital display and button layout.
2. Safety Information
Please read all safety instructions carefully before installation and operation. Failure to follow these instructions may result in product damage, property damage, or personal injury.
- Professional Installation Recommended: Installation should be performed by a qualified technician to prevent damage to the gauge or vehicle's electrical system.
- Power Disconnection: Always disconnect the vehicle's battery before performing any electrical work.
- Wiring: Ensure all wiring connections are secure, insulated, and routed away from hot or moving parts.
- Water Resistance: While the gauge is designed to be weather-resistant, avoid direct high-pressure water spray.
- Operation: Do not attempt to adjust settings or operate the gauge while riding, as this can distract you and lead to accidents.
3. Package Contents
Verify that all items are present in the package:
- KOSO XR-SRN Universal Gauge (BB017B60)
- Wiring Harness
- Mounting Bracket and Hardware
- Speed Sensor with Magnet
- User Manual
4. Setup and Installation
Follow these steps for proper installation of your KOSO XR-SRN Universal Gauge.
4.1 Mounting the Gauge
- Select a suitable location on your motorcycle's dashboard or handlebars that provides clear visibility and does not obstruct your view or controls.
- Attach the mounting bracket to the chosen location using the provided hardware. Ensure it is securely fastened.
- Mount the KOSO XR-SRN gauge onto the bracket. Adjust the angle for optimal viewing.
An image showing the gauge mounted on a motorcycle handlebar would typically be included here.
4.2 Wiring Connections
Refer to the wiring diagram provided with your gauge for specific color codes. General connections are as follows:
- Red Wire: Connect to a switched 12V power source (ignition ON).
- Black Wire: Connect to vehicle ground.
- Orange Wire: Connect to constant 12V power source (battery +) for memory retention.
- Yellow Wire: Connect to speed sensor signal input.
- Green Wire: Connect to RPM signal input (e.g., ignition coil negative, CDI, or ECU signal).
- Blue Wire: Connect to high beam indicator.
- Light Blue Wire: Connect to left turn signal indicator.
- Dark Blue Wire: Connect to right turn signal indicator.
A detailed wiring diagram showing connections to the motorcycle's electrical system would typically be included here.
4.3 Speed Sensor Installation
- Mount the speed sensor to a non-rotating part of the wheel assembly, ensuring it is stable and does not interfere with moving parts.
- Attach the magnet to a rotating part of the wheel (e.g., brake disc, wheel spoke) so that it passes within 2-5mm of the sensor head with each rotation.
- Route the sensor cable securely, avoiding heat sources and moving components.
An image illustrating the correct placement of the speed sensor and magnet would typically be included here.
4.4 Initial Setup and Calibration
After installation, turn on the ignition. The gauge will power on. You may need to perform initial calibration:
- Wheel Circumference: Enter the circumference of your front wheel in millimeters. This is crucial for accurate speed and distance readings. Refer to your tire specifications or measure manually.
- RPM Pulses: Set the correct number of ignition pulses per revolution for your engine type. Consult your vehicle's service manual if unsure.
- Unit Selection: Select desired units (e.g., km/h or mph).
An image showing the gauge in setup mode would typically be included here.
5. Operating Instructions
The KOSO XR-SRN Universal Gauge features intuitive button controls for navigating its functions.
5.1 Button Functions
- MODE Button: Press briefly to cycle through display modes (e.g., Odometer, Trip A, Trip B, Max Speed, Max RPM). Press and hold to enter settings menu.
- SET Button: Used to confirm selections or adjust values within the settings menu.
An image highlighting the MODE and SET buttons on the gauge would typically be included here.
5.2 Display Modes
The gauge can display various information:
- Speed: Current riding speed.
- RPM: Engine revolutions per minute.
- Odometer: Total accumulated distance. This value cannot be reset.
- Trip A/B: Resettable trip distance counters.
- Clock: Time display.
- Voltage: Vehicle battery voltage.
6. Maintenance
Proper maintenance ensures the longevity and accuracy of your KOSO XR-SRN Universal Gauge.
- Cleaning: Clean the gauge display and body with a soft, damp cloth. Avoid abrasive cleaners or solvents.
- Connections: Periodically check all wiring connections for corrosion or looseness. Ensure they are secure and insulated.
- Sensor Check: Inspect the speed sensor and magnet for damage or misalignment. Ensure the gap between them is within the specified range (2-5mm).
7. Troubleshooting
If you encounter issues with your gauge, refer to the following common problems and solutions:
| Problem | Possible Cause | Solution |
|---|---|---|
| Gauge does not power on | No power supply; Blown fuse; Loose wiring | Check 12V power connections (Red, Orange wires); Inspect vehicle fuse; Secure all wiring. |
| Incorrect speed reading | Incorrect wheel circumference setting; Faulty speed sensor; Sensor/magnet misalignment | Verify wheel circumference setting; Check speed sensor wiring; Adjust sensor/magnet gap. |
| No RPM reading | Incorrect RPM pulse setting; Faulty RPM signal connection | Verify RPM pulse setting; Check Green wire connection to ignition signal. |
| Display flickering or erratic behavior | Unstable power supply; Electrical interference | Check battery voltage and connections; Ensure proper grounding; Route wires away from high-voltage cables. |
If the problem persists after attempting these solutions, please contact KOSO customer support.
8. Specifications
Key technical specifications for the KOSO XR-SRN Universal Gauge BB017B60:
- Model: BB017B60
- Brand: KOSO
- Operating Voltage: DC 12V
- Speed Display Range: 0-360 km/h (0-225 mph)
- RPM Display Range: 0-15,000 RPM
- Odometer Display Range: 0-99,999 km (miles)
- Trip Meter Display Range: 0-999.9 km (miles)
- Dimensions: (Refer to product diagram for exact measurements)
- Weight: (Refer to product specifications)
9. Warranty and Support
KOSO products are manufactured to high-quality standards. This product comes with a limited warranty against manufacturing defects. For specific warranty terms and conditions, please refer to the warranty card included with your product or visit the official KOSO website.
For technical support, troubleshooting assistance, or spare parts, please contact KOSO customer service through their official website or authorized distributors. When contacting support, please have your product model (BB017B60) and purchase information readily available.
Official KOSO Website: www.koso.com.tw


