
AmScope M158C-SP14-WM-E
AmScope M158C-SP14-WM-E Biology Science Student Microscope User Manual
Model: M158C-SP14-WM-E
1. Introduction
This manual provides instructions for the proper setup, operation, and maintenance of your AmScope M158C-SP14-WM-E Biology Science Student Microscope. This instrument is designed for educational and scientific observation, offering magnification settings from 40X to 1000X, and includes a USB digital camera for image capture and a slide preparation kit.

Image 1.1: AmScope M158C-SP14-WM-E Microscope with included accessories and 'The World of the Microscope' book.
2. Safety Information
- Handle the microscope with care. Avoid sudden impacts or dropping the instrument.
- Do not disassemble the microscope or its optical components. Refer servicing to qualified personnel.
- Keep the microscope away from direct sunlight, high temperatures, dust, and corrosive chemicals.
- Ensure the microscope is placed on a stable, level surface during use.
- When using the AC adapter, ensure the power outlet matches the specified voltage.
- Keep small parts, such as eyepieces and slides, out of reach of young children to prevent choking hazards.
3. Package Contents
Verify that all items listed below are present in your package:
- One Monocular Microscope with Three Objective Lenses
- One Widefield 10X Eyepiece
- One Widefield 25X Eyepiece
- One Dust Cover
- Two Stage Clips (pre-attached)
- One Outlet Power Adapter
- Three AA Batteries
- One Hex Wrench
- User's Manual (downloadable)
- One 5-piece Specimen Slide Kit
- One 5-piece Blank Slide Kit
- One Bottle of Eosin Red Stain
- One Bottle of Methylene Blue Stain
- One Swab
- One Set of ID Stickers
- One Petri Dish
- One Pick
- One Stirring Rod
- One Vial
- One Set of Lens Tissues
- One book: 'The World of the Microscope'
- One 640x480 Pixel USB2.0 Digital Camera
- One 6' (1.8m) USB Cable
- Two Eyepiece Adapters
- One CD with Software, Driver, and User's Instructions (for digital camera)
4. Component Identification
Familiarize yourself with the main parts of your microscope:
- Eyepiece (Ocular Lens): Where you look to view the specimen. The monocular head rotates 360 degrees for comfortable viewing.
- Objective Lenses: Three lenses (4X, 10X, 40X) mounted on a revolving nosepiece, providing different magnifications.
- Stage: The flat platform where the specimen slide is placed.
- Stage Clips: Secure the specimen slide in place.
- Coarse Focus Knob: Large knob for large adjustments to focus.
- Fine Focus Knob: Small knob for precise adjustments to focus.
- Illuminator (LED Light Source): Provides light from below the stage.
- Diaphragm (Disc Diaphragm): Located below the stage, it controls the amount of light passing through the specimen.
- Base: The bottom support of the microscope, housing the battery compartment.
- Arm: Connects the head to the base and stage.
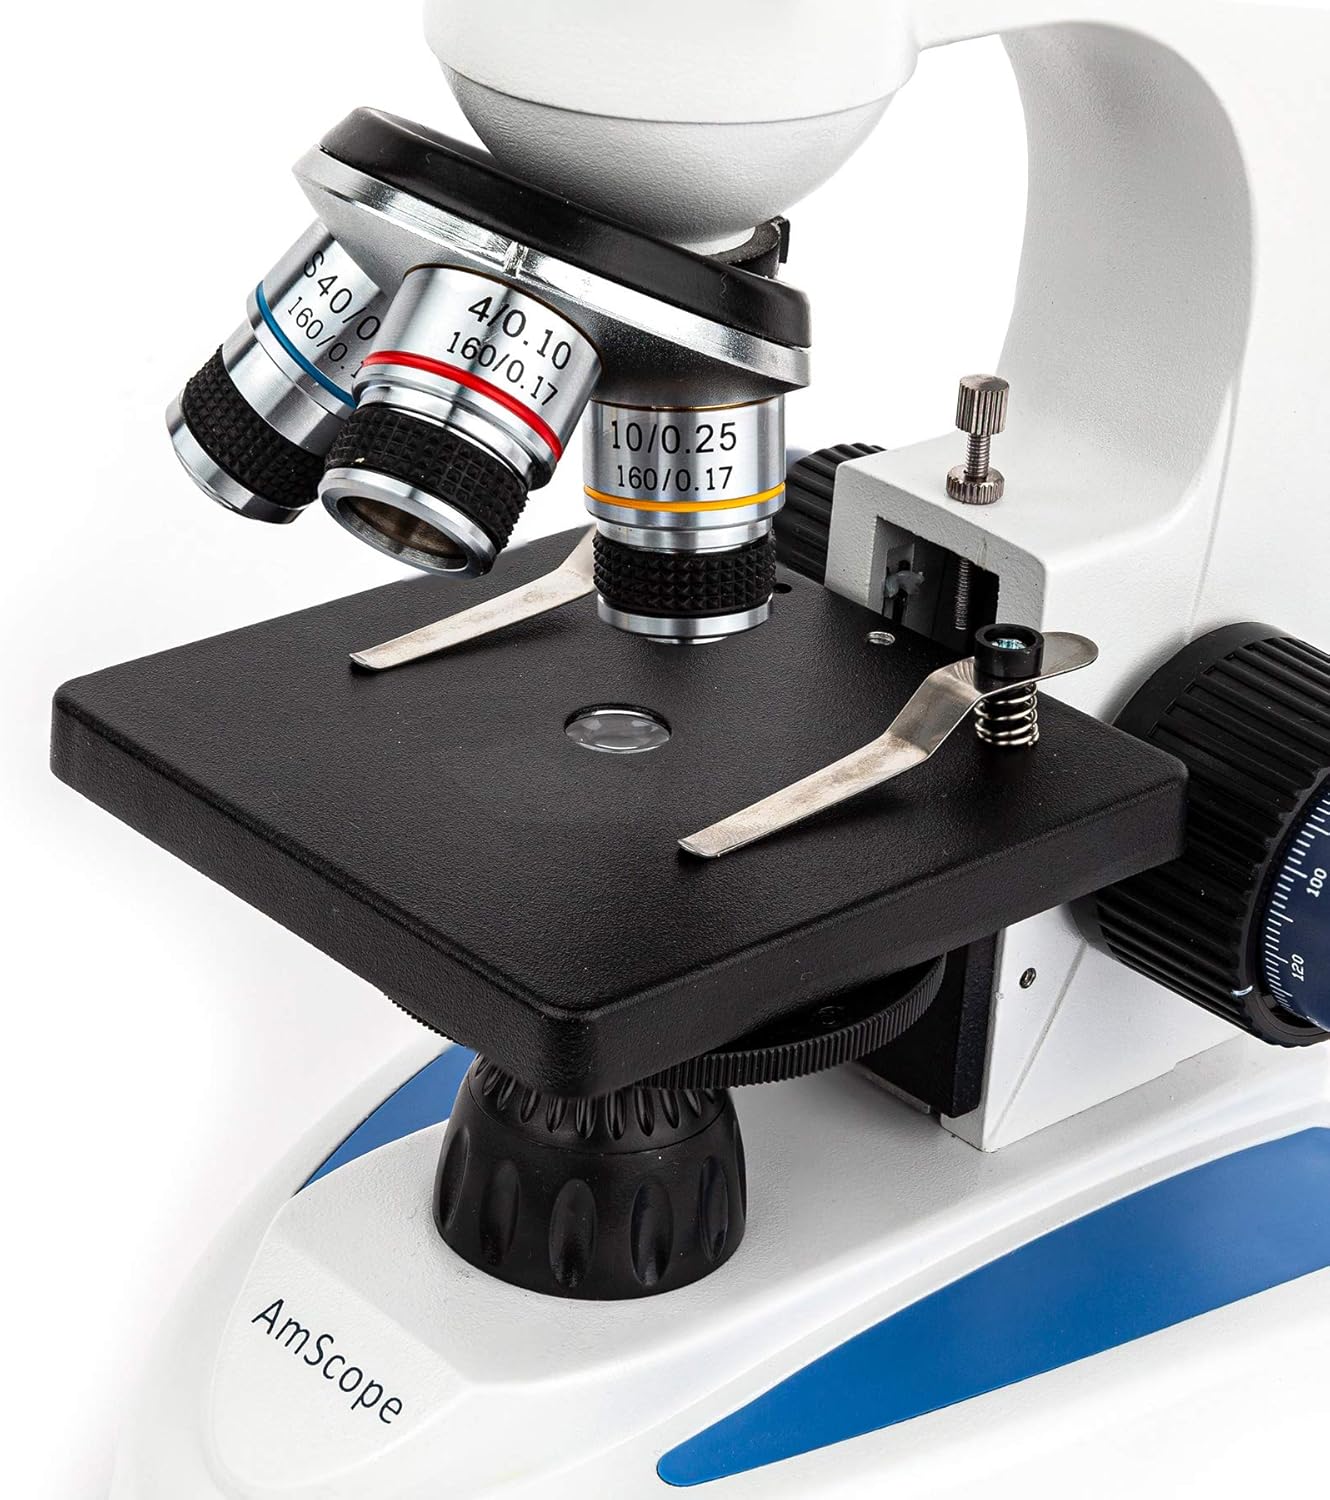
Image 4.1: View of the revolving nosepiece with objective lenses and the stage with stage clips.
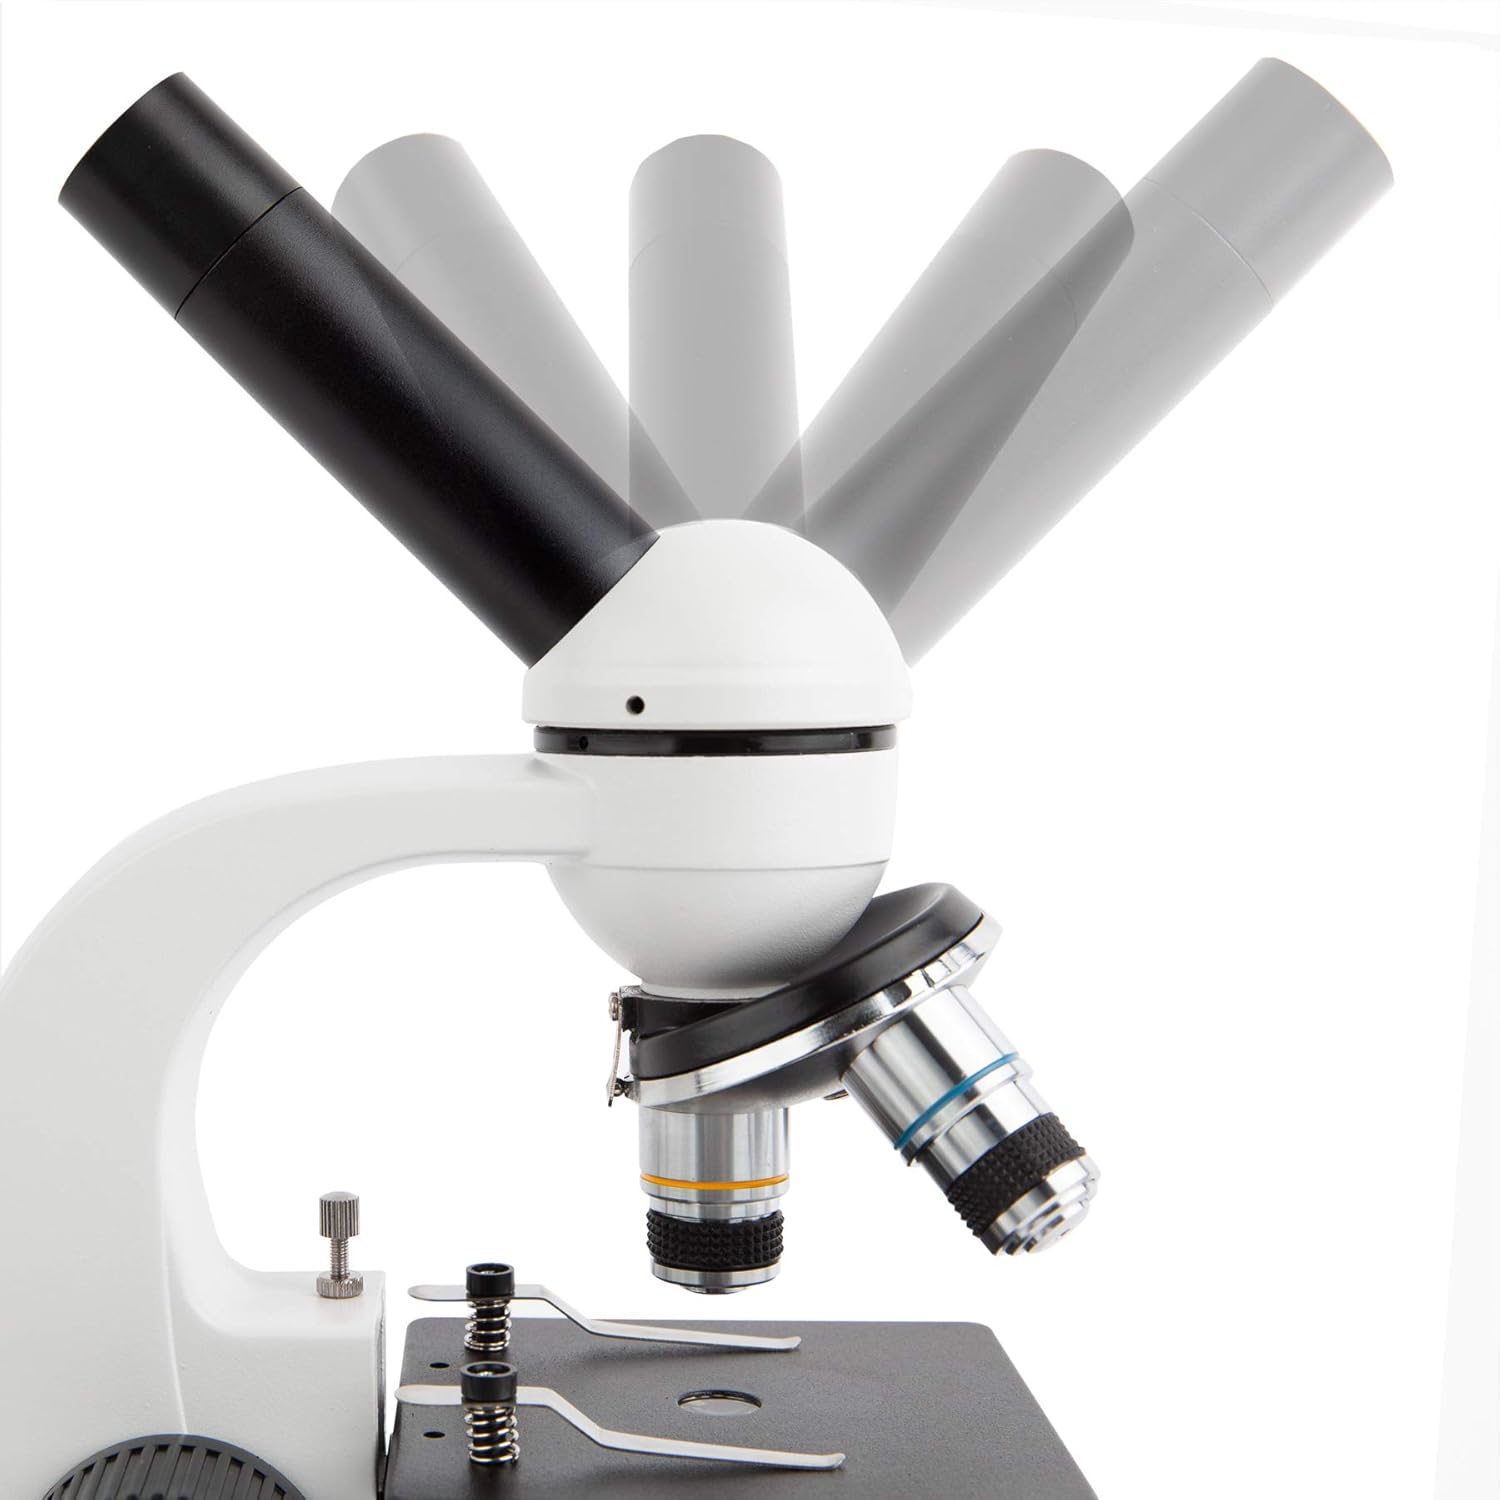
Image 4.2: The monocular head can be rotated 360 degrees for flexible viewing angles.

Image 4.3: The LED illuminator provides light through the specimen and the disc diaphragm.
5. Setup
5.1 Unpacking
Carefully remove all components from the packaging. Retain the original packaging for future storage or transport.
5.2 Powering the Microscope
The microscope can be powered by either the included AC adapter or three AA batteries.
- AC Power: Connect the AC adapter to the microscope's power input jack and then plug it into a standard electrical outlet.
- Battery Power: Open the battery compartment on the base of the microscope. Insert three AA batteries, ensuring correct polarity. Close the compartment securely.
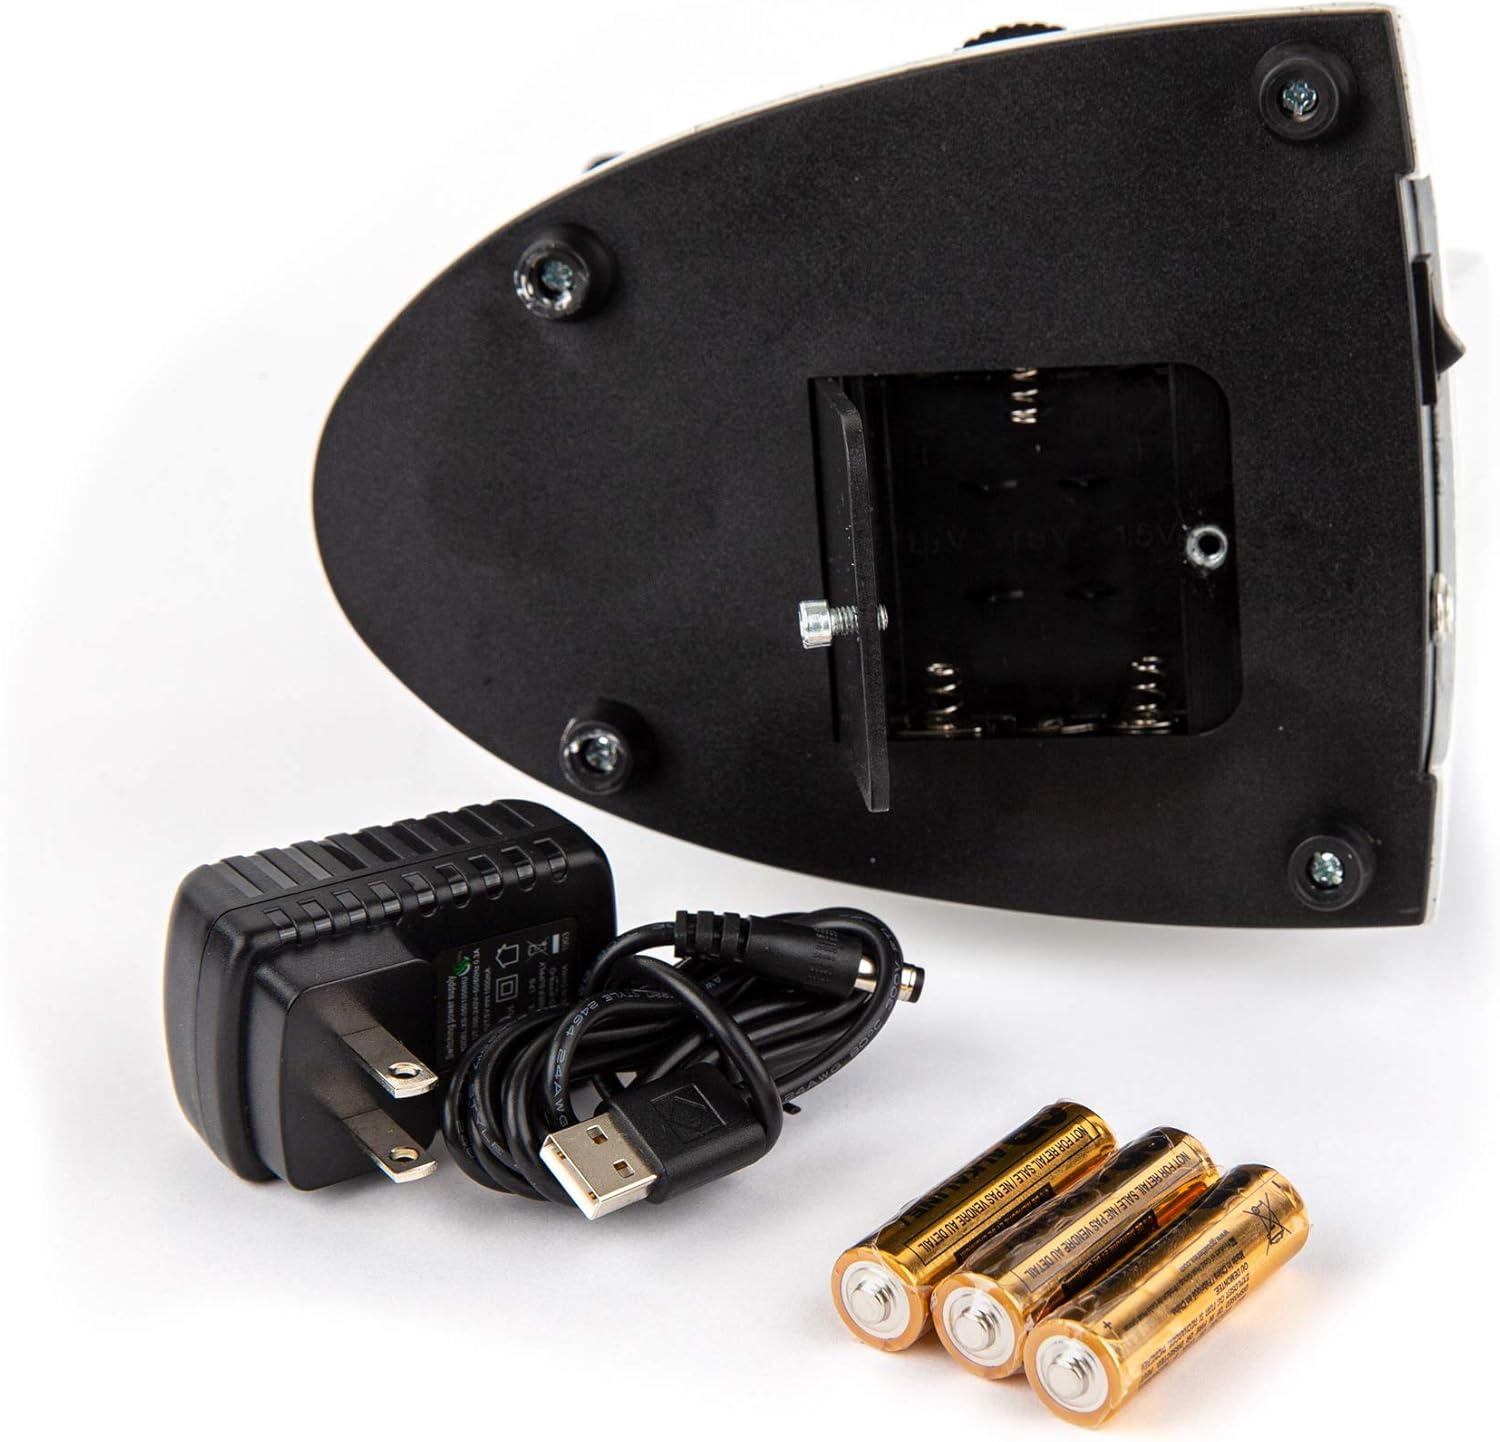
Image 5.1: The microscope can be powered by the AC adapter or three AA batteries.
5.3 Eyepiece Installation
Insert either the 10X or 25X widefield eyepiece into the top of the monocular head. Gently twist to ensure it is seated firmly.
6. Operating Instructions
6.1 Placing a Specimen
- Rotate the revolving nosepiece to select the lowest power objective lens (4X). Ensure it clicks into place.
- Place a prepared specimen slide onto the stage.
- Use the stage clips to hold the slide securely.
6.2 Focusing
- Turn on the LED illuminator using the switch on the base.
- While looking through the eyepiece, slowly turn the Coarse Focus Knob to bring the specimen into approximate focus.
- Once roughly focused, use the Fine Focus Knob for precise adjustments to achieve a sharp image.
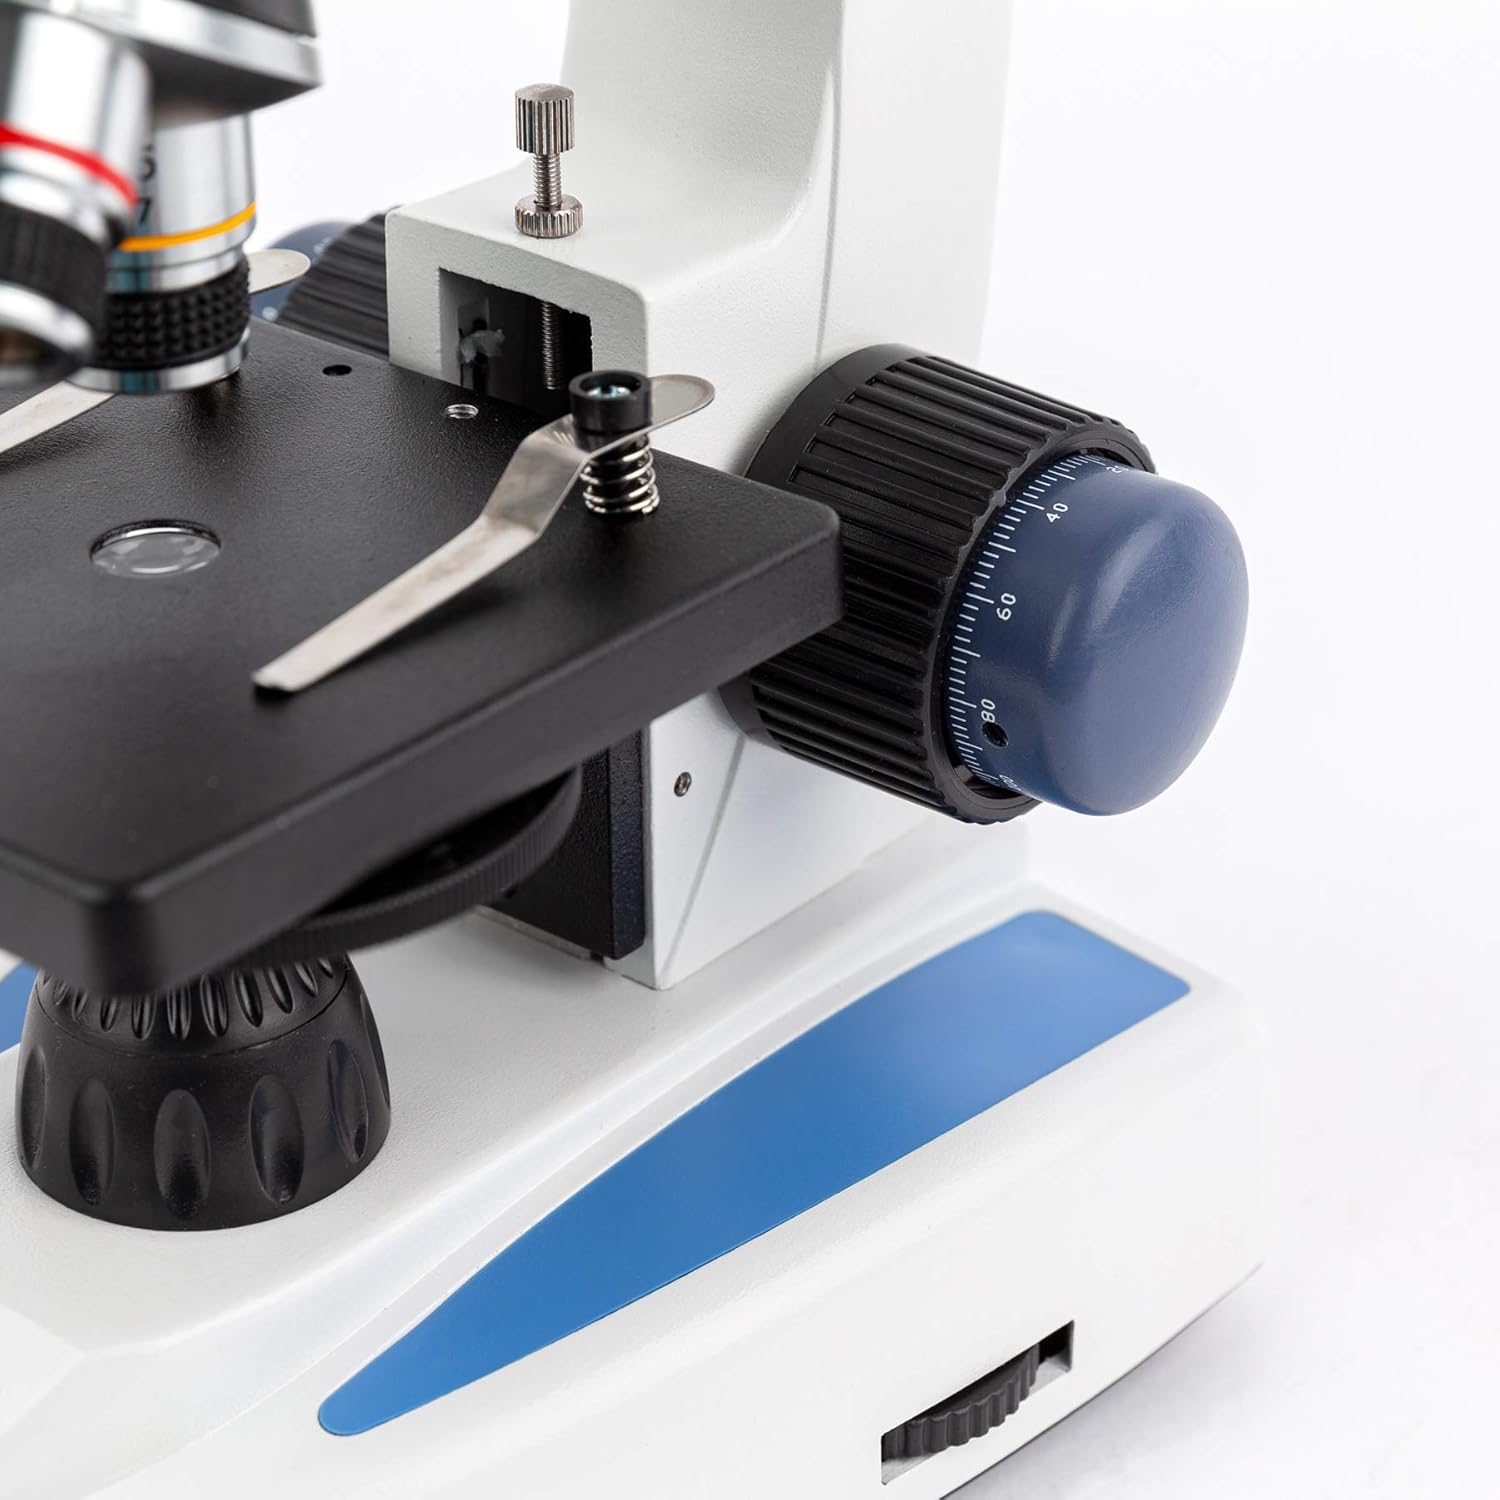
Image 6.1: The coarse and fine focus knobs are used to adjust the distance between the objective lens and the specimen.
6.3 Adjusting Illumination
The disc diaphragm located beneath the stage has various aperture sizes. Rotate the disc to select an aperture that provides optimal contrast and brightness for your specimen. Generally, smaller apertures are used for higher magnifications or for specimens requiring more contrast.
6.4 Changing Magnification
To change magnification:
- Ensure the specimen is in focus at the current magnification.
- Rotate the revolving nosepiece to select the desired objective lens (10X or 40X). The microscope is parfocal, meaning minimal refocusing should be needed.
- Use the Fine Focus Knob to make any necessary minor adjustments.
- To achieve 250X or 1000X magnification, replace the 10X eyepiece with the 25X eyepiece.
6.5 Using the USB Digital Camera
The included USB digital camera allows you to view live images on a computer and capture still images or video.

Image 6.2: The USB digital camera and its accessories for computer connectivity.
- Software Installation (Windows): Insert the provided CD into your computer's CD-ROM drive. Follow the on-screen instructions to install the camera driver and imaging software.
- Camera Installation: Remove the eyepiece from the microscope. Insert the digital camera into the eyepiece tube. You may need to use one of the included eyepiece adapters for a secure fit.
- Connect to Computer: Connect the USB cable to the camera and then to an available USB port on your computer.
- Live View and Capture: Launch the installed imaging software. You should see a live feed from the microscope. Use the software's interface to adjust settings, capture images, or record videos.
- Mac Compatibility: On Mac computers, the camera can often be used as a driverless imaging device with applications like ProScope or Photo Booth.

Image 6.3: The microscope with the digital camera connected to a laptop, showing a live view of a specimen.
7. Slide Preparation Kit Usage
The included kit provides materials for preparing your own specimen slides.

Image 7.1: Various tools and materials included in the slide preparation kit.
- Blank Slides and Cover Slips: Use these to mount your specimens.
- Microtome (not explicitly listed but implied by 'sectioning specimens'): For cutting thin sections of specimens.
- Stains (Eosin Red, Methylene Blue): Used to enhance contrast and highlight specific structures in transparent specimens. Apply a small drop to the specimen on the slide before adding a cover slip.
- Tools (Tweezers, Pick, Stirring Rod, Vial, Petri Dish, Swab): Assist in handling and preparing specimens.
- 'The World of the Microscope' Book: Provides detailed guidance on microscopy techniques and slide preparation. Refer to this book for comprehensive instructions.
8. Maintenance
8.1 Cleaning Lenses
- Use only specialized lens cleaning paper or cloth and lens cleaning solution.
- Gently wipe the lens surfaces. Avoid rubbing vigorously, which can scratch the coatings.
- Never use abrasive materials or household cleaners.
8.2 General Care
- Keep the microscope covered with the dust cover when not in use.
- Clean the exterior of the microscope with a soft, damp cloth.
- Avoid exposing the microscope to extreme temperatures or humidity.
8.3 Storage
Store the microscope in a dry, dust-free environment. If storing for an extended period, remove the batteries to prevent leakage.
9. Troubleshooting
| Problem | Possible Cause | Solution |
|---|---|---|
| No illumination | Power not connected; Batteries depleted or incorrectly inserted; LED bulb failure | Check AC adapter connection or battery insertion/charge; Contact support if LED is faulty |
| Image blurry/cannot focus | Incorrect focus knob usage; Objective lens not clicked into place; Eyepiece not fully inserted; Dirty lenses | Use coarse then fine focus; Rotate nosepiece until objective clicks; Reinsert eyepiece; Clean lenses |
| Dark field of view | Diaphragm aperture too small; Low illumination setting; Objective lens not aligned | Adjust diaphragm to a larger opening; Check illumination brightness; Ensure objective lens is centered |
| Digital camera not detected | USB cable not connected; Driver not installed (Windows); Software not launched | Ensure USB connection; Install drivers from CD; Launch imaging software |
10. Specifications
- Model: M158C-SP14-WM-E
- Head: 360-degree Rotatable Monocular
- Eyepieces: Widefield WF10X, WF25X
- Objective Lenses: Achromatic 4X, 10X, 40X (Spring)
- Magnification: 40X, 100X, 250X, 400X, 1000X
- Focusing: Coarse and Fine Focus Knobs
- Stage: Plain Stage with Stage Clips
- Illumination: LED, Bottom Light Source
- Diaphragm: 6-hole Disc Diaphragm
- Power: AC Adapter (included) or 3 AA Batteries (included)
- Body Material: Metal Framework
- Digital Camera: 640x480 Pixel USB2.0
- Camera Software: Windows XP/Vista/7/8/10 compatible (Mac driverless)
- Item Weight: 8 pounds
- Package Dimensions: 26.77 x 20.87 x 8.27 inches
11. Warranty and Support
For warranty information or technical support, please refer to the documentation provided with your purchase or visit the official AmScope website. Keep your proof of purchase for warranty claims.
Related documentsM158C-SP14-WM-E


Ask a question about this manual
Ask about setup, troubleshooting, compatibility, parts, safety, or missing instructions. Manuals+ will review the question and use this page’s manual context to help answer it.